Galaxy S24 Ultra - Do THIS Immediately! (Tips, Tricks, & Hidden Features)
Apr 24, 2024As someone who has exclusively used Samsung phones since the Galaxy S3 and someone who has shared literally hundreds of
hidden
features
on Samsung phones for almost 10 years, these are the first things I recommend doing when you get your Galaxy s24 s24 Plus or s24 Ultra and as always There are timecodes below so you can skip through the video and find thefeatures
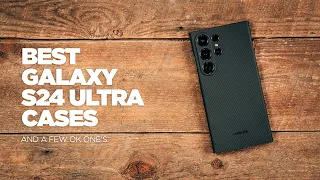
you're most interested in. The first thing you need to do is add Maga functionality to your s24 with a magnetic S Pen compatible secure ring that can attach directly to the back of your phone or the back of any flat case and once attached you can attach any secure charger accessory such as secure charger ring, secure charger holder, charging discs, secure charger wallets, car mounts and more, these particular rings are from today's partner, ESR.
I've been recommending their products long before becoming a channel partner so it was an easy partnership to say yes to and in addition to these secure magnetic sticky rings, ESR also sells a couple of secure magnetic cases, the flick case has A kickstand with a FR hinge that allows you to place your phone at different degrees for portrait mode or at a single angle for landscape mode. If you prefer to show off the color of your phone, the ESR Hybrid Case would be a better buy. Both cases have super tactile buttons and a good sized front edge. to protect from face down drops as well as a deep ridge to protect the cameras and if you want even more protection ESR has a kit for that too,
this
is something I would like to put on my s22ultra
because it has a small crack on the cameras and I didn't see it, then we went to a water park and now the phone is completely dead so I think I'm going to start using them, unfortunately these two magnetic cases interfere with the s24 Ultras S Pen which causes the S Accuracy The stylus gets a little unstable when it's close to the magnetic ring, but ESR is currently working on a fix for that and once ESR releases an updated version of these cases that are compatible with Spen, I'll let you know in the description and the comment posted below.
More Interesting Facts About,
galaxy s24 ultra do this immediately tips tricks hidden features...
In the meantime, you can use these rings to get that Mag Safe compatibility while still maintaining full S Pen functionality. I'll leave you a 10% discount code and links to all of these products as well as some great Mag Safe accessories in the description and comment pinned below, if you're interested now that your phone is protected it's time to make sure you've transferred all your data from your old phone, including messages, home screen layout, Wi-Fi passwords, apps, and everything else. the quickest way to do
this
is to swipe up to go to your apps, then tap on this search bar and type the word switch, then you will see this option here called Smart Switch, go ahead and tap on that app, it should be installed now. default but if not you can find it in Google Play Store once the app is open tap receive data then follow the instructions and if you need help with this I already have a very detailed guide that will show you exactly how to transfer data . from an iPhone, another Samsung phone, a non-Samsung Android phone, and even how to transfer data if you won't have your old phone available when you get your s24.
I'll have that video linked in the description and comment if you'd like. If you're interested, the next thing you should do is familiarize yourself with the incredibly powerful noise reduction tool that's available every time you're on a phone call. This is only available on the s24 series if I turn down the notification tone twice on both. I'll see that only the s24 has this microphone mode option at the top if you tap this right now. I have it set to voice focus, but it defaults to it as standard to show you what a difference this makes.

I'm going to go ahead and record the audio on my Galaxy s23 Ultra and you can hear how much noise is canceled and to make it challenging I'm going to add some pretty loud vacuum cleaner sounds so I'll leave this. on the stand right now and this is what the audio sounds like without the vacuum on. I'm going to go ahead and turn it on, that's too loud and I'm not even sure if the audio is picking up on the other phone, so now I'm going to turn the HJ notif down again and switch to voice focus and this is what it sounds like, like you can See, it eliminates a ton of vacuum noise, but you'll also notice that my voice isn't as clear as it was before, so you should only turn this on if people are having a hard time hearing you on the other end.
Then you want to lock your favorite apps so they never close in the background. To do this, first open the ones you use most frequently. apps, then go to your recent apps, tap the app icon, and then tap keep open. This will put a little lock icon here and once it's there, you won't be able to close this app and while we're here, I want to quickly point that out. that Best Buy has an amazing deal right now on the s24 series, so if you haven't gotten your s24 yet, definitely check out these deals in the description and pinned comment below, going back to recent apps, you can lock up to three apps if you try to lock a fourth app, a gray box will appear, and if you ever want to unlock an app, simply tap the lock icon and it will unlock.
Protecting your phone from physical damage with a case was a great start, but you'll also want to protect your phone from thieves, so go ahead and swipe down on the notification shade and tap the settings gear in the top right corner, then you'll want to scroll down. down to security and privacy. go ahead and tap that from here you want to select lost device protection then allow the phone to be found and it is also helpful to enable last location sending and offline search, once this is enabled you will be able to go to the website Samsung Find in Meanwhile, once you go to this site and sign in with your Samsung account, you will be able to see exactly where your s24 Ultra is or you will be able to ring a different device once Samsung Find is working or the Smart website Things Find. lock it remotely, track its location in real time or even do things like remotely wipe data if it was stolen, so this is an extremely important feature to make sure you never lose your phone and, by the way, to be able to use it You need a Samsung account, so if you haven't set up a Samsung account yet, all you have to do is go to settings, scroll down to accounts and backup, tap manage accounts, tap add account, then tap Samsung account and then just follow the physical setup process. theft is not the only thing you need to protect your s24 from, you also need to protect it from digital theft to do this, go to settings, scroll down and go back to security and privacy, then we will tap app security, tap on app protection and Tap Activate What this will do is scan your phone periodically for viruses so your digital information is not stolen.
Now let's look at some performance improvements that will allow you to unlock your phone instantly and navigate through your apps twice as fast, let's start with faster browsing, go back to settings, scroll to the bottom, tap on phone, scroll down and tap software information, then tap the build number seven times, then enter your password to confirm and this will unlock the
hidden
developer options menu. So if we go back to the main settings page and scroll to the bottom, you will see the new developer options menu. If you scroll about 2/3 of the way down this page, you'll see these three different animation scales.By tapping one, you can reduce the animation scale to just half speed or disable these types of animations completely. The window animation scale is for popups like this. The transition animation scale is for making transitions between different windows, such as going back or forward in different applications. The apps and animator duration scale is for when you enter and exit apps and here's a quick comparison between once speed and five times speed for reference and if you want things to be super fast you can just completely rotate the animations. off and here's a quick bonus tip if you want to quickly switch between your two most recent apps, just double tap the recent apps button and it will jump between them now, let's make it faster to unlock your phone, let's exit out of the options developer, then back up a little bit until you get to security and privacy, then we'll touch biometrics and touch fingerprints instead of just registering your fingerprint once, it should actually register the finger you use most frequently twice, which this does is to give your phone more data about exactly what your fingerprint looks like, giving you a much higher chance of unlocking the phone on the first try while scanning.
It's also a good idea to use different sides of your finger to make sure the entire finger is scanned and if you've already done two scans of the same finger but still want three other fingers to be scanned, like perhaps the other thumb and both index fingers , you can actually scan two fingers with the same fingerprint, so if I hold fingerprint 4 and delete it. I can add a new fingerprint and scan both my thumb and index finger on the same fingerprint and when I finish adding fingerprint, when I tap to mark the added fingerprints, both my thumb and index finger will be registered as fingerprint 4 , but increasing the unlock speed doesn't stop here if we remove fingerprints and then move on to facial recognition once you have set up facial recognition the first time, you need to add an alternative appearance if you frequently use things that will make you look a little different, this could be big sunglasses, a lot of makeup or anything else that makes you look slightly different, so your first scan will be just your face with nothing added and the second scan will be with anything else added and the last What you need to do to unlock tremendously fast is to disable this stay on lock screen until swipe by default, this is on but I had already disabled it so now if I go to the lock screen and then turn on the screen it
immediately
comes back to appear, this is tremendously fast. facial recognition, but if you prefer not to bypass the lock screen, you should at least configure both sets of lock screen widgets, that's right, I said both sets, the first set of lock screen widgets is found by long pressing anywhere on The screen from there you will be asked to unlock your phone so go ahead and do that and it will take you to the lock screen editor on s24 series.Now we have this option here called widgets and if you tap on it you will get a variety of widgets. to choose from, I'll go ahead and set up a reminder clock widget and a Samsung Health widget and if I want, I can tap on them and rearrange them and once I'm done selecting them, I'll just tap on the wallpaper again. and speaking of wallpaper, if you tap wallpapers in the top left corner and scroll to the bottom, you'll see this section called wallpaper services and specifically I want to take a look at the dynamic lock screen, what this does is to allow you to select from a bunch of different categories and your lock screen will show a new wallpaper every time you unlock it, not only that but every 2 weeks you will get a new set of images, so if I go ahead and select Landscapes here and download it. then go back and go back, you will see that I now have a new landscape and if I tap Done and lock and unlock my phone, you will see that I have a new landscape now and once they are enabled, if you swipe from the right edge, you will be taken to a new screen where you can swipe through all the different wallpapers in that pack and if you tap the three dots in the top right corner, you can tap hide this image if you don't want a particular one. image to display in rotation and if you want to quickly change which wallpaper pack you are using just tap on this grid here and select a different pack and if you really want you can choose up to five different categories and cycle through all the different images plus widgets and wallpapers.
You can also customize your watch with lots of different styles or even use a calendar instead of a clock on top. You can choose different clock fonts and different colors, but the first option is an automatic option that adapts a color depending on what is in the background and if you wantmake the clock bigger or smaller, you can just drag these dots here and while we're here, you should also change the lock screen shortcuts to something you want. I find it more useful personally. I find the flashlight more useful than the camera because I can double press the side key to open the camera and most of the time I'm texting someone instead of making phone calls, so I'll switch.
This in the messages app, tapping on the notification option allows you to change the style so that it cannot show notification icons or show the details and for this you have the option to change the transparency, lastly you have to add contact information in the bottom In case you lose your device, anyone who finds it will not need to unlock it to find a phone number to call and obviously choose a phone number other than yours so they can contact you if they have your phone. So once you've adjusted all of those settings, the next thing you want to do is tap on the clock, this will bring up your second set of widgets and if you scroll to the bottom, you'll see some settings here, so go ahead. and tap on it and unlock your phone and that will take you to your widget settings as you can see there are many other widgets that you can add here and depending on the apps you have installed and the devices you have connected to your phone you will have more or less options if you want to change the order of them, just tap reorder and you will be able to move them as needed once you are done with this, you can go back to the lock screen, tap the clock again and you will see the new default order.
Pressing and holding the side button will activate Bixby and I personally keep this set to Bixby for a couple of reasons first. If I jump into speaking messages and tap any text box, I can hold down the side button and use voice texting in any text box to quickly dictate a note or reply to a message. Plus, Bixby is the fastest way to change any feature. on your phone, for example, I can hold down the side button and say flashlight on at level one or flashlight on at level five. You can even do more complex things like Set my screen timeout to 2 minutes.
Ok so I set the screen timeout to 2 minutes or if you want to navigate to a different part of your phone you can say something like show my lock screen settings here you go but if you're still not convinced and just want to change the side key function as much as you can. What you have to do is press and hold and say change side button function and from here you can change the press and hold function from Wake Bixby to the power off menu. Now if I hold it down it will bring up my shutdown menu, but if you ever want to. to change it back, you can tap the side button settings here at the bottom of the power menu and go back in.
Personally, I love Bixby, so I'm going to turn it back on while we're here. I also want to point out that you can also change the double tap shortcut, so by default if you double press the S key it will open your camera app, but if you want to change that, just tap open app and you can make it Turn your flashlight on or off. or open any other app you have installed on your phone. I personally prefer it as a shortcut to the camera, so I'm going to change it back. Let's go back to the Messages app for a second so we can show you some really powerful keyboard features.
I've set up some shortcuts, so all I have to do is type something like br n, then I'll get a little option here, and if I tap on this, it'll populate with busy right now. I will call you later. You can also type P email and it will be a personal email or W email for a work email. You can even use these shortcuts for very long things, like if I tap sub it's an invitation to subscribe to the channel, so if there are phrases or emails that you use all the time, you definitely need to set this up to do this, tap this little collapse icon to get rid of the suggestions, then tap the settings gear, then tap text shortcuts, tap the plus icon, and then type whatever you want for your shortcut. then the extended phrase here, once you've done that, tap add now every time you type the letters wgl, it will replace it with I want to have lunch today.
The powerful keyboard features don't stop here if you exit the text shortcuts, scroll to the end. up and select languages and types, then manage your input languages. You can select up to four different languages to predict at the same time, but to make sure this works you need to exit this menu, then exit once again and scroll down a bit. little to more typing options and tap on that and also make sure that text prediction in multiple languages is enabled so once this feature is enabled and you have selected your languages you can go back to your messages and now I will be able to get predictive text in multiple languages at the same time and if you ever need special characters from a specific language, you can always tap this globe icon down here and cycle through all the different languages to get those special characters and an extra tip if you hold down the space bar.
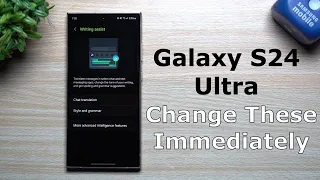
You can simply swipe left and right or up and down to navigate through the text to get to the exact part you want to get to, and by holding down the dot you can quickly select any of these marks. specials and if you ever want to edit these marks just tap this pencil icon and select any other Marks you want. If you need to communicate with someone who is not fluent in your primary language, you can tap this little icon here and it will open a live translation option and if I tap the letters on the left I can change the language I want to convert to and now I can type everything in English and it will automatically convert it to Spanish in real time and when you tap send it will send the message in Spanish to the person and when that person responds you will get the response as you typed it as well as a translation directly below it and this will also automatically display both translations in your original message and this is part of the Galaxy AI chat translation feature, the other Two valuable features here are writing style, spelling and grammar, so if I retype this message and then select the writing style, I'll use AI to give me a bunch of different ways to say the same thing.
This professional option is super professional. casual option A more social, polite option and an emojified option, so if I wanted to use a polite option, I could just tap Insert and it would change everything I typed and the last AI option is spelling and grammar, and this is basically a little more advanced. spelling and grammar checker now let's set up some advanced features by going to settings and scrolling down until you see Advanced Features. The first thing I want to point out is the advanced intelligence and this is where all the AI features exist, so this is a great menu. you should check it out when you first get your phone so you can get an idea of what all the AI features have to offer and at the bottom of this page you'll see an option here called process data only on the device if you don't enable this.
The AI functions will be processed in the Samsung cloud and everything will be processed only on your device. The only downside is that you will lose access to some of the features, more specifically, you will lose access to Samsung Notes' automatic formatting for summarizing and spell checking. as well as generative fill and AI photo editing features, but the rest of the features will still be available and let me know in the comments below if you'd like to see a deep dive into everything the new AI features can do if there's enough interest in I will make a video dedicated only to the AI features for now, let's leave here and go to the labs section and from here you want to enable multi window for all applications by default, not all applications work with multi window or popup view which I'll show you in a moment so this just makes sure everything works fine and the photo ambient wallpaper is a cool feature that changes your own wallpaper based on the time of day and the weather so if I turn this on and I go to my wallpaper settings.
I can select this ambient photo mode and I can tap try now and select one of my own photos and if you tap the play button you can see the different modes so you have Day and Night. You have some rain here like well, and the last thing it will show is snow and this is all based on the local weather, that's not one of the first things to do. I just thought it was a cool feature to show you how to exit the labs menu next time. What you need to access is the multi window settings and for this you want to enable all three.
What this will do is allow you to swipe up from the bottom with two fingers to open split screen view. Swiping down from one of the top corners to open the window in pop-up view and full screen in split-screen view will extend the Windows split screen to the top and bottom of the screen. If I turn this off, you'll see these windows close a little bit and Again, here we have the feature on and off. Now let's get out of here and move on to movements and gestures. These are just different movements and gestures you can do with your phone to make tasks a little easier.
Most of these are on by default, but if you want. even faster access to your phone you can activate this raise to wake feature once it's enabled as long as my screen is off all I have to do is pick up my phone and the screen will turn on if we leave here next you should enable it, especially if you have the s24
ultra
, this one-handed mode option, once you enable it, you will be able to swipe down from the bottom and shrink the entire screen to a smaller window, which makes it much It's easier to reach the top corners with one hand and if you ever want to resize it, just grab one of the corners and drag it out.You can also change it from the left side to the right side by tapping on these arrows here or you can grab this bar here and move it. up or down once you are done using this mode you can simply tap anywhere outside of it and it will go back to normal and if you prefer not to use the gesture method you can switch to a button method and simply On your Instead, double-tap the home button. The last setting you need to change in the advanced features is towards the bottom and is called video brightness. By default, it is set to Normal, but if you set it to Bright, it will automatically make your image more vibrant and bright. whenever you're watching a video in any of these apps and that makes a significant difference, especially when your screen brightness is set to a lower level to demonstrate this, I'm going to lower my screen brightness to about 50% and then I'm going to go ahead and go into the YouTube app and start watching this video.
If I go back to the home screen, you'll see it get a little darker and if I go back to the video, you'll see it brighter. make a backup, so it definitely makes a noticeable difference when watching videos that talk about better video quality. The next thing you need to do is go into your settings, go into display settings and scroll down until you reach the default screen resolution, which is set to Full HD+ but you can increase that resolution to qhd+. That said, even when I apply this, it is very difficult for me to distinguish between qhd+ and F HD+ even when I have my glasses on, so I recommend that you try both resolutions. and if you can't tell the difference, just use Full HD Plus to save some battery.
I'm guessing most of you won't be able to tell the difference or maybe I just have super terrible eyes and I'm the only one who can't tell while we're in screen settings. Another feature you should enable is adaptive color tone. What this will do is give you more natural looking colors depending on your lighting environment, so if the lighting in your environment is a warmer color tone, your screen will look a little warmer, but if the lights in your room are a cooler bluish white color, then your screen will look a little bluer, but if you prefer the default cooler temperature, you can turn it off.
The next thing you need to do is set up your Edge panels, which are accessed by swiping from this sidebar. By default, you get some shortcuts at the bottom and your appsRecents are displayed at the top if you tap this little pencil icon. You'll be able to choose which apps you have there, and if you drag one app on top of another, you can create a folder and give it the folder name, although that folder name only appears when you tap the folder once you've selected all your apps. apps, you can go back to your home screen now, when you swipe in, you'll see all those apps there and you can long press and drag them to the middle to open them in a popup view, which is especially useful for something like a calculator or You can long press and drag the app to the top or bottom to open it in split screen view and if you have two apps open in split screen view and you resize them to be exactly how you like, you can tap the three dots in the middle and tap on this star icon and then select apps Edge panel, what this will do is save the couple of apps directly on the edge panel, so if I take out the edge panel and slide it down, you'll see that couple of apps here and if I tap this, it will open them in exactly the same orientation, even if I adjust the orientation and close those apps completely.
You could go back to the edge panel, tap it again and they will reopen in the original orientation and there's more than just an Edge app. If you tap this settings gear, you'll be able to enable a bunch of different Edge panels. One of the most useful is this tools panel. Once it's enabled, I can swipe once to access my Edge apps. then swipe a second time to go to my tools and that will give me access to a compass, a counter, my flashlight controls a surface level and even a ruler, then I can always swipe again to get back to my apps and be delete this app Edge can always be accessed from any app, so now I'm in the YouTube app and I can still swipe in and pull the panel back out.
Now let's make some significant improvements so that the home screen, to begin with, long press these widgets and stack them on top of each other, let's add one and we'll add another now. I can swipe through these three widgets and access whichever one I want directly from one screen and if I hold down on the stack, I can tap edit stack and I can Make sure auto-rotate widgets are enabled. What this will do is try to show me the most relevant widget at any time of the day, but if you'd prefer it to stay on the same widget until you change it, you can turn that feature on.
The next thing we need to do on the home screen is pinch to access the editor. You can also long press any empty space, then tap settings, then go to the home screen grid and increase it to 5x5 or 5x6 because I'm pretty sure the default was 4x6 and that doesn't give you much space for apps and widgets. You can also change the size of your app screen grid if you want to see more apps on a single page and even increase the size of your folder grid and if you scroll down you will see an option to swipe down to see the panel of notifications.
I recommend having this turned on, this allows you to swipe down from anywhere on your home screen to quickly access the notification panel if so. If it is not enabled and you swipe it down it will take you to your apps and here is an extra tip if you want to move apps quickly just long press one tap select and then tap the rest of the apps you want and you can long press and drag everything the lot and use the other finger to slide back and forth between different pages and the last one. What we're going to do is first delete this widget, then add a new widget and specifically we're going to add a Smart Suggestions widget.
This is an extremely useful widget to add because what it does is analyze your usage patterns and then recommend apps. Based on those usage patterns, now a 5x3 grid is too much for this, so you can just drop this into a single row. Now we'll go ahead and drag this over to the other page and now I'll have quick access to My Most Frequently Used Apps and if you hold this down and go into settings, you can even exclude specific apps if you don't want them to be suggested. Something I almost have to point out in this
tips
widget is if you tap on settings again.You'll see an option here called notification access and if you allow access to your notifications for this, the suggestions will start to include quick actions for things like replying to a message. Now we are going to unlock a powerful hidden camera menu to do this. If you need to go to the Samsung Galaxy store, make sure it is the Samsung store and not the Google Play Store because it is only available in the Samsung store. Once you are there, you will look for an app called camera assistant, install it and once you are. installed called, you can go to the camera app, then tap on the settings gear and scroll to the bottom and you will see a new menu here called camera assistant, if you tap on this, you will have access to a bunch of awesome camera features that were previously not available now there's a lot here so I'll just cover a few of the important ones to start with.
You can change Zoom shortcuts by default. You'll get the four main optical zoom levels plus the 10x digital zoom level, but I can also enable the 2x and 100x Zoom shortcuts from here, so now if I go back to the camera app, you'll see that The two times and 100 times options are there, so if you frequently shoot long distances or like that mid-range of two times digital zoom, these are great features to enable if you have some skin blemishes that you want. hide in your photos you can tap on image smoothing and set it to medium or high, what this will do is soften your photos a little bit to hide those imperfections at the cost of a little sharpness if you want to take photos faster you can activate the shutter quick-touch that takes a photo as soon as your finger touches the shutter button;
However, this will be more prone to blurring due to camera shake when pressing the button, so you may want to try this one out before keeping it on all the time. On the other hand, if you notice that your shots aren't always in focus, you can turn on Prioritize Focus over Speed. It's off by default, but if you enable it you'll get better focus at the cost of slower photos. The next setting is huge and something I use all the time and it's called multiple photo timer options. If you select this, you choose how many images there are. taken every time you use the timer, that means I can take seven photos 1 second apart each time I use the timer and since I have four small children this makes it much easier to get a good photo the first time and, In case you are wondering: If you set the timer and start using this feature you will see all the shots it will take, but if you took a few and don't want to take more, just type the stop icon and it will stop wherever you are and while we are In the main camera menu, if you jump into video mode, you'll definitely want to change the resolution from Full HD to uh HD to get a much better image. video quality and while 8K may be tempting to get the highest resolution, this will limit the amount of zoom you can do and will be quite a large file each time you shoot, so I recommend sticking with UHD and switching back to photograph if you wish.
If you're going to be taking a lot of selfies, you'll want to tap this layers icon in the top right corner, then tap the color tone and adjust it to best match your skin tone if you're new to photography and never like how your photos turn out. . you must go to settings and enable shot suggestions. This will give you a POINT on the screen to help you take better photos. Simply align the white dot with the center of the screen and when the dot turns yellow you are lined up for a good shot, the next thing you want to do is go back to the settings and scroll down a little bit.
The next thing you need to enable is grid lines. What this will do is give you grid lines in your preview and that will make it much easier to align your shots if you want to get something right in the center or if you want to align something in one of the thirds and if you switch to video mode, It will also give you a level line so you know you're getting a level shot. Just below the grid lines option, you'll also want to enable location tags. What this will do is add location information to your photos, so that if you later want to search only for photos from a specific vacation in a specific location, you'll be able to find them easily. just by looking for that location, if you tap shooting methods, you'll see an option here called floating shutter button.
If you enable this, go back to your camera and you'll get a floating shutter button that you can move around your screen to do this. It's easier to take a photo no matter how you hold your phone. Once you're done with the floating shutter button, you can just drag it down to the regular shutter button and it will disappear and any time you want to pull it back out. Drag in from the shutter button once you are done adjusting all your camera settings, you need to go to more and then download Expert Raw. This is how you get crazy star photos like this once downloaded, just open the mode, accept the permissions and then tap this. comfort icon in the top right corner and you can choose to hide or show a star guide and if you choose to show it you will see the constellations that your camera is pointing at, so as I move it you will see different constellations.
You can then change the long exposure time from 4 minutes to 7 minutes or all the way to 10 minutes. If you really want to get a brilliant shot, and speaking of great star photos, you should also familiarize yourself with the Hyperlapse mode so that you can get great photos. star time lapses like this or star trails like this to do this go back to the more menu then select hyperlapse then change the resolution from Full HD to HD for better video and change this top right setting from Auto to 300 times and You'll see a little star icon here and for as long as you want to keep this setting at Infinity so it doesn't stop the time lapse when you don't want it to, but if you really want it.
For you, you could have the time lapse stop automatically after 10 minutes which wouldn't really give you very good star photos at all or up to 300 minutes which would give you a pretty good video and if you want turn on Star Trails. you just have to tap this star icon in the bottom right corner, now just set your phone on a tripod, tap the record button and let it run for at least 30 minutes to an hour and the last thing you need to do with the app camera. is to learn how to create a slow motion video from a normal speed video, all you have to do is start playing the video, then long press anywhere on the screen and it will automatically convert it to a slow motion video using artificial intelligence and if you want to make that part of the video in slow motion permanently, just tap on the pencil icon, then scroll to the part of the video where you want it to be in slow motion, then tap adjust speed and select the speed you want, then you can readjust it to the time you want. that's right and if I save this, the video will always play in slow motion in that part of the video.
Now let's enable some hidden quick changes to do this, pull down the notification shade twice to reveal your quick changes, then tap this edit icon and then tap edit here and you'll see all these additional quick changes below. There are many here, but there are only a few I want to point out. The first two are camera access and microphone access. What they do is completely remove access to your camera or microphone. each app including the built-in camera to add them to your other options all you have to do is tap on them and if you want to move them just long press and drag them to where you want now once you tap done and come back.
I get out and go back to my quick shifts. I'll be able to remove access to my camera or microphone with just a couple of taps. Now if I go into the camera app, everything will be black and I will get this notification asking me to turn on camera access, but if I don't, even if I switch to the front camera, the camera still won't be accessible and a Bonus tip if you want to access your quick files faster you can just swipe down from the top with two fingers and it takes you right to the quick toggle menu, let's go back to that edit menu because there are some more awesome quick toggles that I wantshow you.
The next one you want to add is always on the screen and I'll show it to you. why in a moment and the last two are wireless power sharing and calling and texting on other devices, so I'm going to tap Done here and before we move on to those options I want to point out this instant access to quick settings option if you tap this and enable this, you will be able to directly access your quick settings by simply swiping down from the top right corner, if you swipe to the left it will simply open the notification shade and now we are back here.
I'm going to go over a page and let's take a look at the always show on screen option. Now you can tap this to turn always-on display on or off, but if you hold it for a long time it will take you to always-on display. in display settings and always-on display gets some major improvements on the Galaxy s24 Ultra specifically, it will show the lock screen wallpaper while in always-on display mode and by default it will only show when you touch your screen, so if I tap my screen it will show the single screen for a few seconds without turning it on completely but if we go back to the single screen setting you can tap this when to show option and change it to always so it doesn't matter what your screen is always onscreen. will always show, but this could kill your battery life, especially if it is always on when in your pocket or in a bag or face down, so I recommend going back to that setting and changing it to Automatic, this will only show the always on mode.
It shows when it is out of your pocket and face up if it is face down or in a pocket or in a bag or other really dark place it will not turn on the always on screen and it will help you save some battery and if you want the screen always on but you still want to save some battery you can turn off the show lock screen option and now when I lock my screen I will only get the time and widgets so now let's go back to the quick changes and the next one I wanted show them was wireless power sharing.
Now this is how you charge another device on the back of your s24 Ultra, so if I turn it over and take off the watch, I just line it up in the center of this ring. and starts charging and this will work with almost any wireless charging device including an iPhone and a bonus tip: if you connect your phone with at least one fast charger and then enable wireless power sharing you will be able to charge both your phone and another . device at the same time with a single charger, the last option was to call and text on other devices and if you enable this you will be able to make calls and text on other Samsung products like a Galaxy Tab S9, you just have to make sure This may not be enabled on both devices.
If we slide to the left, you should see a switch here called link to Windows and this should be enabled because what it does is allow you to control the entirety of your s24 Ultra. directly from your Windows computer. I personally use this all the time to send text and transfer images back and forth from my phone and computer. If you want significantly higher volume and better sound quality from your s24 Ultra, particularly for movies, then it is an absolute necessity. to go to quick changes and enable Dolby Atmos, this makes a big difference in the audio quality when listening to movies and this even works with headphones and they don't even have to be Samsung brand headphones.
I tested this with the Apple Airpods Pro and it still worked great, just keep in mind that the volume and quality increase will mostly be heard when watching movies and will only make a small difference for things like music and YouTube button navigation is pretty good , but if you want to free up a little more screen space and get smoother navigation options, jump into settings, scroll down to show, then scroll down until you see the navigation bar, tap it and switch from buttons to swipe gestures, this will free up space at the bottom and give you iPhone-style Navigation where swiping up takes you to the home screen.
Swiping up and holding brings up your recent apps. Swiping from one side acts as a back button and this works from both the left and right side, unlike the iPhone where it only works from one side occasionally and not in all apps and you can also swipe from the corners to activate the Google Assistant. If you have any specific medical conditions, you need to go to the phone app, then your contacts, then select your contact specifically and then scroll to the bottom, tap medical information, then tap the pencil icon and add any medical information you once to save that information, a first responder just has to pick up their phone, swipe it and tap this emergency call option, then tap medical information and they will be able to see all of your medical information if you are not conscious. to tell you and I know for some people this could save their life so I recommend setting it up if you have the s24 ultra specifically the next thing you want to do is take out your S Pen then tap on this pencil icon and set up set up your shortcuts by tapping This add option from here will give you access to a bunch of Spen specific features or access to any apps you have installed.
One of the features I use the most is this zoom feature. What this will do is give me a little magnifying glass which makes it easier to see what's on the screen and this is especially useful if I left my reading glasses somewhere and I need to quickly read some text or something on the screen and you can choose between 150% zoom and 300% zoom and you can also enlarge the zoom box if you need. The create notes shortcut is also quite useful for quickly creating a note, but you don't really need it because all you need to do is hold the Spen button and double-tap. the screen and that will automatically create a new note for you anyway and while we are talking about the S Pen, if you are new to the S Pen, you should also know that if the screen is off, then you have to pull the S Pen.
You will be able to take a note off the screen and write the notes you want without having to unlock your device. Then, just tap Save and it will be saved to the Samsung Notes app, now that's just scratching the surface of what that means. The S Pen is really capable of doing this and if you want to see many more really useful features of the Spen, you can watch my video dedicated to Spen by clicking on the card above or on the links in the description and in the comment pinned up to this point . We only covered the 24 basic features you need to configure, but now it's time to move on.
We're going to enable a hidden app by going to quick controls, swiping until you see a quick switch called modes, and instead of tapping it, press and hold. In it, this will take you to the modes and routines app and this is the most powerful app on any Samsung device. In short, it allows you to literally automate any action on your phone or any connected smart device based on almost any condition you can. I think this feature is so powerful that I had to make a video dedicated just to this app and you can check it out by clicking this video here or if you're already featured for now, you can check out the best accessories for your new Samsung phone by clicking this video and if you want to see some tremendously advanced features of the s24, consider subscribing and turning on notifications because they will appear in a future video, that's all for this technological age.
God bless you all and I will see you in the next one. one
If you have any copyright issue, please Contact