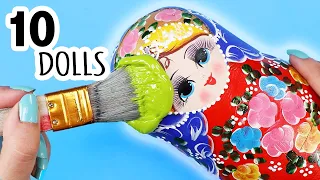
I Made DIY Plastic Pins...it's a good time
Feb 23, 2020leave them in the oven long enough try to take them out while they're still like that don't do that unless something goes wrong they should flatten out when they're done You're ready uh-oh something went wrong so this is always a risk when you have little thin pieces that they stand out. If you catch it while it's still warm, you might be able to save it. Oh, it will be hot, so now they are. all out of the oven and cooled we had pretty
good
results overall no major problems this is the worst remember this mouth I told you about look at it now so I tried to fix it by simply removing the loose paint and then went over it with a liner fine and a white gel pen.
There were similar issues, one and a couple more, mainly on the faces, is where I saw the problems happening. I had to do quite a few little touch ups and then I went over the edges of this one because the edges rolled down so I had to redraw the outline to hide that they are now cooked and primed but we want the paint to stay fresh and protected, so now I'm going to apply a top coat. This is another benefit of using pastes instead of pencils you don't use. You don't have to worry about smearing when you apply the icing because that can be a problem when using colored pencils.

More Interesting Facts About,
i made diy plastic pins it s a good time...
A small problem, although apparently the icing stuck to the paper and for some reason the icing disappeared, this is afterward. two coats usually this comes out very shiny they ate it up which would have been fine if I wanted a matte finish but I wanted a glossy finish so I decided to break out my dimensional magic and this is a thick gloss that mimics a resin look It's not as durable and doesn't give as clean or even a clean finish as resin does, but I try to reduce my exposure to toxic materials if there is an alternative.

I just, you know, don't try to die before me. I'm not really into resin at the moment so this is fine for me, there may be some bubbles in there but you can pop most of them with a needle, although some
time
s they are buried under the surface and it's like they are there. impossible to burst so you have to deal with it, this takes about three to six hours to dry but once it dries it's completely clear and I think the gloss makes them look much more finished and well put together and now They are finally ready to bemade
intopins
, speaking ofpins
, be sure to check out my new enamel pins in my shop.
I designed custom packaging for them and am very happy with how they turned out, each based on one of my soft designs from the past. So many details to them, this one literally has every bit of color. I'll leave the link in the description and the iCard if you're interested. Back to these folks, I'm getting some of my pins and I'm using some e6000s. Glue is always a pain to unclog, dammit, and just glue them on now if you're interested in trying this whole process yourself, I'll leave links to the different materials I've used in the description once the glue is dry.
I finally finished it and wow, this was a much bigger project than I remembered. Once Upon a
time
. Imade
hundreds of these, but you know, I didn't really put that much effort into the designs. I'm very happy with how they turned out. If some of these designs were turned into products, which one(s) would you be most interested in seeing and in what form? I can't make any promises, but if there's something many of you want, I'll try. to make this happen, I hope you enjoy this video and like my new food and mole family, probably the last time I will use that word and I will see you next Friday, bye.If you have any copyright issue, please Contact