$15,000 Table Destroyed in Seconds
Apr 29, 2024I'm not going to bury the advantage. I was very wrong on this, by far the worst carpentry mistake I have ever made. I'm not exaggerating and you'll see, but every problem has a solution and this time it was one of the craziest things you can do to a couple of very expensive slabs. I think some people will love it and some people will hate it, but I promise you'll definitely have an opinion, so I'll cover them. Everything in this video, the good, the bad and the ugly, nothing hidden, so let's get into it. Well, normally I wouldn't start a video like that, but I think I have to this time so it makes sense.

In short, such a long story almost at the end. At the end of this project I make a big mistake and ruin the
table
, don't worry, I put it together, that's not right and that's why I had to find a solution that was very out of the ordinary that said there are so many. Other aspects of this build that I don't want to focus on all the time, but I just wanted to address them early so you can see how thetable
comes together and realize that this is going to happen. I'm not ignoring it, but now I can experience it chronologically the way I did.
More Interesting Facts About,
15 000 table destroyed in seconds...
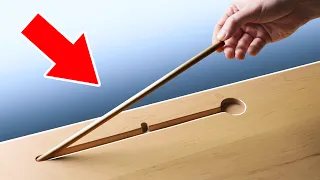
I hope you enjoy. Here is a bold statement. This is the nicest wood I have ever used. I know they don't seem like much right now, but this is the worst. I'll look at all of that sometime I guess we'll all have to wait until the end to see how these puppies turn out, so what they are are a couple of light walnut slabs that I bought from my friends at GL veneer and I bought slabs 10619 and 10621 because someone had already bought 10620 before I could get access to them, but that's okay, they should still go well together and the reason I have two is because I'm making a very large circular dining table for a couple of clients named Horst and Angie who live in Massachusetts now what I'm doing here is positioning the SL to try to get the nicest possible gap between the two and my first attempt at this was fine, but I kept playing with things. and I finally settled on something like this, which I think will look a lot better, but keep in mind that at this point these are just rough and slightly oversized guidelines and usually the way I start cutting them is by using a circular saw to remove most of the material but here I couldn't do that and here's why so you can see in the last shot that this slab will be mostly used but in this one I'm just cutting and looking at the brands.

It gave me a great idea to turn this into a desk or a dresser where you would sit inside this arch and it would wrap around you, but if I use a circular saw to make the cut, ironically, I can't cut a circle. meaning the best option was a jigsaw, which turned out to take forever and I basically decided I needed a much bigger and more powerful jigsaw and the biggest and most powerful jigsaw is a band saw. , so that's option b now, obviously there's no way I'm going to balance a big piece of wood on this little table, but I had a really good idea.

Check out this mobile workbench from Craig. It's almost the right height to use with the band saw, but I almost wasn't going to cut it here. We need almost exactly the right height and honestly we're not going to launch Rockets here so this is definitely close enough so I put the slab on the table, took a spoonful of yogurt and as soon as I turned it on the band saw this He immediately felt that way. It was a really terrible idea so I went with option C and saw that I'm going to use my CNC to cut things and if for no other reason I'm happy I went this route because it just makes such a beautiful sound.
Well you know what to say work smarter, not harder, well sometimes it's actually better to just work harder, yes the puzzle was very slow, but if I had sat there for 30 minutes and made the cut, I would have done it and the whole game. I guess the band watched and the CNC was more fun, but I'm pretty sure I ended up losing more time than I saved, assuming this isn't the first video of mine where you've seen something you might have noticed. which seems to build a disproportionately high number of roundtables. I was thinking about that as I was building this roundtable and I had two epiphanies, so the first one quoting the late '90s alt-rock band The New Radicals is: "you get what you give." and in fact I think there is a good side and a bad side to this.
The bright side is that the more you are willing to put yourself out there, the more rewarding you are, at least that's what I've experienced and the fact that Build This Table is actually a great example of that. The way Hani found me and commissioned this piece was because they saw the video of this table. In that one, I went pretty in-depth into how I came up with the design and shared a lot. of different ideas I had along the way and one of them really resonated with Hani, which led them to contact me and here we are, I put more of myself and got more in return, so that's the bright side and I'm going to go back to the bad side in a minute but the second Epiphany I had was a little more practical and coincides with what you see me doing here on screen and that's if I'm going to be setting up round tables.
From time to time in the future I should try to build a form that I can use repeatedly in the same way I do now. I can reuse the base, but every time I have to break everything down to get my slab out once it's cured and The reason I have to do that is because I always somehow forget to spray the release agent, but what I'm hoping is that This time, using large amounts of release agent, it went flying like a champagne cork in a P Diddy. party and by the way a big round of applause to my wife Dolores for helping me shape these pieces and here is Dolores' official stance putting the slabs into the shape love you alright epoxy time so right now the slab measures approximately 2 and 13 30
seconds
. about an inch thick and I'm using a full thickness fathom that says you can pour it up to 2 inches in a single pore, so if my math is correct that would mean I'll need to do a second pore, but that's okay honestly, I almost always do a shallower first pore just to make sure it doesn't leak and then a day later if everything still looks good I can confidently do the second pore.I guess all of that is correct. now I'm just looking for a good base coat and while we let that base coat cure we're going to work on the base of the table, so I mentioned that the reason Hani reached out was because they saw a piece I shared on the other. video that you really liked and I'm not going to bury you, the protagonist was this one who said sharing too much the design process is something of mine in these videos and, in fact, the version that I just showed is not what we ended up with.
Let's go with this, so this is how it happened. My first version of this design looked like this, which reminded me a lot of the Honda logo. It's not intentional, but it makes sense. I really love Honda and hope that one day I can own an NSX, but I'd settle. for a CRX anyway, back to the boards I decided I wanted to make bigger swooper arches here so the next design looked like this and then I kept pushing that idea until I ended up here so this was the version we had when I started. talking to hii, but at some point we started toying with the idea of making a four-legged version and we were a little divided.
I think both versions have their advantages and disadvantages. One of the advantages of a three-legged table is that they are actually sturdier than a four-legged table, which may seem counterintuitive, but you know, sometimes you go to a restaurant and the table wobbles because one leg is too short; Well, it's literally impossible for a three-legged table to do that, no matter what it is. It will always have three points of contact with the floor and it will always be sturdier in that sense and in terms of how it looks from this angle, I actually prefer the three-legged version, but when you look at three-legged tables from certain angles, sometimes the base may look a bit weird like it's not centered on the top even though, all things considered, we decided to use four legs.
Something I think is worth mentioning here is the size of these white oak boards because I don't think it really shows in the video so look at this piece which is a pretty typical board that you would use to build furniture. Now here's something else we're all very familiar with, a 2x4, and here's the wood I'm using. using for this piece and it's important to mention this because the extra thick nature of these boards can sometimes cause them to go forward where you'll think why would I cut that that way and I'll tell you right now it's because these boards are so thick the first step will be divide our pieces into oversized chunks and it will be pretty obvious to see what I'm doing here, so let's use this time to plan how we're going to do the leg assemblies, so first the first thing you'll notice is that the design of the legs changed from this to this, which shouldn't really change the look of the table once it's all together and with the top on top, but it will make the table sturdier.
The end and each set of legs will be made from three pieces that I can get from my material, as you see here now. Unfortunately, we're not going to do a set of plans for this piece because if I'm honest. I just don't have time right now and because we already have a project course for a piece that's not the same, but if you like this one I think you're going to really like the Surly table too, so I'm going to put a link to that along with our other projects in the description and I don't want to brag but I think we make the best woodworking plans out there, from design to instruction to support as you build we put a lot into them so if you are ever looking to build something, just do me a favor and take a look at them, no pressure, so our pieces are all fragmented and now we're going to reduce all the pieces to their final thickness and then I can start cutting the joint faces and I want to walk you through the next part in detail because it may seem a little confusing but it's actually very simple, so before I cut anything I'll make sure I have a perfectly flat reference face. on each piece and I like to do it by taking one or two passes on my Joiner and then we'll start with the vertical part of the leg, so this is actually the easiest cut to make because it's designed where these faces are. parallel so you can place the fence at the proper distance on your table saw and rip the joint face, so I'll start here with the largest bottom joint face and then after I cut them I can readjust the top face, but There is a trick here and that is to mark the curve as a guide because when you cut this face of the joint you have to make a stopped cut, so this will help me know where to stop before I start cutting the part of the leg that I want.
I want to preserve and then clean the material. I can use my band saw. We can then cut these two joining faces and the good news is that they are identical angles, which means I only need to do a sled setup to cut them all. The bad news is that these pieces are so thick that now that they are on top of a sled my saw blade can't reach high enough to cut all the way through, so what we're going to do is make the cut as high as possible. in all eight pieces and then there's a pretty easy solution.
I can just take the pieces to the band saw and cut the rest of the material making sure to stay closer to the waist side of the wood which will leave me with this little ledge that I can cut flush with the router table, it's Well, the downside is that you get what you give, so this will sound very obvious, but it all comes down to the fact that people will pigeonhole you based on what you show them now. The thing is, you can let it be a prison of your own creation or you can use it to your advantage as an example.
Over the last two years, these three videos have racked up the most views on my channel and because of that, probably 90% of the people who come to me want a round slab table or something like that desk. Now the good news is that I love building that kind of thing, so on the other hand, it's been a great calling card to have it available a few years ago. This video of me building a giant Nintendo Switch got the most views, and as you can probably imagine, this led to a lot of people wanting me to build them a giant Nintendo Switch, which was a fun thing to do. once, but it's not something I'd like to try to make a career out of, it's just not what I'm particularly passionate about, so the bottom line for me was that I can't necessarily control what's going to catch on with people.
I can control what I want. share and publish and it would have been very tempting to let the success of the Switch video lead me down a path where I would always search for strange and sensational viral videos, but for me it was much more sustainable to do so. videos about things I have a longer term passion for so I guess ultimately do what you want to be known for because in the end that's whatwhat you will be known for, what tool in the workshop scares you the most. I'm going to guess the most common answer is probably the table saw, maybe the joiner, but when I started doing woodworking for my money it was the router, now over time I've gotten more comfortable, I mean, honestly, to all tools but especially the router because I probably use routers more than any other tool in my shop but it's always good to remember how dangerous they can be.
Hopefully I don't get hurt and this project has definitely given me a good reminder. Here's the first one, so you can imagine it being your skin instead of a table and it's pretty sobering, it definitely reminded me to hold on tighter and think harder as I finish. my cuts and I wish I could tell you that was the only reminder I needed during this project, but it wasn't and the next one is worse, let's pause for a second so we can all learn, so that a router bit always turns from the same way and 99% of the time you will want to feed your material so that you are pushing against the direction that the bit is rotating.
If you just do that, what you're about to see here won't happen now, hopefully a bruised thigh and this. A note to myself will prevent me from making this mistake again and the reason this happened in the first place is going to sound really silly but that's pretty much the case with all mistakes but what happened was I was trying to make a photo for the video. and I was standing on the opposite side of the table than I'm used to and I think that was enough for me to turn around, let's take a break from the router and go back to the slab, which should be hard by now, so this is A Kind of a Moment of Truth, did the mold release do something right to give it the best chance?
I walked around tapping to hopefully loosen things up and then it was time to flip, so we flipped it and then realized how big and heavy it is. The top was and I thought, you know, if it flies off, it's probably better to have it on the ground so it's easier to hold on to, so we put it down and nothing even moved, so here's my conclusion on unmolding if you're already using masking tape on your form, which was the red stuff you saw on my melamine base. You don't really need a release agent. I mean, it doesn't hurt, but I don't think it helps either, and it really does. you're not using masking tape if you're just placing the slab directly on the melamine, that's when you definitely want to use mold release, so unfortunately for me that means my dream situation of building a form once and then reusing it for a ton. of projects is just a dream.
In my last video I announced the return of this type, the thick brass mechanical pencil, and that I started a new separate company called Quirk, where I will design and manufacture more products that share the same philosophy that They are basically things that you don't really need, but maybe you want. This pencil doesn't do anything better than this pencil and costs a ton more, but it's great and brings me a little joy every time. I use it well. I always hate announcing things too early, but I think I'm deep enough into the process of the next tool to be able to say something, so the next product will be a hammer.
I'm still very early in the process. prototype settings design phase and something I learned from pencil is that prototyping physical products is expensive so this time I'm going to do as much as I can digitally and I'm using Fiverr to help make that possible so yeah You have never heard of Fiverr. You can think of them as a marketplace for freelance talent where you can find professionals to help you with pretty much any digital service you can imagine, interior design editing, marketing all kinds of things, but what I'm looking for is product visualization, basically making renderings of a product to help you get a better idea of what it will look like before you've produced something, so I'm pretty good when it comes to designing and drawing things, and this is where I'm at. the hammer, but when it comes to rendering I don't know what I'm doing and if I'm honest I don't really have time to add another hobby to my plate so I searched Fiverr for product rendering and I'm done.
Going with these three freelancers now is full disclosure, this is a sponsorship, so if I were doing this alone I would probably just go with one freelancer, but I figured why not look at more options and let you guys see what kind of consistency you can expect. The cool thing is that you can feel pretty comfortable with just one person because they have pretty comprehensive user reviews and ratings, you can see their portfolios, and if that's not enough, you can now even book a one-on-one consultation with a freelancer to make sure you're comfortable. before we continue so without further ado here are the results I got and I have my favorites but honestly I would have been completely satisfied with any of the three I went with they all had great communication. quick response and, most importantly, good results, and my opinion is that this step is worth investing in.
I mean, obviously, you can't make final decisions until you have an object in your hand to really critique things, but the difference between this and this is pretty significant and if you eliminate just one round of prototyping, it would pay for itself many times over. , so whatever you're looking for, check out fiverr.com % off with Code 4 eyes 24 and thanks again to Fiverr for sponsoring this video. Right now, to make sure this is easy to follow, what you see me do here is finalize the shape of my legs and I started by cutting a flat edge along the top of my assemblies, then I routed a chamfer that runs along the entire length of the inside and then I made a sled so I could cut these butt faces on the ends and now here I am putting this gigantic bullnose bit on the router table so I can cut some edge detail on the outside of the sets of legs it's called a thumbnail which is where you make a big round but instead of it being a smooth continuous arc it has these sharp transitions like your thumbnails so remember at the beginning of the video when I made the bold statement of that these were the most beautiful. slabs that I've ever used well, I still think that and I think we're finally going to start to see if that's true or false, but before we jump to conclusions, I want to point out a bit of irony, so ironically, many of the The same qualities that make a slab really pretty when it's finished are the same qualities that make it a little uglier when it's raw.
Look at these two slabs. I imagine that many people would say that this is the prettier of the two. I mean it looks pretty good from the tree, while the other one looks pretty rough, the thing is the rough one with all its flaws and problems, those are the ones that will make it really stand out in the end or maybe now I just have a complex of savior Obviously this is just my opinion, but in fact what I can guarantee is that raw slabs require a lot more work even though the initial pore we made filled like 99.9% of the voids, every time you expose a new layer, you reveal new ones.
I think a good analogy would be like an antilla. You've seen those pictures of what they look like underground. That's an extreme example, but that's what I imagine the slabs might look like on the inside and you're kind of chasing your tail. simultaneously filling voids and then revealing new voids, so a lot of touch up work with Hot Melt epoxy and eventually some CA glue for the smaller holes and I guess this is all my way of telling you if you thought these slabs were ugly at all. beginning or maybe you're still thinking just don't give up on them, but they're late at this point, the top looks pretty good, there's obviously still a lot of sanding and touch up work to do, but the next part was the hardest. part of this build and it might also be the most confusing, so I'm going to go over this in detail, but my goal will be to make it as easy as possible for everyone to understand, even if you don't like it. the technical aspect of woodworking or maybe you're a beginner so you just want me to look at this and see if I understand it just pause and then you can ask, this is how the most common way someone would join a table base together like this would be I'll be with something like this, but I think one of the things that will really make this table stand out is this center piece that makes everything flow together, so the first thing I need to do is cut four square pieces of wood, one for the upper cube and then three that will be joined together to form the lower cube.
This is where it starts to get complicated, so the block for the bottom hub will be 10 inches by 10 inches and 6 inches thick and you could do this. Shape it basically the same way I shaped the legs by making templates and then routing everything, but the problem is that I can't glue it onto a big block and then shape it because there's no way the blades on my table saw or my router bits stay big enough to go through the thickness, so what I have to do is shape all the Hub pieces individually and then glue them together after shaping them and as you have already seen me shape them things by hand, I thought I'd just do it on the CNC for the sake of variety.
Now the other thing is to remember that I said the axis will be 10x10. Well when I cut it on the CNC I had to leave everything long because I know that if I try to route the faces of the joints this is how they will look and that is because the fiber runs perpendicular to the cut and it will break very badly so Next I need to find a way to super precisely cut the pieces to the right size on my table saw and here is the sled I came up with. You will hit the workpiece at these four points so that each cut is identical as you turn it to cut all four faces of the joints and in fact I have to make 16 of them because right now I still have the four individual cubes right , so at this point we have our three pieces for the bottom cube and our fourth piece for the top cube and the next thing I have to do is put together the three pieces that will make up the big bottom cube.
Hub and, as you can probably imagine, it's very important that everything lines up perfectly, so my first thought here was to cut some little dominoes between them to make everything line up and prevent things from sliding around when the glue is drying , so I did it and Then the good thing was that I did a dry assembly because this just wasn't working, it just wasn't close enough and The Dominoes prevented me from being able to adjust things on the fly, so instead of using them, I just threw caution to the wind and just glued them together and it's probably a little hard to tell in the shot, but I'm in panic mode here because the glue is drying and they're not going together perfectly, so I'd say they came out closer to what they were. with the dominoes, but this is probably the step I should have spent more time thinking about.
Something I should point out is that perfect alignment here doesn't really matter, I'm really only concerned about The Joint's faces and as you can see. in this shot they are not perfect and I definitely need to fix them because otherwise there will be some pretty bad gaps, so this is what I came up with: I clamped a couple of blocks in my C so I could register the piece like this and then by manually moving my CNC on the face of the joint with a flattening bit, it should remove exactly the same amount of material from each face and although the top hub piece was fine, I had to do the same because they should all be identical.
Okay, that takes care of making the Hub piece and now we have to assemble everything, so normally I would just use dominoes for this type of joint, but here I wanted to do something different and bigger and here are all the dominoes from the that my Domino is capable of. of cutting and I can't make it bigger because I don't have the Domino XL, so I'm going to make my own Domino Magnum and to do that I made this template that can fit the joint faces of both legs. and the Hub and then I can use my router to cut everything out, so Domino would have worked here.
I will say 100% yes and I think this is a very good example of why some people love and why others hate boiled Domino's. Down to its simplest form, here I am using seven cents worth of MDF and a router in pieces that I already have for other things to do the same thing as a tool that costs over $1,000, but cutting these four joints with Domino would be Meanwhile , it'll probably take me about 15 or 20 minutes to get the template to cut everything out and then having to do the Domino tenons probably took me like 4 hours, so basically, if you were only going to do this once, I could see where the Domino.
A scam, but if you're going to do it twice a month for 10 years, you'll start to see the value. I know it's simplified math, but you get what I mean. The last thing we need to do before assembly is cut the corresponding bezel on all of them. the cube pieces andthe only trick here is that I will stop cutting just a little bit of the ends and then refine all the transitions after the glue dries so that brings us to the most difficult and technical part of this build and My question for you is: was it easy to understand and respond to on your behalf?
Dolores, yes, I mean, I can't recite it, but wouldn't that be the case? If you leave a comment on this video about that or anything else, let me know. I know you saw a good bit using the term thank you Dolores in your comment and if you are honestly enjoying this video, if you would be willing to like and subscribe to the channel, I would be honored. Thanks in advance, did you ask anyone? Yeah, so I talked to Sean and Cam and we basically decided there were two ways to do it, which was the way I did it or carve it hard, so I basically just put together a big block of wood. attach everything and then just power carve everything and shape it, which in theory you could do.
I don't think I can do that. I'm just not good at power carving and you know, strangely, power carving a bear is easier than power carving. carve a large perfectly smooth 90° arc because a large smooth 90° arc is only perfect in one direction, while a bear can be perfect in infinite ways, you know what I mean, it's funny how you associate it, I mean , I associate that too when you said pocket card, I thought, oh, like a bear, and then the other idea we had was that there was something called a hole saw. The problem is those bows in order to cut them you would have to have a hole saw with a radius or diameter of probably 8 inches and they are made to not cut through a 6 inch thick block of white oak where it would come out so terribly. that was the best I could come up with, okay, other than a little sanding and some finishing, we're almost done here, we're definitely in the home stretch, but here comes the part of the build that I get a lot wrong about, like this that maybe you can.
I have noticed these holes in the top sections of the leg assemblies and this is what we are going to use to attach the base and top eventually, but there is something that worries me, obviously I want this table to last for generations and once I get it Let's put it together, the larger piece of wood at the top will be supported by three of the legs, which is great, but the smaller piece will only be supported like this by one of the legs and I would feel more comfortable knowing that it is being mechanically supported a bit more, so I'm going to cut two slots for the C channel that will close the gap.
Turn it off, that's not good. I tried to stay positive, but that sucked. I guess that marks another lesson learned. and that would be if I ever do this again, use a down cutting bit, not an up cutting bit. I thought I tightened the bit in the chuck quite a bit, but apparently not enough and I think when you're removing a fairly large amount of material and it's a fairly large half-inch piece, the cutting part facing up is being pulled down and slowly He pulled out more and more and cut off completely. This was supposed to be for a client and I would totally understand if they don't want to. this board already, but I guess that's saying I can't do anything right now, so I'm going to email Horse and Angie, uh, give them a couple of options, including just a full refund, I'll see what they want.
I will continue building the rest of the table I am not happy but I will get something working right so I spoke to Hani and they decided to accept the refund which is 100% understandable and now that means we can do whatever we want to fix this problem. So the first thing I did was cut into the second C channel, but this time I made sure to use a downcut bit and then flipped the entire table over and enlarged the problem area on top, a better starting point. To brainstorm and talk about brainstorming, these are some of the ideas I had, so this is what we are dealing with and the most obvious solution would be to try to camouflage it with matching wood or possibly even highlight it with a little white oak As a base, another idea was to take white oak walnut or any type of wood and do some sort of patch work which I think can look great, but it looks better if it's more random and this was just an area concentrated too large.
Other idea. It was to do something like this where I would create the illusion that the entire base or just the legs of the base were sticking out through the table and then another idea was to just cut out the entire problem area and make a sort of white oak. Permanent Leaf I didn't really like any of these ideas and in fact there was one more idea that I did like but it was too crazy and that was embedding a Pac-Man Chasing Ghosts which sounds pretty random but is a Call Back joke from a previous video, don't worry, I'm not going to do it, but anyway, as I was looking at things and thinking about it, I decided that I didn't really care about the way the line looked, but no.
I don't like how unbalanced it was, I mean I like symmetry but this was too much so I started playing with the idea of adding some lines to create a little more visual balance and I like this so I took the executive decision. to cut it with the cut side down, now what to fill it with, so I got this friend named Ben who we call Wy because that's the name of his YouTube channel and he builds things out of recycled skateboards and a few years ago he gave me this . A big blank of old skateboards and I felt it was time to take them out so I started by cutting some thin strips but I didn't want to embed them like that because they have a lot of gaps like you can see here to make it look cleaner I cut them crosswise into a bunch of smaller pieces that didn't have spaces like this.
Now I'm not going to sugarcoat it. I'd give myself maybe a B minus on this. I would say the installation. It came out pretty clean, no complaints, but I'm a little put off by this strange optical illusion it creates, so from afar it looks good and up close, like you're sitting at the table, it looks good too, but from one point half. From a distance some of the darker pieces of the skateboard blend into the Walnut and it creates this illusion that the pieces are staggered even though they aren't and as much as I wanted to like it, I didn't like it so now I'm not I totally agree with the skateboard idea, I think with a different pattern like Chevrons or maybe even just rotating the pieces 90°, it could have worked honestly, check out W's channel.
He makes amazing patterns, but on this one the biggest problem I just think it's just too much skateboarding, I think something that could be cool would be to make a little bow tie to fix a crack or something and maybe I can play with that in a future project, but doing this made the whole piece look like it was about The embeds became the focal point and I don't want them to be, so I decided I just needed to do something that didn't try to hide the fact that I made a mistake, but also didn't make the mistake.
Define In the project that these will be, I called them pill inserts, but I think Dolores hit the nail on the head with her description of the popsicle stick inserts. Thanks to Loris, now you're not supposed to embed pieces like I did there perpendicularly. each other, but I decided to roll the dice with this one. I mean, I think it'll probably be fine, but I feel like I'm playing with the house money right now, so I was fine with using this as an experiment and if it comes to fruition. Maybe one day I will try to sell this piece.
I don't know, we can revisit it from time to time in future videos, but in closing, let me tell you the eight things I learned from this project. this is the prettiest wood I have ever used it is real two mold releases don't work for me three 3 inch thick wood is more than twice as hard to work with as one and a half inch thick wood four remember to push the right way in the router table five cuts down bit six the people at Fest Tool should make a domino Magnum seven skateboards are an ornament, not a focal point at least for me and last but definitely not least people will pigeonhole you into depending on what you do.
The samples and what I showed in this project could very well reduce my reputation with them as a designer craftsman and decision maker and while I'm pretty sure I could have left all that stuff out of the video, I edited the beauty shots and cheated. That people think I'm better than I am, that's not how it happened and what's more important to me than people thinking I'm good is that people trust me to always be honest. What I talk about in these videos are the things I'm thinking about while I'm building, but if I take a step back from this project and look at it honestly, I'm very happy with the result.
I think the base and shape of the table are beautiful and I can't sit here and lie and say I'm happy I screwed up the top at Hour 11, but I can say I'm happy that I'm not going to let that define everything. The project is a scar. We all have scars, but no matter how aware we are of them or how much we may imagine that other people focus on them, the reality is that they don't define us and to think that they do is ridiculous, thank you. for watching and thanks again to Fiverr for sponsoring this video and don't forget to visit fiverr.com
If you have any copyright issue, please Contact