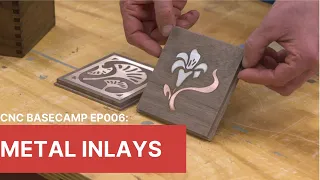
Inlay Basics on the CNC using Easel
Mar 23, 2024welcome to Pawpaw's workshop, well I'm starting the
inlay
video series and today I'm starting with theeasel
inlay
generator and I made this very, very simple inlay with just a piece of plywood and some scrap wood that I had. around the store and it's been working really well and I want to show you how I did it with just the basic setups on theeasel
and then from there we'll continue to progress as this series continues so if you haven't subscribed by means subscribe no you're going to want to miss this video series so let's get started today so we can have a good understanding of easel software as it relates to inlays we're going to have to start from the beginning.
Getting started and looking at the software itself before I started trying anything on the CNC machine, the first thing I did was open a new file for a new easel project and the workpiece size is only 12x8, perfectly fine. We're going to carve something much smaller than that, but to start, let's look at the thickness of the material. Currently, the material thickness is set at half an inch and that will be fine for this first demonstration purpose. Then also the drill bit size here is going to be one eighth of an inch. This is very important because depending on the design we choose, you may or may not get the detail you want, so we'll start with these. two figures and we'll go from there and I want to really show you what happens as we go through the process now as I come up and show you this, this is set up for a half inch material and it also has an eighth inch drill bit, these two factors are going to be very important, most importantly as far as the 8th inch bit, you'll be able to clear the pocket pretty quickly, but it also won't have a lot of detail, so depending on the inlay you want to have, you'll need to keep this in mind. account, one of the things I really love is this professional design library.

More Interesting Facts About,
inlay basics on the cnc using easel...
In reality, it will give you thousands of works of art that you can choose from so you can get any type of design you want. being able to do the inlays, this is absolutely amazing and I'm not going to show you all of this because there are too many of them to even think about, but this is absolutely amazing, but for now what I'm going to do is just highlight this little dog paw and let's go to incorporate it and I want to incorporate it as a filling. The main reason I introduced this as a filler is for the shape, this will give me nice, uniform cuts
using
that eighth inch the next thing I want to show you is the depth that it brings is at the 0.2 point that's not important at this point but it what I'm going to do is go ahead with this highlighted now we're going to come Go to applications, select applications and this is the embed generator.
Now this app creates both the cutout and the pocket parts. Also, you don't need to set the trim outside. All of that is already done for you right now. have a .128 bit size, which is what I showed you a moment ago, so when you're setting up your inlays, this is the first thing you should be able to adjust depending on what bit size you're
using
and then next thing is the tolerance that you will actually be able to create, how much margin you will be able to have to be able to fit that inlay in the pocket.
It is currently set at 3,000 of an inch. leave it like this as the default setting, so let's go ahead and import that. The first thing I want to do is go ahead and get this one out of the way and these are the two pieces that we're going to work with. First thing is the pocket and you notice that the pocket is set to 0.3 inches. This is the actual embed here and it has all the tabs. The first thing I want to do is get rid of the tabs because that's just going to get in our way for the purpose of this demonstration now, if you look at this, this shows where it's going to be completely cut off now because our material was half an inch thick, it's cutting to half an inch deep so I can cut completely the idea behind this is that these pieces will fit into the pocket now I want to slide the pocket out of the way and I want to zoom in on the actual inlay and then I want to be able to zoom in real close to this, this blue line which is the actual path, so this is cutting the path, so when it is cut, you see that this part here is actually going to be cut inwards creating this cutout, now how is that going to fit in our pocket? let's take the pocket and see, and if you look at that, you can see exactly how it will be cut because this one will be cut on the outside and the other one will be cut and sit right there so those margins are made, the only thing I don't like is these little tabs here.
I don't like those little pieces, but you can actually see how they fit together and that's the point of this discussion. If I change the bit size, if I go ahead and delete this. Cut it, we'll cut this one and go back to the original that we have here. The first thing I'm going to do is change this to a 16 inch bit. I'm going to come here to my application, click on this and we're going to change this to one-sixteenth of an inch, so I'm going to type in 0.063, we're going to leave the tolerance the same and let's go ahead and import that now, these little bumps that were gone before, the depth of the cut is still 0.5 inches and if I take and put this one right on top again, well, let's make it easier, let's take this, I'm going to highlight, whoa!
I just want one. remove the tabs, we're going to put this at four and five, so I'm going to click on this right here in the center, I'm going to put my x axis at five, I'm going to put this at four and then I'm going to do the same thing with this one, let's go ahead and select this on 5 and 4 and now that's going to be directly above it, let's zoom in and you can see how it should fit perfectly into that space and that's it. using a sixteenth inch drill bit now, here's the problem I want to be able to discuss with you.
This is being set up on a half inch material. Will you really use a half inch thick material to make the inlay? Probably not. I don't think you will, so this is what I want to do. I want to open a new piece of work. I want to be able to recover the first one. Let's separate this. I want to take my embed and press control c. and I'm going to go to my new workpiece and put control v with this now open on a new workpiece. I want to change my depth. The wood I'm going to use for this demonstration is actually 0.29 inches. so I'm going to go ahead and put in 0.29, I actually want it to cut all the way through, so 0.30 and that's going to take care of that part and when we look at my cutting depth now, this shouldn't be at 0.5 it should be at point 3.
Now I want to be able to set this to where I'm cutting the center, so I'm going to go back to my shape with this highlighted here. I want to be able to set my x y coordinates to zero by doing that, this is going to be my initial x y zero position and I'm going to be able to cut all this material right there, so now this part is set up and I'm going to have these individual pieces and I'm going to use the method of glue and adhesive tape to hold them and protect and store them as they are cut.
Now I want to go back to the other one and I want to cut this because it's already set up I want to get rid of the original we're going to cut it now we're cutting material that's 0.3 inches thick this is actually cutting at 0.3 inches do I really need to cut it? so deep, I'm not really going to change this and we're going to go to 0.2 inches, what that will allow me to be able to do is press the inlay into this wood and be able to Hold it and be able to hold it firmly while the glue dries.
Now I want to go ahead and do the same with this one. I want to set it to where I have position x and 0 in the house and we're going to cut. this is going to be 0 and 0. We'll zoom out and you can see it's there now because it's a 16 inch bit, how long will it take to be able to cut this? It takes about half an hour to go down, you have to go down to 0.2 of an inch, why don't we do this? Let's go down 0.1 of an inch and see if that cuts our time in half, so 0.1 and now let's recalculate this now. that takes about 15 minutes and that will give me the inlay that we want and it will sit proudly on this pocket.
Now let's try this out and see how it cuts and see if these inlay pieces actually fit now, first thing. What I'm going to do is just take a little piece of plywood, nothing special, and we're going to cut out the pocket, so I'm just taking the stops and it's got this little slot and I use that as my Hold and hold too and it works great . These stops or clamps or clamps, I should say, are free to download on the inventables project page, so you can get them if you want, but all I'm going to do is use this. little lip right here and being able to hold it down and it works perfect and really all I need is two of them and that will keep this project going without any problems right now because I'm making the pocket right now.
I don't need to worry about the glue and tape method, so it will be fine. I have my x marked here in the center, which will be my starting position. We're going to get everything out of the way and then I'm going to change the bit and I'm going to put in a 16 inch bit. Now I'm going to go ahead and move the CNC machine up to this point to set my initial x and 0 position and I'm just lowering the z so I can be more precise and since this is a piece of wood it doesn't really have to be exact so I'll call it good right now.
I'm going to go ahead and climb. This now we're going to lift it higher than that, here we go, that will give me space to be able to place the 16 inch. Now this is a 16 inch up cutting bit that normally you would probably use. a cut down bit, but again, this is junk and this is just to test this process, so I'm taking this bit to use. Okay, so I've got evidence bit number 16 in position now and it's over my initial position x and 0. I'm just I'm going to go through the checklist now and I'll be able to carve this pocket, the other thing I could probably do and I'll say this now.
You could probably do this as a two-stage carving and use an eighth-inch bit to cut. Take out most of it and then go back with a sixteenth inch drill bit and cut off the outside edge, but again I want to stay with the original configuration in this first process. I will most likely speed up the feed rate since this is the carving I want. To see how this reacts with this bit with this piece of plywood, I'm going to go ahead and carve the material. The thickness again doesn't matter, but I have it set to 0.5 inches.
The material is definitely insured. I'm using the 16 inch bit and we're going to go ahead and probe so that process is done, we'll get it out of the way. The z probe is stored x and the zero position is set, we will skip the dust boot. The spindle will increase the feed rate to 52 inches per minute. I'm going to go ahead and let it stay that way. You will notice a little bit of the frame here, which is normal because there is now an upward cut while carving. bottom line I want to be able to say that again this is definitely the stock position, there's nothing I'm really altering here other than the thickness of the wood so I can set this up and I want to see if this is actually going to fit and work before I start making the settings.
The other thing is to keep in mind that we could do the carving in two stages so we can carve this even faster. I've already cut it down to a one inch point for depth which I think is fine, but I could have cut this in one or two passes instead of three, maybe that's it, but again, this is a sixteenth of an inch bit. Now, one of the things I'm going to do as we go through this. series of videos is that I'm going to do some very small inlays and I'm going to use a one inch 30 second bit to be able to do that, you don't want to miss this and I'm We're going to put it in a round cylinder which will be even more fun as Let's move forward on this, so it's going to be a very exciting series to be able to follow it to the end, let's go back and see how the machine is doing.
Well it actually looks pretty good let me look at this up close so this is the pocket and the only thing you can see is a little bit of wear here and that's because I use the up cutting bit it's not great thing for this test. I'll just hit a piece of sandpaper and hit it a little bit and we'll take care of it. Now the little piece I'm going to use is a piece of poplar and this one is 0.29 inches thick. You can see it on camera at a thickness of 0.29 inches, that's what we're going to cut the paw out of and in this I'm going to use the tape and glue method to attach it, the other thing I want to point out on this dog paw, these They are actually individual pieces, so essentially this is like having five different inlays for this little leg.
Now I have my tape down and it is secured on both pieces. Now I'm taking the starboard glue. This is the medium thickness and you could use it. the thin one, but I'm going to go ahead and glue it on now. Please note that I have a 15% discount in the description below. If you want to be able to buy this glue, it only takes a little bit. then I'm going to spray the accelerator, then I'm going to put it right there, hold it down for a moment and we'll be ready to go as soon as I clear the work area, which is fine and tight now, so I'll keep goinggo ahead and put the router back in, set my x and zero position right here at this point and be able to carve these little pieces.
Okay, I've got my x and 0 position set up here, so now I'm going to go. go ahead and pull this up and you can do the z probe and we'll follow the checklist through the full probes, we'll leave that aside The z probe is saved and these set x and zero, we've already done that so you're good to go , so I click OK on that, I skip the dust boot, I turn on the spindle and I press the card, I do now before I carve it, I changed one thing instead of having the three passes so I can cut the material, I went ahead and set it up . to four passes so the depth of cut per pass was .075 and I wanted to go a little easier on the bit itself and that's the reason I made that change so let's go ahead now and see if this It fits without doing any modifications it looks great, there's no movement that's nice, so what I could do now is just glue them on and sand them, and that would be a very nice inlay, not bad now that it was at three thousandths of an inch. tolerance Could you make that tolerance a little tighter?
I don't know if I could do it in this wood. This fits very well if I take it out and put it back in so it fits in there as perfect as it can get so I think The first test has been extremely successful using the easel software with the Inlay app it doesn't lift up we're not going wrong, I think I'm going to go ahead and glue this down and I took a piece of sandpaper and I literally hit it really hard. very lightly, that's really all I did, I cleaned the pocket where there was no residue or sawdust at all and that's all the prep work I'm doing on the pocket, now I'm going to put some glue on. here and spread it out and we're going to go ahead and put them in place now down to the inlay itself, this bottom edge is perfectly clean and smooth, it's the top edge that has a little bit of fluff on it and I'm not worried about that because it's going to get cut. , so we'll leave it like that, so let's add a little bit of glue, that's it and we'll spread it all over the place if I had a small brush, that would probably be better but I don't need a little bit more there let's go I'm going to try to put it on the side walls too it's okay we'll get another piece of wood that we'll put on top and hold it tight, we'll come back in about half an hour and remove it, come on, very good, the glue is drying.
I want to mention a couple of things that I've read in a lot of the uh different Facebook groups and on the forum where people have had all kinds of problems using the easel inlay generator to be able to make their inlays if you have questions please write them down in the comments so you can see the different questions and I can address them for you, if I can answer these questions and improve your embeds that is what I want to achieve so leave me a comment below and let me know your good and bad experiences and what kind of questions you have so that we can all progress and be able to make better embeds.
I want to get really close so you can see this first embed. Now, I can't completely sand it perfectly smooth because I'll eat it. on the plywood surface, but I don't want to remove that coating, but you can see that overall it looks very, very good, there is just a slight variation between the pockets, but not enough to cause any kind of problem, so The next thing I'm going to do is move on to the solid wood and do another inlay, but I'm very, very pleased with this.
If you have any copyright issue, please Contact