Como hacer PAPEL RECICLADO bien hecho y FÁCIL | PAPEL EN COMA
Apr 01, 2024Hello! I'm Andrea, from Papel en
coma
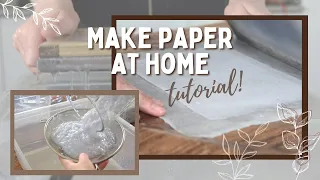
. And in this video I will show you the entire process to make recycled paper. These are the papers we will make today, they can be different colors, and they are thin and flexible. The materials we will need are these. First we will need water. Ui, Chuli got scared. I use rainwater so I don't waste as much, but if you use tap water it works too. A mixer, don't worry too much if you don't put a lot of paper in it at once, it won't break down and will work perfectly.
And if you don't have a mixer, another option is a hand mixer. I say the same as with the blender, shredding the paper little by little. We also need used papers, from old notebooks, diaries, loose sheets... All these papers are useful to us. A tray, mine has about 13 liters. It has to be deep enough to submerge the frames. And speaking of frames, these are the ones we need. There are two frames, one with mesh and one without mesh. These frames are available to buy on my website, I leave the link in the video description. A few fabrics, as you see, have to be smooth fabrics.

More Interesting Facts About,
como hacer papel reciclado bien hecho y f cil papel en coma...
In my case they are fabrics from an old cotton sheet, but the important thing is that they have no texture. For example, towels, we cannot use this one since the mark would remain on the paper. A tile, this is really optional but it will be very useful to have a smooth surface, and thus be able to transport wet papers better. A sponge will help us remove excess water. Or we can also use a roller, which in addition to being able to remove excess water, we will use to flatten and smooth the papers. Paints and dyes, although there are different ways to color paper.

And these are all the materials we will need to make this document. Let's do it. First we are going to look for notebooks or used papers like these old notebooks and agendas that I had around the house. And we are going to cut all the papers into pieces. And it is not necessary to cut the papers into super super small pieces, this size is more or less fine for us. By the way, I recommend that you cut them with your hands, although it seems that you will not get less tired than with scissors, I tell you this from experience.

Now we are going to use the mixer or the hand mixer. And we add water, you don't have to add too much or too little, more or less half, or a little more. We put the paper, and well, if you want you can let the paper soak for a while so that it becomes softer, but you don't have to leave it for hours and 30 minutes, it will be quite soft. So we plugged in the blender and please do not put your hand inside the blender when it is plugged in, to avoid accidents. We cover it, and grind, this is the actual time it takes to grind, a few seconds.
And to give it a little color we will put paint on it, this part is optional. I recommend that if you want to add color, you add the paint to the mixer and grind the paper with the color a little more, since this will make it more intense than if we do it without blending. But if you don't want to add paint in the blender, you can do it separately. This is how the pulp should be, without pieces of paper and that when you crush there is not much pulp left in your hands. The foam you see is from the paint, nothing happens if it stays like that.
This is the most fun part, playing the role. We have to pour as much water into the tray so that the frames sink well. It doesn't have to be a very large tray, the frames are well submerged in this type of trays. So we added about 10 liters of water, although the measurements to make the paper are not exact since depending on the container, the size or thickness we want of the paper may vary. While I'm adding the water, I'll tell you something. To make 1 single non-recycled sheet, about 10 liters of water are used, and with those 10 liters we can even make more than 100 recycled sheets.
I normally mash a cube of pulp but there is no need to add it all, it would be too thick. We have to add enough pulp so that the paper, when taken out of the water, is more or less 2 millimeters thick. I use a coconut to make it easier for me to calculate the pulp I add. Normally I add 3, 4 or 5 coconuts and then if I see that the paper is thinning, then I add more pulp. It is very important that we mix the pulp with the water well, otherwise we will end up with very thick parts of the paper and very thin others.
The mixture of water and pulp should be more or less like this. I am going to explain how to use the frames correctly. As you already know we have 2 paintings, the one with mesh and the one without. There is one side that has the mesh. And on the other side are these centimeters of distance with the mesh. We have to look this way, which is where the paper will be. The paper should never remain on this side, otherwise we will not be able to remove it. Then the meshless frame will go on top of the other frame's mesh, like this.
The mesh should be in the middle and the frame without mesh on top. We place them well and hold them with a little force so that they do not move. To move the frames we will do it this way. It may not be perfect the first time, but with a little practice everything will turn out better. Now we can tilt the frames a little to distribute the pulp well while the water drains. When we see that there is no longer that little puddle of water, we will let it drain a little more. And we remove the top frame, the frame without mesh.
And what I normally do is put my hand behind the mesh to help drain it a little more and get out all that water that still remains. You see, there is still a lot of water coming out. And this is the thickness that should be more or less the 2 millimeters thick that I told you before. If you put too little pulp in the water, the paper will be too thin. You see, it's useless for us to write this. And if you do the opposite, you add too much pulp to the water. You would end up with paper that is too thick, like cardboard.
And that doesn't help us either, so we have to remove more pulp from the water. Now we will place a smooth cloth on top of the tile, or the smooth surface. I usually wet it a little so that it doesn't move and remove any possible wrinkles that the fabric may have. And now we will have to transfer the paper that is in the mesh frame to the fabric. What we will do is hold it well from below and we will lower the frame in this way. Always from one side to another. With the roller or sponge what we will do is remove the excess water.
Don't do it randomly, follow a direction so that bubbles are not created. We remove the frame, without fear, from one side to the other as well. But as you can see the mesh marks have remained. That is why we are going to place another cloth on top of the paper and use the roller to smooth the paper and remove those marks. I usually stick the papers on a window so that they are smoother and flatter. But in another video I will tell you more options for drying the paper. To stick it we just have to place it on top of the glass and tap it a few times and roll it again.
We can remove the top cloth so that the paper dries faster. Once the paper is dry, avoid pulling it down, pull it up so the paper doesn't curl. And to remove the paper from the glass you have to wait until it is completely dry. We don't have to separate the paper from the fabric, but the fabric from the paper, so it will be flatter. That is, we hold the paper and pull the fabric. And this is how the paper looks, although if you want you can trim the margins a little so that it is straighter, but I like how it looks like this.
And these are other examples of papers that I have, they can be of different sizes and colors. So that's all, I hope you liked the video, if so you can like it and if you want to see more tutorials don't forget to follow me. Well goodbye everyone and have a good day :)
If you have any copyright issue, please Contact