UNBELIEVABLE DIY Wall Transformation| DIY DOLLAR TREE Design To Try Out!
Mar 18, 2024I am starting this DIY project with foam boards that I bought at Hobby Lobby and these are hard foam boards that they sell at Hobby Lobby that I will be using for my
design
. I will keep all the words together with tape. It's quite big, so I made it in such a way that it was easy for me to carry it on both sides. I will mount it on thewall
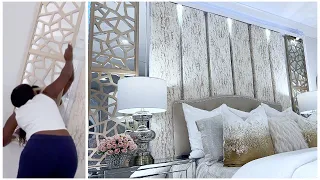
with small nails. I will be using the leftoverwall
paper that I used on my staircase and For those of you who follow me on my Instagram, you will have seen a video or short clip of when this was mounted on the wall.
I used the foam board here because I would love to change this up after a while. Now I realized I should do it. I used a piece of wood instead of foam board because of the adhesive I'm using to stick the wallpaper to it. After a while it started to bulge even though I had used the hard foam board from the hobby lobby. I'll make it vertical. lines on this with gold tape when I got to this point I realized I would need this particular
design
somewhere else in my house so I quickly swapped it out for something else.
More Interesting Facts About,
unbelievable diy wall transformation diy dollar tree design to try out...
I used a different wallpaper on the wall and this particular one can peel. that's why I put it directly on the wall, this will look much better when the glue is dry. Now I'm going to go ahead and add foam boards and I'll make a border for this other design around the wallpaper and the border will have black marble contact paper and I bought it at Walmart. I would like to apologize in advance in case you see me sweating a little during the course of this video, it's because I went to the gym, so when I came back.

I decided to go ahead and do this project knowing that I'm going to sweat a lot before I shower, so I apologize for any of the clips where I'll sweat beforehand. I would like to know all the limits of this. The design will be 15 inches thick, so I'm going to trim that measurement for the four borders that will be around the wallpaper. I will be using gold ribbons that are self-adhesive for this design and come in different sizes. Leave a link for this in the description box below. I'll start with the thickest and work my way down to the tape sizes.

I'm using the width of a sticky tape as my guide to give me equal spacing between all the lines if you're new to my channel it's great to have you here now don't forget to click the subscribe button and the notification bell so you don't Miss any of my latest videos, the one I'm working on will be at the top. I'll make two of these and these will be on the sides. I was making sure everything was right before mounting the foam boards and then I realized that putting the foam boards up as is wouldn't work just because the designs look a little different when mounted on the wall as you can see , so what I did was bring the ones we bought on the sides. down and then worked with the tape to make sure that once it's on the wall it lines up with the other one that's placed horizontally, now that it looks a lot better I'm going to attach this to the wall with little nails after I have the I hit the wall.
I grabbed bowls from Dollar Tree to make a design with them. I will need six of these, so I bought three packs of these bowls because they come two to a pack. I will also use paper plates for this design. These are gold paper plates sold at Party City, so I purchased this design and I am going to glue the paper plate to the back of the bowl to give my design a 3D effect. Now I'm going to glue
dollar
tree
mirrors. In the middle of the paper plate, what I have here will stick on thedollar
tree
picture frames and I will remove the parts that I don't need, leaving just the glass because they are lightweight.Mount them on the wall with dollar tree mounting tape. Now that I'm done with this, I'm going to make another pattern that will be around the six frames after I have the tape directly on the wall, I can see. which is not smooth like I want it to be, so I will definitely use PVC strips and tape over them to replace what I already have here and I will do that later in the future, this is what the wall looks like. I like and love the distinction between the black and the center of the wall and the way the gold ribbon ties everything together.
The wallpaper is dry, as you can see, it is very pretty and you can see the shiny gold lines, the two black and white tables that You will see, there is a DIY of mine and I will leave a link for that DIY video in the description box below . This is definitely a focal point in this room and this design will be perfect for a hallway, now this side of the wall barely is. it's used for anything, that's why I have this design here. Thank you all so much for watching. I have DIY home decor videos that are linked in the description box below to watch and for those of you who haven't subscribed to my channel don't forget to click the subscribe button
If you have any copyright issue, please Contact