How to Paint Edges Without Tape - Cutting In Tutorial
Mar 19, 2024Hello, my name is Nils from DIY Nails. In this video, professional
paint
er Chris Berry, also known as the Idaho Painter, will show us how to cut roofs and trim like a pro. Almost everyone has topaint
a room at some point. in their lives and if you haven't you probably will if you've painted a room you know how frustrating it can be to not have nice cleanedges
you puttape
on them you try to make a nice clean line and sometimes it works sometimes it doesn't. Not so, Chris, the painter from Idaho, will show us in this video how to cut a nice line with a brush.
There are several tips and techniques that he uses as a professional painter to get professional results. He will also explain it to us in this video. why he doesn't use an edging tool that you can buy at the store, but rather he prefers to cut with a brush to do a better and faster job. Let's take a look at this Christian painter in this video that I will give to the viewers. D my eye Nils some tips and advice on how to seal
cutting
s like a professional painter at the end of this video if you haven't subscribed to his channel, don't forget to subscribe to this channel if you want more tips and tricks for painting yourself.
More Interesting Facts About,
how to paint edges without tape cutting in tutorial...
I can go see my son, the Idaho painter, so stay tuned, here we come. We'll give you some tips and tricks on how to seal
cutting
s like a pro, so first up is the brush you'll never get. a very good strength seal line cut or line cut on anything you do if you don't have a good quality brush and one of the things you really look for and a good quality brush is to have good quality sharp bristles now if Yes you buy a cheap brush, what you're really going to see with a cheap brush is that if you look very closely the bristles will just cut off and be dull and not having a really sharp bristle, you won't be able to get one.
Very sharp straight cut in line, so my quality brushes will have bristles that come to a very fine point and will basically be a small sharp point. Another thing you'll see at the end of the brush if you look at the brush you'll see it's also got a nice
tape
r shape and the really cheap brushes can be just flat or very uneven so I'm going to look at the brush it's got a really nice taper shape. a high quality brush I also like a brush that is actually an angled frame brush. I use a 3 inch angled frame clear cut brush when I make my cuttings, so another thing I'm really looking for when it comes to a brush is I'm doing cut tips.
I like really stiff brushes. Really soft brushes like nylon brushes are really difficult because they're flimsy to make a nice straight line, so I want a really stiff brush and this brush that I use actually has a pretty clean cut. The clear cut brush is classified as a stiff brush so we can start cutting it and hook it into a corner right here and one of the reasons I like an angled frame brush and that's that brush that actually It is only cut at an angle because it is a lot. It's easier to start and work in two corners and then go out, so I'm going to load up my brush, take it out here, I'm going to get it, but about an inch up and down here, about an inch away, put it in this corner, so I can start this corner right here, load my brush again and one of the key things is when you start with the cuttings, don't try to stretch them too much.
You can usually take a loaded planer and cut about 12 inches. and then reload it somewhere between six and twelve inches like I'm really loaded and up, I just dip it here, hide it on both sides and they're going to start like copper here, so I'm going to start giving it about an inch. away from where my yokai lairs are going to start, so I'm going to start moving forward there and then I'm just going to start with my cot and then I'm just going to cut back in the opposite direction now that I have this section here that you can actually just backtrack now.
I'd like to get about a quarter inch away from you where I could cut this out and then just spread out my paint and blend it out, so once again I'm just going to load up my brush. I just said Dip it in there, if I brush it you'll get about a half inch and the bristles will fall into the paint. I'm going to paddle both sides of my bucket and then I'm going to be in my car, so I'm going to set it up here, place it about an inch away and then start working my way up to my cut and then go out in the opposite direction.
The reason you cut in the opposite direction is usually because it hits the walls that are textured, when you go in one direction you miss some small holes and spots go in one direction, you cut in the opposite direction it will fill them in and there is another tip when you're actually doing it. your cut is over - until you know you're really comfortable doing it really well, it's a good idea to hold your breath when you're making the cut and then breathe and then cut in the opposite direction and then breathe if you hold your breath, you'll usually have A steady hand, another key element to making a good straight cut in mind is to keep a nice steady pace, if you go too slow your lines will end up just being jagged or crooked.
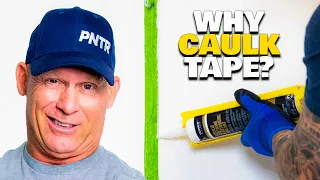
Understand that you don't want to go too fast but you also don't want to go too slow when I'm cutting. I'm actually not using the whole brush, I'm actually using basically just the tip of the brush and I'm the only one using maybe about a quarter of the brush to make the cut and what's happening is I'm not actually using the entire brush, it's actually just the tip and you're basically drawing a line just from the tip of your brush so one last final shot here I just loaded my brush another key thing the last simple tip is to try not to stretch, you know the paint on your brush and many amateurs will simply try to get to know you. you know, a line too far you always mean by rolling your walls and anything is always keep loading your roller, keep loading your roller or keep loading your brush always keep enough paint in there so every once in a while I get asked if any I sometimes use these edging tools and these are some tools that are really designed to cut straight lines around door frames, window frames and even say in this ceilings and baseboards and I've actually tried them in the past, but I don't use them. them and this is why once you learn how to cut a roof line with a brush or use light brown and then glue and glue your lines and cut, you can paint a lot faster or not say three or four times. faster than you could actually paint with one of these things so it all comes down to one thing really is speed and then it also comes down to your expectations as a professional painter.
In fact, we could create much straighter lines, sharper lines, and lines that look much better. using caulk and tape or even cutting our ceilings by hand, then you can overcome these things. There are a lot of variables that will cause these things to not get a straight line or a really crisp line and unless you have, they're the ideal scenario where you have a square door jamb and it has a 90 degree corner and a flat texture, then the things will not work as well as normally advertised when you see these videos, these things are being used, that's how they are.
We've created this ideal scenario for this to actually work and make a perfect line, but in the real world that will usually only happen if not more than 10% of the time, so we definitely try to stay away from these things if you want. To make money as a professional painter, this will never make you money. Is it a tool that DIYers can use and might work well? It actually must be because I get a lot of feedback that people really like them and they work well. but we didn't use them, there you have it, there are some tips and tricks to make your cuts look like a professional painter.
If you have any tips and drinks, don't forget to leave them in the comments below, Nils. and I would love to read your comments and respond to all of them and if you haven't subscribed to the Nils tab, don't forget to subscribe to this channel if you want more, choose more painting tips and tricks, come check out my channel. idaho pain on youtube I want to say a big thank you to Chris, the Idaho Painter, for showing us some tips and tricks for trimming. In fact, I watched a lot of his videos before doing my last project, which involved doing a lot of painting around the trim. and around the ceiling and I use those same tips and cutting techniques and it saved me a lot of time having to tape and mask everything like Chris mentioned.
Be sure to check out his Idaho Painter's channel to see if your painting needs anything you want. learn for your next painting project he has you covered if you want to learn about home improvement projects and DIY projects for the whole house check out my channel and be sure to subscribe and you can also visit my website at DIY milcom. Thank you so much. For watching it, give it a like if you liked this video and see you next time.
If you have any copyright issue, please Contact