TRENDING Beginner Woodworking project that SELLS - ONE BOARD BUILD (almost)
Jun 06, 2024Hey guys, welcome to Jasco Goods or back if you're crazy enough to come back for more of this abuse. God bless you. I am always searching the internet for the perfect
woodworking
project
s and what I mean by that iswoodworking
project
s that are easy tobuild
,beginner
friendly, don't require many tools, low cost and high profits, so I think I found the perfect one and Not only is it great for high profits, but it's also something I really need right now. This project is a new twist on an old concept and it's hot right now everywhere so let me show you what I'm talking about let's startbuild
ing so this is the current side table that I have now and as You can see, Also, I always have a bunch of remote controls, a book that I'm reading because you know, knowledge is power, a couple of snacks, a drink, uh, my glasses and usually my phone that's charging and , as you can see here, stands out. on the runway a bit, so today I want to build what's hot right now, this new narrow side table, so here's a couple I've seen online that I'm going to use as inspiration, but I'm going to make my own own.
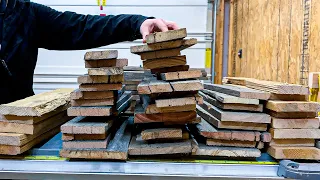
I'm not going to copy these guys, they're selling very well, but I'm going to make my own anyway and I'm going to make mine with 1 8T 2x10 and some 1x8 that I have, so the first one. The cut I make is always the Factory Edge because it is drier than my wife's meatloaf after cutting all my pieces. This is all the rest I had left of the complete 2x10, so there is the entire 2x8 cut. You have the top on the top of your table. 24 on its two sides Sid at 23 1/2 inches and then its bottom shelf will be 19 inches, so the sides of my table will be 23 1/2 inches, so when I put the top on, it will be one inch and one half of the top of my table will be 25 inches, if you want it shorter just shorten those sides to 20 inches or whatever you want, mine is based on the height of my couch so first thing I I'll do here is I'm just squaring off all my edges.

More Interesting Facts About,
trending beginner woodworking project that sells one board build almost...
Nothing says I built this in my garage at Construction Lumber more than Construction Lumber's rounded edges, so I'm cutting an E8 on each side of the four
board
s and that should leave you with a 9-inchboard
, assuming you're starting with one Approximate 9 and 1/2 inch board construction. Wood always varies a little and that's okay because you don't have to be exactly 9 inches as long as they're all the same, here's me doing what I do 90% of my building looking for my tape measure once you find your tape measure place your close to 8 inches. I don't know about your saw but my fence is the worst, it's a Ryobi saw and when are you going to lock it? in it the fence moves, it's a pain in the ass, so now you're going to cut an inch off three of your boards, all of them, but your superior appearance, even Batman couldn't take my jokes, so now your two sides and Your bottom shelf will be 8 inches wide and the top shelf will be 9 inches wide, so it will have a little bit of an overhang at the top, so now you're going to take two of those 1 inch strips that you just cut on the other one. pieces and you will put them against your fence and hold them there. your fence should still be set at 8 inches, you use to cut all your pieces down to 8 inches, now make sure you leave enough room under the clamp to slide the piece of 1x8 I mentioned earlier underneath and then place another clamp on the back again making sure you have enough room underneath to slide your 1x8 very freely and the reason we are doing this is because Actually, we are making another shelf, but this one will be the same thickness as the 1x8, but it will have a gap inside to so you can set up your similar remote controls and things like that.
Let me show it to you so you have a better idea. so the bottom is your 2x8 which is going to be your bottom shelf and the top of this is your uh 1x6 and its two sides are going to be your little built in top shelf so before I get up I'm going to fill in all the little knot holes with a little bit of CA glue and then spray it with a little activator. I'm using a brown CA glue because I know my stain is going to be brown and this will just blend well.

You don't need to use CA glue if you don't want to, you can leave it as is or you can use a wood filler, uh, whatever you want to do with yours, however you want the end result to be, if you use CA glue, don't try to fill it in. all at once, like you have a deeper hole, uh, don't try to fill it all at once, do it in layers because if you fill it all in and then spray it with the activator, it will just form a skin. and then when you go to sand it later, it's going to break that skin and then it's going to be like a blister underneath, you know, for everyone's favorite part, sanding, I have these little grippy things that you can that I put in.
On my table, my bench, and somehow it keeps it in place. You see, I bought them on Amazon. I'll leave a link in the description if you want to get them something to make the sanding process a little easier, easier and more fun. Also, when I use it, when I'm sanding soft woods, for some reason, things on my bench, I don't know if they're little specks of glue or whatever, it always scratches the other side and then I turn it over and scratch the side that just sand it to prevent that from happening. I also used my orbital sanding around the corners of my blouse because I wanted to just put a little roundness into the corners that were starting to get hot, so here's a little bit. tip for my fat mates, uh, if you want shirtless sand, you get a little sawdust in the crevices under your man boobs and stuff, and it dries up your sweat, you may look like a breaded walrus, but oh well, at least. your fat rolls will be dry so I'm using those little pads again those little grip pads and I'm using a little trimming router and I'm just rounding off the top of the top okay now I'm going to assemble everything first .
What I'm going to do is assemble this bottom or top shelf, it's going to go like this and I'm going to use the pocket holes on the bottom to screw this screw in and glue it in and then I'm going to use the pocket holes on the side to screw to the side legs, so like I said, I'm using holes for everything. I'm using holes to attach the bottom shelf to the legs and then the top shelf, which is what I'm working on now, the 1X. six with the two sides to put all that together like I just said and the reason I do it is because you are not going to see it since they will be so low that you will not be able to see anything, I mean, not even Peter Dinklage could see them , but the top I need something different to assemble the top so I bought a small tool on Amazon.
I think it was like 25 bucks, but you can get them even cheaper than that and uh. I'm going to use that to assemble the top. I'll show you when I get to it it's great. I had never used it before. It will be new to me, but it should be super simple. We'll see. When I got there, I forgot to leave the parchment paper. I usually leave a piece of parchment paper every time I glue things together. That way, you can leave your project there and then you won't have to worry about it sticking to anything.
Here's me holding the screw gun upside down, west side west coast style. I don't think I gave the dimensions, but this is the top shelf and it should also be 19 inches, so I'm using these 2x2s as spacers because I'm trying. to keep an even reveal around this thing, uh, or certain things that I do and I'm trying to keep the 2 inches or inches and a half, I should say reveal underneath as well, and then these are my two sides. I'm going to look at them and see which ones look the best, so I think they look pretty good, so I'm going to glue them together, then clamp them, then flip them over and screw them together.
Look at that focus and concentration if it was just that focus in high school I wouldn't have repeated ninth grade three times. I want the top of my shelf to sit on my top shelf at 6 inches, so I want to make a mark at 7 and 1 12 inches. I have to add an inch and a half to the thickness of the shelf, so now I'm going to fasten one by two to both sideboards and this will hold my shelf while I glue and screw it. I have a pretty big space here, hoping. I'm not hearing a creak at the moment, so now I'm just placing my table base on top of the table upside down so I can center it all and then mark it where it will go if you notice there's already a gap on one side, whoops, greasy fingers May this way, when you put the top back on, it will be very easy to find the center again without brushing everything, everything is tilted.
Can you see the top tilted, so I'm going to have to do that? Try to put a little pressure on it to get it to hold on. Take a little out of the bow. Okay, so I'm going to attach the top using 3/8 dowels. This is not the tool I was talking about, but I have it. this from I think I got it from Amazon, if I did I'll link to it in the description. This is pretty easy for marking pegs, you put it in there and it helps you drill in the center and then you put it in. on another piece to help you drill in the center, but since I'm making a top, this is of no use to me, because the top is just flat, there's nowhere to reference to get a center point, so This really doesn't help you at all.
No, you don't necessarily need this, but this other tool that I have, um, if you can call it a tool, I guess it's a tool because it helps you do something that I can't do with this on a top. without even having to worry about getting it Downtown, but if you have another alternative to getting it Downtown, I have a ton of these. I think they come in a pack of two. Someone got it. I think my wife bought it for me for Christmas. You can also use this to mark a center line. You just put it there and it marks a center line for you.
What I use the most is it has a magnet and I stick it to any metal utility in my garage and it holds my pencils wherever I need a pencil I just have this glued on so you can always use something like this to help you make a center hole and then you can use something like this this is a drilling block there is one made by Craig it may be better it more or less helps you get a straight hole you can put it over the top of the hole it has little slots to help you get it into the center and you can put this over the top of the hole and then you can drill.
You're completely focused, let me drill some holes in this. I'm so excited to drill a hole that I forgot to put a stop collar on it. I drilled like a 6 inch hole for some reason. Here I am realizing what I did and staring at it for 10 minutes contemplating burning myself. and I'm just going to color in my Spider-Man coloring book while watching cartoons and drinking chocolate milk, so I made my own custom Dow and then fluted it myself with these pliers. I learned this from Stumpy Nubs he has a video about it's on his channel now I'm going to finish drilling my holes and show you what I have so this is the new tool I have it's this package here and it has these things that you put at the top of your peg. to transfer the holes over these was less than $5 so I think I got a two pack, maybe the two pack was more than five so you just put them in your hole.
I got a two pack so I only came with four so I'm going to have to transfer over the four that I put the Dows on and then transfer over the last one so before I marked the lines of where my top will go and now I just have to match those lines up and then give it a little tap, the tips are a little bit sharp so it's not easy to slide around here so you have to pick it up and move it. I was a little worried about accidentally pushing it down and leaving impressions on it. different points, well, here we go.
I have the top, now it's time to transfer the markings. Look at the marks I left, so I'm using this 1 at a time to attach my stop collar because the pegs are an inch and a half each, so half that. that's 3/4 inch and it's the same thickness as this material, so now I'm going to vacuum all the holes, do a little dry fit test and see how it turned out, hopefully, all the holes. I lined up and didn't waste $24. Damn, a hand or a leg of ham is fine, so that part worked out great. Now all I have to do is put the dowels back into the holes that are already drilled and then put in the center marking pins.
Take out the holes that weren't drilled and then drill the last few holes and there shouldn't be any problems, they should all line up so now I just have to do one more dry fit before gluing it in, uh-oh, something's not right. fits well, let's try this again, fingers crossed I'm about to burn it out and start watching cartoons. I'm about to burn it. I think what it might be is the custom pin I made. I didn't taper the top. So let me scrape it into the concrete andsharpen it a little bit and see if that helps believe it or not that simple thing was here's the ham trick okay so it's time to glue the top on uh if you see any way I can I've done this differently or any of the projects that I do, uh, I'm here to learn like everyone else, if you see something that I've done wrong, you know, leave it in the comments, uh, I'm happy.
I like it I said I'm glad to know that's what I'm here for I'm not an expert I'm not a professional My goal is to build a community of carpenters that is here to share ideas I just wanted to show you when you build things with cheap construction materials, you see that Gap and you don't you use expensive equipment like planers and things like that, it can be done. I mean, look, here's a side table, it's probably better than anything you can get at Ikea or Walmart. or any other place where people get furniture will probably last longer than that, but it's not going to be perfect.
You'll have things like this because my CED board is just a soft construction wood. If you're going to practice with this, just hope it doesn't come off. perfect you're going to have gaps you're going to have problems but you're going to have fun you're going to learn how to use your tools you're going to learn how to deal with these problems and that's it The point of this woodworking so let's start building okay so I'm dying this with my favorite color, provincial. I don't know if I'm saying that right. Could someone tell me if I'm not in the provincial comments as who named? something of that color anyway uh, it's a dye.
I bought it at Home Depot. I like this stain in Pine because it applies really well. I don't need to use conditioner, it doesn't stain, it's a little thick so you have to do it. keep putting it in, you have to keep dipping it into the can, but other than that it works great on Pine. If anyone has other suggestions for colors or stains that you like and that work well on Pine, please leave them in the comments. Try something new and then for my clear coat I'm using a matte finish nude polyurethane. I like this one too and as usual I do a minimum of two or three coats.
I think the can recommends three, but you have to do at least two because the first layer is going to make it rough because it raises the grain of the wood, then you sand it and the second layer is smooth. The third layer is really just for protection, extra protection and then also with pieces this size I like to do them on a furniture dolly. because I can easily turn them and then you can notice my arm in the reflection, you can move it and look at the reflection to see if you've missed any spots, it works great for clear coatings and stains, in fact I just did it.
I don't do it for the stain and then I like to use a foam brush as well while I'm clear coating because look how it doesn't wrap around the edges, you can use this and slide a brush down the corner, the bristles will go around the stain. edge and they will ruin the top, I would have ruined that top, I already did that, so foam brush and now for the big reveal, what do you think? I think it turned out great. I love it, uh, I don't have it. That big table next to me I already have a little shelf down there to put all my things.
I think it makes the room look sophisticated. I think it looks good. I think it looks very elegant, but enough about me. Let me know what you guys say. think let me know in the comments
If you have any copyright issue, please Contact