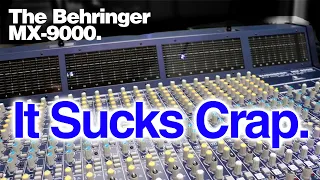
The Console That Changed Mixing Forever
Mar 20, 2024Thanks after solid-state logic introduced the D-series
console
in 1979, music would never be the same. In this video we head to Echo Town studios in Dorset with SSL expert Karen for a hands-on demonstration of the revolutionary automation technology that took the 1980s by storm my name is Karen Down I worked on my first SSLconsole
when I was 18 years old and I worked for Solid State Logic for 25 years in the service department and was able to travel the world teaching people how to use these consoles. and also in later years how to fix them the SSL 4000e series console was launched in 1979 and this is the console that evolved and dominated the music industry for the next two decades.
This was the console that integrated a computer into an online console and today uses In this 6000e series console we are going to look at Total Recall automation and the physical computer itself on the SSL computer that we have with us today, we have the disk of the program that has the program data written in 16-bit assembler and we have a real disk on which we are going to have our titles, our total, our mixes, our track list, song lists, etc., a floppy disk weighs 1, 44 megabytes, the program around which SSL was built weighed 256 kilobytes. The genius of the SL4000 system was the fact that it integrated tape machine consoles and external equipment that were disparate pieces of equipment that the engineer had to use separately.

More Interesting Facts About,
the console that changed mixing forever...
The 4000 series console added EQ Dynamics auxiliaries to the channels and solves the problem of controlling the machine. He was able to control the transportation of a tape machine. From the console you could follow the arm stroke to record and you also had the bus tape change available, right, Chris? We have a 24 track tape that I would like you to put on this foreign tape machine, stick your finger in there to pick it up and then just pull it, I think if you just push it in, put your finger in there and then move it a little bit, here we go, so it becomes a little bit more, here we go, now press stop, here we go, press rewind, click on these, yeah, click on these. down and rewind, so today we're going to work with 32 channels of automation which is very different from the tracks you have today, for example in Pro Tools you can have 192 channels in a Pro Tool session and you can automate all of them. those channels, if you want this console to have vcas, now a VCA is a control device that will help the computer remember what the position data is, all it has to do is play that information, it will basically disconnect from the dimmer. lower the faders and continue playing your mix.

The only time the dimmers will reconnect is when you return them to the right position and move the dimmer. For those of you who are used to Pro Tools, you will recognize some of the automation modes that Today I'm going to go through the correct mode, the reading mode, for example, but you will see that the SSL automation system is quite powerful and does a lot more than you'd think a system designed in 1979 would do. SSL didn't invent it. automation systems there were already automation systems in use and one of them was the Allison automation system and that involved recording the data on one track of the multitrack tape and then bouncing that track with updates to another track, so we normally use tracks 1 and 24 and while playing on one of those tracks we would be recording updates on another track, some pretty scary data entry into the console is done via this command line keyboard and this became muscle memory for a generation of engineers.

We have the command line interface. here and the QWERTY keyboard right here before we start looking at the automation, we'll look at some aspects of SSL computer maintenance, so to start our session we'll type the word start and we'll start the computer and here it loads once. is loaded, it has given us a nice login message, if you really wanted to change that message, you would type the word sign space and then the message that you want the SSL computer to give you. The next thing we see is a page called tag. page, you can see we've filled it out a little bit and if you wanted to just add me on there, you would type in like support space and my name, the next thing we would have to do is figure out where our song starts is, we would be playing our tape and when we get to the beginning of the song, we'll stop and press the name, the title and the name of our song, we'll just call it song and there we have a list of songs that we have stored on this three and a half inch floppy disk we can see that the song starts with a dot timecode reference seven minutes 39 seconds we have a track list here we're going to put the track list information into the computer We're going to use the name command again and press the word track again.
This is a job for the assistant engineer and he would sit there and slowly, very slowly, one key at a time would appear on the tracks, the next one is the snare and the next one here. Once I had finished doing that, we would press finish and this would save it to the floppy disk, we would rewind a little bit to the beginning of Our song at this point and we would need to start a cue list that this is going to do. be Verse Chorus, etc., etc. and we start using our name command again, name Q, we'll go first and there we have it, we continue playing and then eventually we would be name Q, chorus one and we could see ourselves grow up the cue list.
This way, if we wanted to locate anywhere, we could say go to Q V one and we would be locating the tape machine back to q1. We also have the ability to toggle between signs and tape machines in place and stopped, perfect. The next thing we are going to do is What we need to do is create some Total Recall configurations. This is an image of all the controls on the channels and faded positions taken and stored on the three and a half inch floppy disk. We do it by pressing the name of the setup command and giving it. a name, okay, you press run and it takes a little while before it stores the settings, it asks us to press the separate buttons which we will talk about later, these are on the faders so you know and we press run to finish the saving our Total Recall settings let's say we needed to recall that setting what we would have to do, let's say set up playback since we are on K1 that's all we had to do but if we didn't have it we would type K1 once we press execute The Total Recall screen will appear on our computer monitor.
Using automatic scanning allows us to make the computer take responsibility for scanning desktops for errors. We will be adjusting each channel and then as soon as we have adjusted the last control we would jump to the next position on the desktop where there is an error and we would move across the desktop until we have made all 32 channels of Corrections. If we look at the screen we can now see a pictorial representation of Channel 24. I will be able to adjust the controls to match what is on the screen. We can see if I just work on the signs.
You can see me adjusting the controls until the indicator goes off and you can see that this is a very long process. Anything with a rectangle next to it means it's in the on or off position, so you just need to snap them together. We can see here that the cut button cut, so we'll undo it and move the fader to match the position there. if auto scan was running this would now jump to the next channel, that's it and you can imagine on a 96 channel console how long it took. Now let's look at the SSL automation, we're parked right at the beginning of our song. so we are going to type the words setup mix enter we are in a new mix the faders have been
changed
to Absolute this is the correct mode for all Pro Tools users we have a mix in the console and when we press Play we are I will be writing data and it will be faders and mute data press run to start following the instructions on the screen and there we go you can see the fader levels settings on the screen and when you cut you can see that. we lose the level we look at the screen we can see that we are running a mix and that we have time code playing we are going to make this a fairly short mix so we are going to save the mix When we press finish it asks us if we want to name the mix, it is not necessary, we'll just give it a number, we press enter again and we can see we're on mix number one, it lasts about 30 seconds, then we go to mix and there's the sound we haven't heard for a long time once the tape machine is parked , it will tell us that mix number one is now being updated, the tables have been put into trim mode, which is read by those Pro Tools users and we can use the Theta state. in the center of the console to switch between absolute play and trim or write and read repeat if we're only going to work on one fader, for example fader 20.I can change it to absolute in this position we're in. It is called
mixing
head. I'll touch on that as we go through this little tutorial, we hit run to start the tape and start writing data. You can see that my other faders are playing and the cut should happen soon. It's as easy as that, if I find that I want to remove this fader from rice, I just press the fader status button, so let's update mix one, we're parked at the beginning of the mix and we want to use the absolute command. we type you or number one to select it now we know that we are going to update absolutely or we are going to place the faders right when we press the fader status button, we press run and when we press the fader status buttons we are releasing those channels are written each other once we're done, we'll press the fader status button and we'll play them back and you can see what I'm doing reflected on the screen.It's as easy as that, you'll just rewind playback again, choose a refresh mode. end to save the mix and continue, so let's look at something the faders will do in the right mode, we're just going to rewind a little bit, press play. You will notice that we are in mixed review, now let's stop at the right stop. and we're stopped at 7 18. I'm going to rewind a little bit, we're going to press play and at 7 18 we're going to go from replay to the right like we did there and then we were ready to drop. on the right, we just press the photo status button, it's as easy as that, there's a lot more to the SSL automation system, so we'll see that I'm just going to save my mix, press run to name it. and then press go to mix to return to the beginning of the mix.
Thanks, we're going to start updating our mix, so we're going to hit run and now we're going to hit option number three for auto acquisition, basically. I'm going to stand on the right. I'm going to move the fader and now I want to go back to the playback that matches the underlying automation data. To do this I press the dimmer status button with the auto takeover selected, the light will flash in the direction. I need to go green up, red down and as soon as I cross the point where the data matches, I'll read again. Now I can save my mix again and go back to the beginning of the mix.
The automation system is not alone. the automation modes that you see at the beginning of the mix there is also a settings page that you can enter to make the modes work in a certain way, we enter by pressing configure we want to see more yes, we press and we can see that we can see the information of the session or we can see the mix information here, so press the mix button and here we can configure whether we want the five automation modes to appear as standard without us having to select them and We can see other modes that we may want to modify, like this that I'll use the arrow keys to make changes, for example, insert mix, yeah, okay, and again, do we want to see more?
No, no, so we're ready to go back. To mix, going to mix takes us back to the beginning of the mix. There are a couple of modes to refresh Cuts or mute. These are just playback cuts, which basically leaves the faders at all and the cuts playing the data. This was useful when I sometimes had to put three or four different instrumental parts on a track, so one of the first things you do in Numix is mute the different sections of the instrument that are playing, then you would put the desktop in cuts of reproduction, only you would have spread the entire desktop on the desktop. your instruments sound when they should, the cuts appear when they should and then if they were a little off, you can use option number two of revised cuts to fix those problems.
The next one we will see is immediate collection. number five, we can pressthe number five or I to turn it on and what this will do in a VCA system is allow us to move the dimmer a very small amount to put it in the next mode that we will look at. preview we can activate it by pressing the number four or the letter P and we are going to get an absolute preview, this allows us to rehearse any moves before committing to them, so we may have some underlying mixed data that we are not sure if we can write something better so we press run to continue we are in preview and to put the fader in preview we press the fader status button a flashing light appears and we can stop Theta remains in preview we are rewinding we press play and once again we are previewing the level, once we like it, we can rewind, put it to the right and actually write it, once we're happy with that, we can use auto acquisition, turn on number three, press the status button on the dimmer and it will flash in the direction we need. to move the fader to get to the underlying mixed data Through the threshold we exit from the right we press end to save our mix we are rewinding to the beginning of the mix once we get there we are going to look at the trim allows us to increase or decrease the levels written to the underlying mix data, we don't need to activate any options, we will instantly be in trim the moment we place the fader in the right position, run to continue the header fader status button, we place in trim and I Now I am setting this attenuator to about 10 DB.
If I want to go back to the reference mix again, we activate the option. three press the fader status button and use the automatic tap again, this time moving the fader down until we cross the reference mix position threshold, we exit right, we read again, stop there for a moment, rewind now, I'm going to switch us to absolute for our next update go into absolute write some data rewind I quite liked where the level of that fader was when I got to the final position I would like that the level of, say, that guitar would be written from the point where I press a certain button so I ended up with that fader at all at around -5.
I was happy with it, very coiled and now I want it to take that level from the beginning of the chorus, for example, I'm going to press play. The chorus is going up and I'm going to press join, which will instantly put the fader into absolute writing at the level we were at when we rewind. The next mode we're going to look at is review, we're going to look at that mode using trim, so we're going to remove the absolute update, we're going to press play and we're going to put the fader into trim by removing the fader, finding a position where we want to trim the instrument a little bit down, okay, now we rewind to the beginning of the chorus, if we press join, we will go down to the right with any level difference in the fader reference and the fader itself will be heard.
If we press review, we will enter to write that matches the underlying mixed data. I'm going to hit review this time so it's even. although the fader is in a different position than it was when I rewound, it will fall to the right matching the underlying mixed data. Then I can crop up, turn on auto acquisition, press right and two lights will flash, by the way, I'm talking about the crop. The button is in the wrong place and we move the fader down, cross the reference mix threshold and exit the right stop end to save the mix we were talking about earlier about working on the trim, you go back into the trim and you just say we move the faders up.
We turn on trim, stop, rewind, we can't trim a trim, what we can do is choose, when we press the fader status buttons again, whether we will fall into the correct position that matches the underlying mixed data, i.e. the data mixed data we just wrote or we can go back to the mixed data saved on the hard drive, so that's a choice you have to make and it's the option to insert or disable
mixing
in the mix settings menu that we saw earlier. We've been mixing in a very uh, linear way, this computer is able to edit the mixes offline.You can actually have two mixes and mix mix A into mix B. If you had a chorus in mix A that you wanted to put into mix B, it's just a matter of putting it in. correct commands with the correct timecode values and you will instantly have created a new mix offline, a little more technical to do it nowadays but we had the functionality in 4K, we also have the ability to trim mixes offline again in the command line and we could trim the mix by 5 DB for example without running the tape, another cool feature was the VCA trim pot on the console, this actually
changed
the console headroom and any channel selected as Independent would not would be affected by clipping, but anything grouped together would. group 0 to 8 would change its level by the amount of clipping.Next we will look at soft grouping. This is where we can group any type of switches. I am typing a command on the keyboard preset and on the computer. He tells me when I make a mistake that was the name I put as the assistant in the session and sometimes he can use the engineer's name but he tells me that he doesn't understand what I just put in and what he should have done. What was done was just type the word preset and here we can see the different types of soft groups that we can have, the slave fader and the cut only fader appear, we just cut, we will stay with the slave fader and cut, so I group the button red master and the slave, then we have our first software group, I can go out of there and then with just one press of a cut button, I group two cuts and if we have VCA to meters on, I can see that I'm moving tracks 19, 20 and 21 controlling that level. that's all for now, if you like what you saw make sure to like, share, subscribe and click the bell icon so you know we upload new content to our YouTube, also find us on Twitter, Instagram and Facebook, thanks for watching.
If you have any copyright issue, please Contact