Photography Masterclass - 10 More Things You Didn’t Know Were In Photoshop
Mar 31, 2024so just quickly check a quick way to match a font, so if I click OK now, those other backgrounds are still loaded and they still have all those other ones. options now I would start, I would start the adjustment process to at least expand it a little bit so it looks closer if I was really trying to match that and thin it out, but anyway, the matching font is number three, number four, come on . Look here, my pictures are no longer in order, let's go to We did that one, not that one, yet, not that one, yet, this one, okay, let's zoom out or zoom in, and if I zoom in on your eyes, we can see this image.

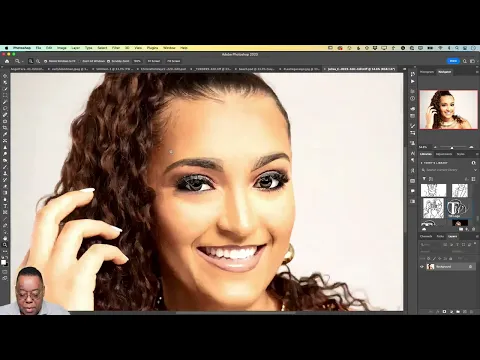
It's pretty sharp, It's a good job on my part capturing a nice, sharp image in Focus, but just because an image is sharp in Focus doesn't mean it's as sharp as you want it to be in certain areas like me. I'm a fan. of portraits with really sharp eyes and sharp jewels and sharp accents that make the image pop even
more
now looking at this image at first glance it looks great it looks so sharp and focused and everything is great but one of my favorite tools which has been in Photoshop pretty much since day one, definitely in the early years, but in the early years it was horrible to use because the algorithm and the technology behind the tool would destroy your image and that tool is the sharpening tool, so I got it.
More Interesting Facts About,
photography masterclass 10 more things you didn t know were in photoshop...
I pulled out here in my tools panel, but your sharpening tool will be under the blur tool, blur and I think, um, sponge, I don't remember, no, there's like three, two or three tools together. I separated mine a long time ago, but just go to your focus tool, which is like I said, it's under your blur tool and you'll notice in the top options there's a checkbox that's checked by default and it's a beautiful checkbox that you want to keep checked is called protect. detail because without protecting the details is the way it used to work in the 90s and early 2000s, it was horrible so first I'll show you how bad it was and then I'll show you why we hate using If you like it, you could get away with yours with a single pass and that's it, if you went further this is what would happen and I'm exaggerating it but this is why we hate that tool because it would literally start destroying your image after the second or third pass like this which was one of those tools that you use sparingly, you use sparingly on a duplicate layer, you turn down the opaque like you just don't use it too much or you would get this, it would just be completely ruined. your image so I'm going to go ahead and revert the image back to the way it was there we go and now we're going to go ahead and turn on the project details like I said you never have to worry about turning it off I can't even imagine a reason why which you would want to turn it off unless you're trying to destroy an image for a special effect, that's the only reason I can think of to turn it off, but it's on by default, never touch it, just leave it on and then you can get
more
than one pass.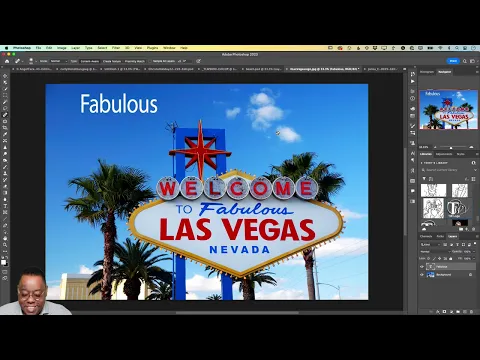
Now I'm going to do two, maybe three passes, so one, two, that's it, like I would do it. I could do three, but that's too much, so I go. to undo the last one, so two passes and actually, let me do it, let me do it back and forth like a stroke, once, twice, okay, now it looks like it's sharper. I can already see it and then when you undo it, your image is almost blurry. Compared to the amount of sharpening that you just added, sharpening is a key thing that we do in photos that makes them stand out, makes them stand out, especially if you're going to print them because when you print an image you lose some of that sharpness right in the moment. the printing process, so you may even over sharpen a little or use output sharpening when you go to print because of what will be lost in the printing process.
So when do I use this tool every time I'm retouching a portrait? I'll do the eyes, so two passes on the eyes. Maybe do the teeth, just sharpen them a little more if the person is wearing any jewelry, bracelets, necklaces, earrings. I'll sharpen the ones I like because, you see, I'm doing it. multiple passes here and it's not destroying it and again all of that is just going to make it look better now let's show you a before and after come on let's reverse this one more time that's the hole before let's duplicate the layer there we go and then we'll do everything I just did a couple of times in the eye a couple of times in the eye there I see an earring hanging over there and I would zoom in to make my brush smaller and do a better job.
I'm just doing it quick to get through this right now, let's see, come down here, get all this nice and crisp and again, I'm spending more time on this because I like it, it doesn't make it worse, it makes it better, so
things
like jewelry. I can really do a lot with Ok, so now I have the before and after layer, so if we zoom in and do before, that was before, that's after, look at the difference, so that sharpening tool is golden, look, I see what I did. there we go anyway um just that and if we go up and look at the person he might have been able to get away with one pass but two passesdidn
't makethings
worse so uh and then if we go to the arete I think I only did it once or twice oh yeah , look at the difference there now again.I went off the line to get some of the background so you could get closer and do a better job, but you can even see what it did to the earring right there, so it's being sharpened with a brush, which is cool because you can choose what areas you want to sharpen, all right, the next one um and that was number four, number five, I need that guy, this guy, okay, number five, let's do um. we're going to do a technique that's been in Photoshop probably as long as a sharpening tool, it's been there forever, but a lot of people use it once they try it, they don't like it, it's inflexible, it's old and then you think : because I would do?
Has anyone ever used this and it's again because you don't
know
the workarounds we're being so old so it's a filter so first of all we're going to create a new layer and I'm going to fill that new layer with black so I just press the letter black. Now the reason we do this, the reason we create a new layer is number one, it will give you the flexibility to move around the effect that I'm about to show you number two, go black and set the blending mode. it means you can put it anywhere else, dude, funny, Reverb could call him Fabio and that'll see me do something in a few minutes, but that's the exact name I came with.Anyway, anyway, black is going to let me do this filter because you have to do it. This particular filter can't be done on an empty layer, there has to be some pixels there and once you see me, do what I'm going to do. what to do in black you will see why I chose black okay so the filter menu has been there forever the lens flare filter now when I open this filter only the UI will show you how old it is because it is back in the days when filters
didn
't preview on the canvas like we didn't see the lens flare on the canvas, we see it in this little window that you can't make bigger, you can't, you can't make the window size , anyone can I don't do anything with it, that's how filters used to be, now the newer and more modern filters are previewed right on the canvas or have a big giant filter window or workspace to work and make all of its options, so this is kind of what I would call a legacy Photoshop filter that could probably use some updates, but the Photoshop team of course prioritizes what people use and apparently not enough people are using a lens flare filter to give it some love, but I don'tknow
, maybe let's get started. a request anyway, first and foremost, you have four different types of lenses, from 50 to 300 millimeters, Zoom, 30 millimeters, Prime, 35 millimeters, Prime, 105 millimeters, Prime, oh I like 105. and the film Prime, um, and once you pick one, you can move it over and over again.You're not seeing this in the image, you're not seeing it on the canvas, so you have to imagine what it's going to look like from this window. You can also increase the brightness to turn it into a solar flare or just an um. a lens flare you can turn it all the way down so I'm going to fix it around 70 something there we go and then once I click clut I click OK that's going to put the lens flare on my black layer um and that's all. You lost all the ability to go back in and move it, you lost everything, it's like it was permanently added to that layer.
However, because I put it on layer number one, I can move layer and number two, I want to see this lens flare. my subject so by putting this lens flare on a black layer all I have to do is change the blend mode to screen and that will remove the black and leave me with the lens flare now oh I couldn't see its hair so now I don't know that the lens flare is not in the right place well I'm just going to switch to the move tool and move it because it's on its own layer you can place it wherever you want you can do whatever you want with she.
Scale it down, scale it up, and place it exactly where you need it to be to get the effect you want to get, especially if you're taking outdoor portraits and want to add a cool special effect. with that lens flare, go to town because if you add it to the image now let me show you the difference, let's turn off the right one and go to the bottom, let's say you would have applied the lens flare well to the image. number one because you're on the image layer when you go to lens flare render lens flare you're going to be able to see it in the image so cool you're going to be able to see it you can see where you're putting it you can see what it's going to look like okay that's it It's great, you can see if you need it to be brighter and maybe do this first, just so you can lower the settings, so for example, I said I like the 105 millimeter Prime. but maybe it's not that bright, but once you click ok that's it, you can't move it anymore because you put it on the actual layer, even if you duplicated the layer, you still can't move it anymore because it's like back In the old days of classic Photoshop, you applied those pixels permanently, so that's it.
Is there. I can't do anything with him. I could just hopefully undo it or if I did it as a smart object. I can, you know, turn it off, but I can. Let's not go back and reset it, so we created that separate layer so you can control it after the fact, okay, so let's undo that, turn this one back on and again this one on the wrong layer, this one can be moved. around because it's on its own layer, okay, so lens flare is one of those, especially if you're new to Photoshop, it's probably one of those things that you haven't seen yet and haven't been able to get right.
Next, let's go ahead and Yes, 40 years of Adobe, let's go up and this is number one, two, three, four, five, six, six, number six on my list, it's searched a lot, especially with Photoshop that has hundreds of options, maybe thousands of buttons, presets and sliders. and the things you can adjust is like one of the most well-known deep tools that we make, it has so many different layers and abilities, silver and so on, so maybe you know it well. Terry mentioned this thing called a sharpening tool, I don't know where. I don't see it in my tools panel, but I know it's there because he said it's there.
You might hear about something in Photoshop and just not know where it is, and instead of searching for a tutorial on Google or going to Google, Photoshop has its own kind of built-in search technology, so if you go to the magnifying glass on the top right corner whenever you forget where something is or maybe even you didn't forget it you just never knew how to use it nine times out of ten search will help you get to what you want so if I type uh let's skip the walkthrough if I type sharpen there it is, so the moment I type sharpen I see all the different technologies and techniques of sharpening, but I want to get to sharpen tool, it will take you to the tool, it will highlight it, it will select it for you, it will find it and it will do what necessary to take you to that tool, so remember that when in doubt, don't do it. you like searches, write it built into Photoshop, so if I was looking for lens flare, I get a tutorial on how to use lens flare.
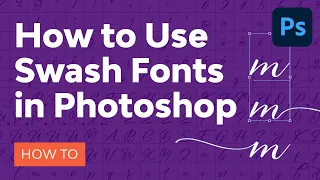
I understand that lens flare tells me where it is, pointing it in blue at the top of the screen shows me where it would be and then other variations of lens blur appear and so on because I didn't finish writing lens flare and if I add a Lens flare will give me a step-by-step tutorial, so it won't actually give me a step-by-step tutorial.step or give me a quick action, so I did it the right way. He made it as a smart filter. He did the right thing. thing and then I can go ahead and turn it off and again it walks me through the whole process, so a lot of times when you do a search it will just tell you what you're looking for and it will do it. for you, in this case, he just did it for me, he'll give you a tutorial on how to do it, so search is like one of your best friends inside of Photoshop, so don't forget, let's get into it next. and let's talk about the next one, which is another one of my favorites, the glyph panel, okay, let's close this one and, yeah, we'll leave it on for now, okay, one of my favorite features to talk about and I've talked about this many times before.
Let's go ahead and write an imaginary name for the original model. This is a file photo. I don't know this guy's name, but Reverb Mike and I agree that his name is probably Fabio. Okay, let's move on and uh. expand on that and it's okay depending on the source, so these are several source specific sources. I'm going to go to the source that I know has the most options for what I'm going to show you there, let's go abroad, okay. and it's the um this particular font is bickham ScriptPro is an Adobe font, so you can access it.
Bickham Script Pro is one of those fonts and there are other fonts that have what I'm going to show you that are called glyphs, but it's the font that I found a while ago. which has more glyphs than any other font I've seen. What is a glyph? When someone chooses bickham Script Pro and types Fabio, it will look identical to what I just did. Change the size, change the color whatever, but that's what it will look like by default, but usually if it's an open type font, like all Adobe fonts are now, and depending on who created the font, because different people design different fonts, they have the option to put as many glyphs as they want, up to thousands of glyphs now, what does that mean if I open the glyphs panel there it is and I'll make sure to activate a function in the glyphs panel called alternative Force alternatives for the selection because if you just do all font it will show you the full font, it's not very useful for what we're about to do, but if you toggle the selection, what it will do is every time you select a letter, so let's say that I select the letter o, then it will appear.
To me, all the O's in that font is like playing the game Jeopardy or whatever that shows you all the letters of a particular phrase that is hidden, so this one has, I don't know, 15 20 Or different, just the lower case, oh, so this is what I mean by some fonts will only have one or some might have two or three, in this case Bikram Script Pro has a dozen. I'm counted, but at least a dozen, so if I choose this one, that's the O I get. So especially if you're trying to design your look, your logo, your um, your special text for your client and you don't want anyone else to have that exact same look, glyphs are your friends because now, even if they wrote Fabio exactly the same font, unless they knew about glyphs, they'll never get it to look like that because they'll be like where does that F come from when I write the capital F.
I don't understand that, so for example, let's say I enter the letter b and these are all different B's, so I can choose a different B like that, so the glyphs are just amazing, I can't get enough of these because, especially when there's a font that has a ton of them, it makes designing with typography a lot more fun because you can create something that's totally unique and then what the person would get if you don't have the exact same font now if I can make it work here , let's say I selected a letter i, it depends, mine isn't working right now, but Photoshop has had the Glimpse panel for a while, but it also has an option that when you highlight a letter and get it, you pull it down, not up down, but you hover over the bottom. of that selection usually appears with the sliders to the side and it doesn't work for me right now.
I don't know if it removed that feature, but that feature was also useful because it allows you to do it quickly without having to do it. to open the glyph panel to get it right um you're welcome uh Fiona and yeah Robert it's great it's one of my favorite hidden weapons for design because when you're trying to stand out you want to stand out you don't. I don't want to have something that everyone else created with, oh, they just match the font, oh, he's using, it turns into Script Pro, but mine looks different, guaranteed, okay, so that's it, it just takes advantage of glyphs, and again, all fonts can have glyphs. but not everyone may have them because it depends on who designed the font, so you don't automatically get a dozen O's, or you know, depending on the font, each font will be different, most fonts you're lucky if you get them . three four or five points, you're lucky because and with some fonts you won't have any alternative, you'll just have the letters that are there, but become Script Pro is the one I like to demo with because it has more rights.
Next, um, this one's fun too, let's hide Fabio's text for a second and we can actually leave it on because we're going to go to a different document, let's go to this one, okay, let's zoom in on this one now. What did I do here? All I did was create a new document with no background and put my logo on it. I now have my logo in a Creative Cloud library, so I can always drag it onto an image if I need to, for example. if we go back to Fabio and I want to put my logo there, I can just drag it from my Creative Cloud library, there it is, I can scale it, I can drop it in the corner, I can lower the opacity and, like that, and have like you know, kind of a brand of water if I need it however one of the quickest ways to get your logo onto an image is to create a brush from your logo so what I did was there are some restrictions so I think it's 200 per 200. or 250 by 250, so let's say 200 by 200 would be safe, but I think it's 250.
Make an empty document 250 by 250 pixels, put your logo without a background because you don't want the background to be part of the brush, so transparent background, then next or transparent layer, next we'll go up to the edit menu and we'll go down to Define Brush Preset, you don't have to select the logo, you have to do anything. it just has to be on the layer on its own so next up you're welcome is that cami Cami Marshall I'm glad you're enjoying the tips. So divine pressure defined brush preset will open a window where you can name your brush so I'm going to name this TW logo and you'll notice what it does like it's the logo and I guess 250 will work because it's 249 so The logos almost touch the edge, they are defining a brush that matches the look. of my logo, so when I click OK, there it is, it defined it and it took me to it, so now if I came back to this, I turn off this layer and create a new layer because we would always want the ability to move this and I do my ALT control and I get bigger.
I can make my breasts bigger. I can make them smaller. The animation won't be in the shape of the brush, but it will be there and then if I change. my colors and then click there is my logo. I can click on my logo all day long because it's on its own layer, so I can always turn that layer off. I can always undo undo undo undo and um if I ever need to scale it from it's on its own layer, just uh command shift T PC Ctrl shift T and scale it down and just use anything basically can become a brush, so why not turn your logo into a brush and that way you can just click on where is Adobe Muse, unfortunately was Adobe Muse? discontinued I don't know like eight nine ten years ago, so it's time to move on.
I had to move on. I'm a fan of Adobe Muse, but everything worked out fine. The next step is to turn your logo into a brush, so that's fun. what to do and of course you didn't lose all your other brushes but your brush won't look like a brush in the brushes panel your logo won't look like it does in the brushes panel so it's important to name it because if you like it if I just looked at this brush I would never know that that's my logo because take and maybe if I look closely I can see the left edge there but take your logo and paint with it so that's why you would do it you never know , so name it, it's important because otherwise you'll never know which is which and then of course you can go back to your previous soft brush, whatever you were using before.
Well, next, let's go to um or something like that. let's get in there, come on, um, okay, let's move on to the next one, okay, this is a little wild, let's go to a different photo, I want to go to this one, okay, zoom out, okay, there's Krista, a model. I work frequently um and Krista, I want to apply a look now converting to black and white is certainly not new and I don't know a dozen or two dozen methods for doing it, like everyone has their own trick for making a black and white. to make it look a certain way, I personally like the black and white presets in Camera Raw and Lightroom.
Those are my favorite ways to do black and white because I like all the options and I can see them right then and there, but if you want to create that unique black and white look or just a different tone in your photo that you won't see everywhere , then you will love this. The first is the first. Photoshop introduced a couple versions back, a lot of gradients like just tons and tons of very beautifully designed gradients, so if you needed gradients before and you were stuck trying to make your own presets or making your own or you were buying presets or something like that, remember you now have more gradient presets than you'll ever need, so thanks to the Photoshop team for giving us all these beautiful presets when they made this, although they removed a set of photo gradient presets like they don't anymore were there, they were not on the list.
Most people never knew they were there to begin with, that's probably why they were removed, so to get them back the first thing you're going to do is open up the gradients panel and you're going to go to the menu and it's going to go down to Gradients. inherited, so they didn't take them out of the program, but they just took them out of the Main View, but as soon as you choose Inherited Gradients from this menu what that will do is put them back at the bottom, there we go to the bottom of this panel and here are the inherited gradients and in that list of inherited gradients is this photo category, Tony, who knew it was there?
So what is
photography
? toning, getting it right, is a set of gradients designed for photographers and when you want to use it, you just go to your adjustment layers and choose the gradient map that I'm looking for, so go create your adjustment layers. a new gradient map that will create a probably horrible looking gradient on your image; however, in that gradient map popup you can go to all the different gradients that are here, including Who Legacy Tony photographic, and now you can have some beautiful photos just by choosing the different tone, for example, which is black and white , but it will never be the black and white that you would get by converting it to black and white because it is first toned with a gradient, so it will only give you that.Look at that professional look you see and you wonder how they made it look like that and it's because they are using a method similar to this, okay wow you have to have detective talent to find all these gems. I know that's the case and I could probably do another 10 and another 10 because there are so many little things in Photoshop that are buried that you might never come across, maybe you stumbled upon it and wouldn't necessarily know how to use it or what it is. Because since it's not obvious, so these photographic gradients, I expect to see a lot more beautiful black and whites now because you have a different way of toning them than just a conversion to black and white, okay, that was the number. nine number ten and we're right on time here um number ten and let's put this away okay number 10 is uh I need my Blue Angels picture let's go here there let's get away okay this is this is a classic um it's one of my favorite kind, like little ones hidden things about Photoshop, Photoshop has had content-aware padding for a while and then, I can't remember if I think before or after, I can't remember what the first content-aware padding was or the finished content. scaling I don't remember which one came first, I think it was Phil, but content-aware scaling, like content-aware padding, looks at the pixels in the image and tries to scale them without showing that they were scaled, in other words without destroying the image. image.
However, the problem with scaling an image is that you usually end up stretching everything, so let's say I want to take my photo of the Blue Angel. I want to spread it on a banner like my YouTube channel or Facebook banner or just a banner like the one I need, so I need something wide. Couldgo in and change the canvas size, so let's do that. First of all, let's do that and then go to the canvas size. The image canvas size right now is 6,000 pixels and 6,048 pixels wide, let's make it 10,000 pixels wide. Okay, and I'm going to tell him.
Okay, we'll throw the image to the left. Okay, great, now we have this 10,000 pixel wide image canvas, but we need our image to go through it. Now the problem is. It's if you freely transform it and scale it to fit, that's great, but then you're going to cut off part of the image. We've been there, we've all been there, like you need to climb something but you can't climb. because the proportions don't match, it doesn't work right, however, if I make a scale and hold down shift to stretch it, that's exactly what it does and if you do this, we'll just be ashamed of you, like please. don't do this, don't distort your, um, your subject and I see this sadly all the time, especially with people who make them too thin or too wide because they're trying to fit the photo into a certain space, that drives me.
It's crazy so if you want to know what one of my triggers is show me a picture where you stretched it and that will trigger it fine anyway let's undo that before my eyes fall out so next this That's what we're going to do. Are we going to tell Photoshop that planes matter? I'm going to tell Photoshop not to mess with the planes, protect the Jets, so what we're going to do is select the subject and that will select the subject and it received some of the jet stream, but not all of it, but that's okay.
I don't care if the jet stream stretches a little and if I really care I'll go ahead and brush it and make sure. that also selects paint, but for the sake of demonstration, now we're going to go up to our images menu, no, we're going to go up to our I want to select menu, sorry, it was blank. We're going to go to our selection menu and we're going to choose save selection. Now, when you choose to save selection, a thing will appear that will ask you: You are saving the selection, what do you want to call it?
I'm going to call her. It's Blue Angels, okay, so now I have the Blue Angels selection saved. Now I can deselect it. I no longer need it selected. So that's all. Select what you want to protect and don't want to stretch. Save it as a selection, give it a name because when you go into the content scale, which is what we're going to do next, edit the content of the content scale or scale, there we go, you'll have the option of which mask to protect, so from By default it will be activated. none and it will be grayed out if you didn't save a selection, but because we saved a selection, we can choose it to protect the Blue Angels and not let anything happen to them, so now when I hold down Shift to stretch this. it just does the right thing, it doesn't affect the Jets or the Blue Angels, so I can make it as long as I need it, if I need it to be a taller image, maybe in a magazine, now I can get it. to a point where it will start to affect the image because I'm invading the subject's space, but maybe it goes here and maybe here not too much, so yeah, I have a point where you can't go anymore, but anyway That's where we start, we can go so far or we can go so far, we can keep going out and it will protect you abroad.
Rick says I needed this last week yeah protect the image in content or scale and then you can get whatever you want without messing up your theme now where you'll see this happening a lot let me get out of my library come on here I need to make a new one to 2023 um let's see I had one here that I would like to try Okay, and those were the 10 things, by the way, we have the 10 since I have a couple of minutes left, let's see here, I'm finding everything except what I want. Okay, if it's not in this library, I know where it is.
Okay, this is just another example, but let me switch libraries. I think I know which one it is. It should be in We're scrolling We're scrolling We're scrolling now I don't see that library, but maybe it's this one No, it should be What's new in Photoshop I just didn't see it? Oh, I'm sure he'd be crazy. I can't find it anyway. If I don't find it in the past, I'll take something else. Thank you. Okay, let's see what's here. Try it on this one, okay, same thing, let's zoom out. Let's make it a layer. Let's do a selected topic.
Let's save that selection and deselect it. Let's change the size of our canvas, let's make it triple, no not the image size, the canvas size. like wait, that looks bad, layer, image, canvas, not image size, sorry for that fifteen thousand, and we'll just put them, keep them in the middle and then we'll make our content aware scaling and make sure we protect the deer . It even automatically selected that channel, uh, for you, so if you don't hold down the shift key, it's just going to scale, so what you want it to do is hold down the shift keys, so sorry, it's going to scale. proportionally you want to hold down the boat ski shift key so it scales the actual bottom.
Now in this case there are some things that were stretched that probably shouldn't be so this doesn't work across the board unless you protect undo unless you protect all the things that needed protection so in this case it might have gone in and protected some of these flowers as well so they don't stretch because they look stretched, so basically you would go in and add those to your mask and that way, um, those get protected too, so the things that you don't want to protect get stretched , they protect things that are okay to stretch, you're okay to stretch, so, and I ran out of time, so with that being said thank you all, I hope you got something out of today and today was a fun day for me because I was showing hidden things that people were like, wow, I didn't know that was there, well, hello everyone, stay tuned for the daily Photoshop creative challenge.
We'll see you next week when I'm editing your images. Images sent by the user. Pay attention.
If you have any copyright issue, please Contact