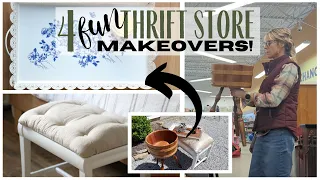
TOP 10 EASY OUTDOOR DIY DECOR PROJECTS FOR SUMMER!!! EASY BUILDS,DOLLAR TREE DIYS AND MORE!!
May 30, 2021Hello everyone, welcome back to my channel. Today I'm sharing my 10 favorite DIY
outdoor
projects
to help you spruce up youroutdoor
area forsummer
. If you are new to my channel, hit the subscribe button and ring the bell to receive notifications. Alright, let's get into it. I started with 14, 2 by 4 by eight. I have my saw, the Kreg jig, which I didn't end up using because I made a different cut than the plans and to suit my needs and then I used two and half inch outside screws to put everything together I started my cuts here I made eight cuts at 72 inches one cut at 79 inches 13 cuts at 25 and a half inches and two cuts at 28 and a half inches all good now that all my cuts When we were done, I took two of the 72 inch boards and placed five of the 25 and a half inch boards to make a frame for support.
Then I worked on putting the legs together. I need two sets of these for each side. I used four of 25 one and a half inch boards for this and then also one twenty eight and a half inch board for a set of legs, after that I simply attached the legs to each side with the outside screws. Then it was time to attach the seat slats to the support frame. I used six of the 72 inch cut lumber and simply attached them to the bracket with the outside screws. The last step in building the sofa was attaching the backrest to the arm pieces.

More Interesting Facts About,
top 10 easy outdoor diy decor projects for summer easy builds dollar tree diys and more...
The next day I went ahead and sanded the entire piece. really good, so that way I was able to apply the dye. The stain I used was minwax on the dark walnut and I applied one coat all over and I'm going to let it dry for about 24 to 48 hours and then I'm going to do a polyurethane on top of this to protect it from the weather in the rain and guys I'll link the plans Check out this DIY sofa in the description box below so be sure to check it out if you are interested in building your own outdoor sofa, it was actually very
it only took me a couple of hours to build and a couple of hours to dye it, so not bad for a day's work guys, so I needed my cushions to be affordable and cost effective.
easy
it only took me a couple of hours to build and a couple of hours to dye it, so not bad for a day's work guys, so I needed my cushions to be affordable and cost effective.
So I started looking online and everything I found about ready-made outdoor seating cushions that I wanted would cost at least $120 for three sets of cushions and back cushions for my couch and I was really trying to get that cost down and make it happen. about half of that, so I probably spent about 70-80
dollar
s on all the supplies I need for these cushions, which makes the total for my couch and the cushions about 150, so I thought it was a lot better because I didn't want to make something that I could have just gone out and bought at the store already made for two hundred and three hundreddollar
s and I wanted it to be something that was really affordable and profitable, so this is what I came up with for the outdoor cushions, so for the supplies I chose these 28 pillows for 28 euros and sprayed them with Neverwet from Rust-oleum.
I already had two of them in my closet, so I really only had to buy one. So I bought this on Amazon. I think it was 16 or 17 just for this pillow. That wouldn't have been cost effective if I had needed three of them, so I looked on Walmart.com and I have 26 euro pillows for 26 euro pillows for seven or eight dollars each, so if I needed all three, it still would have been It's cost effective for me to get three pillows instead of buying ready-made outdoor cushions, so that's for the back pillows. Cover them. I'm going to use this drop cloth that I bought on Amazon and I think it's six by nine feet and it cost about nine dollars.
I bought two of them, one to make the top pad for the back pillows and one to make the bottom pad and then fuse all of this together. I have a new 6000 fabric fuse and I've never used it before, but it's supposed to be pretty strong and I'm hoping it's strong enough to fuse it together and make some pillowcases, basically, um. I also have this single stitch that I just found in the drawer in case I didn't have enough e6000 and then I also have this magic stitch that's just a fusible tape that you make with the iron that I'm going to use. that for my hem and then I'll glue everything together then I have my scissors my rulers and my cutter and that's it so I'm ready to go so I started by cutting six pieces of the drop cloth at 30 inches by 30 inches and I did that to have a couple of inch overhang so I can fold the seams with the e6000 glue and that's what I'm doing here I'm folding one piece of fabric and then I have another one. piece of fabric underneath that I'm using the e6000 on and then I just folded it again and took pins to hold it in place after gluing it because the e6000 takes about eight hours to dry completely and then I did that on all three sides of the cover of pillow and I left one side open and then I also did that on each pillowcase and I had three pillowcases in total, alright guys, so now I'm ready to cover the seat and the seat that I bought. complicated bed cushions and they measure 33 inches by 76 inches and I think two inches and two inches thick so I bought two of these to stack on top of each other to have four inch thick cushions now the length is perfect my couch it's 72 inches so it's perfect although the width is about 29 inches so I'll have to cut a few inches off the width of each of these to make them 29 inches so for my seat cushions I started by trimming both mattress protectors. to 29 inches wide with my scissors and then I used my drop cloth which was six by nine which fit perfectly for both mattress protectors and I just folded the drop cloth over it and then I started using my hemming tape and my iron. and I folded the tarp and started hemming the mattress protector.
Now this is an unconventional method, so you want to make sure you don't burn yourself, be careful with the iron and don't burn the mattress either. pad or the fabric, but it worked and fused the two pieces together nicely. This is the side here that was a little
more
difficult to work with, it was just a lot of folding, unfolding and cutting some pieces, but I tried. Simply wrap it like a gift and then use the hem ribbon to fold and fuse it. Do the last side. The long side was the easiest to fuse. I just used the hem tape on my iron and fused the drop. cloth to the mattress protector, so the next day, after the glue dried, I took out the pins and turned the pillowcases inside out and then took the hem tape and hemmed the opening so that I had clean edges and I put my pillow inside the pillowcase and then I just fused the two pieces of protective fabric together so that that way my pillow stayed inside the pillowcase.To start, I'm going to mix my concrete and I just have a bag of concrete here. I'm not going to use all of it, I'm just going to use a little bit because my bowl isn't that big and then I have a bucket to mix it with something to stir it in and water, that's all I have to do. To mix it well now that I have the concrete mixed, I have two plastic bowls here and I'm just going to coat the inside of one with a little spray oil and the bottom of the other with spray oil.
Okay, now that the bowls are coated with cooking spray. I'm going to pour the concrete that has the spray oil inside and fill it now that the concrete is inside this container. I'm going to grab the container with the cooking spray. on the outside and I'm going to press it into the concrete so that my hole works well. Now that I have my bowl in place, I'll just grab some cans I had around the house and place them inside. to hold this I'm going to wait 24 to 48 hours okay guys I've let this concrete sit for about 48 hours so now what I'm going to do is take it out of this container and it should come out very
since we put oil in it spray, so here we go, everything came out very easy, which is great, so now what I'm going to do and you could sand these edges if you wanted to. just grab a piece of sandpaper and spin around.
easy
since we put oil in it spray, so here we go, everything came out very easy, which is great, so now what I'm going to do and you could sand these edges if you wanted to. just grab a piece of sandpaper and spin around.I like the way it looks with a little bit of roughness, so I'm going to leave it, but now what I'm going to do is have my sterno here. I'm going to put it right inside and then I'm going to take this chicken wire and I'm going to cut it to fit inside on top of this and then I'm going to take these lava rocks here and I'm going to put them on top of the wire so you don't see that wire and it's going to look great that way so let's see how it looks good guys so this is the drop cloth that I'm using for my outdoor rug.
It's six by nine and it has a double stitched edge, which is nice, so what I'm going to do before I start stenciling this, I'm going to give it a good wash. The company that made this sent me instructions on how to wash. so it doesn't shrink and also how to wash it twice if necessary to give it a softer fabric so I'm only going to wash it once and it says to do it in cold water and then hang it to dry so it's a very nice outside, so I'm going to let it dry outside and then I'll come back and show you how I do it with the stencil.
Alright guys so I'm back today, yesterday was a bust after washing the I ended up having to hang it inside because it started pouring rain and it was just thunder and lightning and it was horrible outside so it took a little longer than expected to dry because it was inside, but that's Okay, now it's dry, it's all ready to be stamped. One thing I forgot to tell you is that after washing it you should use an iron on the damp cloth to remove all the wrinkles and then hang it to dry. I did that it's all set now I have my stencil here this is what I'm using it's from Americana
decor
deco art and then I have my stencil brushes and then I have some chalk paint and I got all of this plus the drop . fabric from Amazon like I told you yesterday, so I'm going to leave a link in the description box below so you can see everything if you want and I'm going to start creating templates.I don't have a pattern or anything so I'll probably just start in the middle and work my way out and hopefully everything will work out so let's start right so I started in the middle and worked outward with the template and guys it just worked once I started to figure out what the pattern was going to be, I just followed it again, I didn't measure anything, it wasn't perfect, but I think in the end it turned out really cool and it's exactly what I wanted, okay guys, so I have my concrete. mixed here and if you've seen my DIY fireball video this is the same concrete I used I just used the other three quarters of a bag and mixed it with water until it got this cake type dough consistency and now I'm going to use it to fill my containers so for my molds I have these three dollar
tree
containers here and this will be my base.I'm going to fill all three containers and I'm going to fill them right here for the rim and then for the top I'm going to use this plate that I bought from the dollar
tree
as well and then before I fill my containers with the concrete, I'm going to use this spray of kitchen to spray everything inside here and there. That way it will be easier to release my concrete once it's set, so let's get started, let's get everything right. Now that I filled my containers with concrete, I just tapped these to make sure there were no air bubbles and then the concrete will probably set in about 24 to 48 hours now with my plate.What I'm going to do to shape the bowl is I have another plate that I sprayed with cooking spray on the bottom and I'm just going to press it down into the concrete to get the bowl shape and then once I put it back lift, I'm going to add these little dollar tree gems to give it a little bit of color and then I'm going to put this back on top of here after I do that. that and put some rocks on top of this until it sets well, guys, so this is the moment of truth.
It's been about 48 hours since I placed the concrete in the molds, so I'm hoping it's all ready. I'm going to use this box cutter here to cut the plastic and get them out of the mold and then this one should come out of the mold easily since we put the cooking spray on it, so here we go good so that everything stays out. The mold, these were a little difficult to get out of the containers, just required a little extra work but once the containers were opened they just slid out so it wasn't too bad and this one was easy to get . but unfortunately I have a little crack here on the lip, but it's okay, that's what happens with DIY, so I'll fix it.
I'm probably going to take a piece of sandpaper and sand the edges a little bit and clean up the glass pieces so you can see them a little better and then it'll be time to put them together guys, so before I put this bird back together I need to seal the concrete and I've decided to only use two of these cylinders here for my birdbath, the third one just makes it too high and awkward so I'm just going to use two of these and then I have my base here and I'm going to cover it with this protective concrete seal transparent. sealant that will waterproof it, it is for interior and exterior use and will help protect it from rain and water and everything you will get this
summer
, veryokay guys so I'm going to start putting all of this stuff together here in a minute just wanted to show you what I'm going to do to cover this chipped area on my bowl.Here I found this spit in my garage and I've never used it. I had it for a long time so I'm going to use it to cover this area and I'll actually hook it up to a pump to make it work and then this is an oil pan that I found in my garage and it has never been used either so I cleaned it and that is what will hold my pump. I'm going to dig a hole in the ground and put this in and then put the pump in and that's where the water for the spit will come from, so I'm going to start putting everything together and digging my hole, so I'm going to start with this shelf that I bought ago about eight years at Michael's for five dollars.
It only came one by two and some screws that I had to install. Put it all together so I think you could easily replicate this by just going to Home Depot and buying furring strips one at a time or 1 at a time, they are really cheap and you could build them yourself next. I'm going to use these. The cedar fence boards are six feet long and were left over from my shiplap faux fireplace. I have a whole six left over that I'm going to use and I'm also going to use two of these, one times three. that I had in my garage just to modify the shelf a little bit, the first thing I'm going to do is modify this shelf and I'm going to do it by measuring between the two legs of each shelf and then I'm going to Take those white 1 by 3s and I'm going to use those measurements and I'll cut them to size, then I'll put the 1x3 in between the first shelf on the legs and then I'll go ahead and use my nail. gun with two inch nails and nailed them to the shelf and did it the same way for the bottom shelf as well.
This will make it easier when you place the cedar fence boards on top here, this way the boards are level with the shelves, so that's all I'm doing here is placing the six boards of cedar fence and making sure they're all lined up at the bottom and then I'm just going to go in and use my two inch nails in my nail gun and nail them into each shelf now the basic construction of this potting mint is complete like this This is what it looks like after it's all put together. I wanted to go ahead and add a shelf on top where the cedar boards are so I had a leftover piece of fence that was already partially cut so I just measured it to the size of the shelf I needed and then went ahead and cut it .
Now I'm going to go ahead and give everything a new coat of white. linen chalk paint and then I came back with some polyurethane and went over everything to protect it. I also went ahead and spray painted some L brackets, the screws for the L brackets, and some hooks I already had in my garage with some hammered black. spray paints and then after everything was dry I went back and installed those L brackets on the cedar fence boards and then I just installed my shelf on top of them and then I came back with my nail gun and some double nails inches on my nail. gun and just nailed the cedar boards to the back of the shelf so they wouldn't move or anything and now I'm just taking the hooks that I had painted and installing them on the bottom here of the bench after all the hardware was installed and the shelf in the piece, it was practically complete and it was time to
decor
ate it, so I had a piece of cedar board left over from where I had cut the shelf and it was the perfect size to make a sign.So I wanted to go ahead and show you how I did it. I just went ahead and took some white linen chalk paint and lightly brushed it on both sides of the sign just to give it a worn, one-sided look. of the sign I freehand wrote the word flowers and then I turned the sign over so it could be a reversible sign and on the other side I wrote the bar and I just used both freehand with my Sharpie paint pen and then I went back and I filled in some of the lines to make them a little thicker so it stands out a little
more
and I think this sign is perfect for the potting bench and for a bar cart so I can use it as both and whatever I need to do is to turn the sign around and change some things, so I love how this turned out.I can't wait to have people come over to entertain to use it as a bar cart for drinks and then when I'm gone. entertaining and just for sitting on I can use it as a potting bench and I can plant my plants and use it to hold flowers and things like that guys so what you're going to need for this project is a rope rug and I made this one You've probably seen tutorials on Pinterest or on Youtube on how to make a rope rug. I'm going to link below the tutorial that I used to make mine, so I thought it would be a great idea to paint this rug like a watermelon, so I have my rug here I have some green paint, some red paint and some black and white acrylic paint and then I have some paintbrushes or foam brushes and then some painter's tape in case I need to tape where I want to paint, but let's go ahead and start now I'm going to let this dry and then I'm going to come back and I'm going to paint the black seeds on it so I'm going to come back okay so I'm back and now I'm going to try to paint some seeds on the red part of this rug so I really love how this watermelon rope rug turned out.
I have it in front of my sink in the kitchen right now. I might sprinkle some on it. protective spray maybe later I'll put it outside if I want but for now I'm going to leave it here in my kitchen and it's going to brighten it up but I'm going to show you now how I'm going to plant these in the hanging pots I'm going to use this miracle to grow soil of garden, vegetables and herbs, um, to burst them, so here we go, so I'm going to plant the strawberries in these hanging baskets that I got from the dollar tree.
It came with the metal basket and the coconut liner for just a dollar and actually what I'm going to do is make a sphere out of them and try to plant the strawberry plants in between these little things here and everywhere, and I've seen this done. with flowers like petunias and succulents, um, so I don't know how it will work with the strawberry plant, but we'll see and I hope it works well. I think it's going to look really nice in my yard, so I'm I'm going to start by removing one of these chains from each one and then I'm going to fill them with soil, so now that I'm done filling the baskets with soil, I'm going to try to turn this one over. that doesn't have a hook over one that does have a hook, now I've seen where people have used it as a board in the middle, I'm not going to do that, I'm just going to flip it over, it might lose a little bit of ground, but I think it's going to be okay, here we go, okay, that wasn't too bad, so now that it's flipped over here, I'm just going to take these zip ties, go around them, and secure them to the top basket. to the bottom basket, do everything right now that my spheres are ready, all I'm going to do is go around and poke holes in the coconut lining and then I'm going to take my strawberry plant and insert it through the hole in the soil. and I'm just going to do that around the bottom and top of the spheres on both.
I'm going to make a little fire bowl with these tiki torch canisters. I just removed the canisters from the tiki torches and now I will simply remove the wicks from the canisters and set them aside for later use. I'm going to paint all three cans with some black spray paint and then once they're dry, I'm going to use one of these cans from Dollar Tree. and I filled it with three bags of this sand that also comes from the dollar tree. Then all I did was replace the wicks inside the lids of the jars and put the lids back on the jars once it was complete I simply took the jars and placed them inside the sand and then used some of this dollar tree river rock.
I used two bags and placed them around the jars inside the can and that was it, I simply added some tiki torch liquid to each of the jars and lit them. I lit them and started a nice little fire looking for a bar in the nearest town. I had never seen the sky so blue. I'm going to make a lighted garden turtle statue. I thought these oval shaped baskets looked like turtle shells. So I'm going to use three of these baskets, one for the turtle shell and then I'm going to take this other one here and cut it out.
I'm just removing the edge from the top and bottom of the basket, so I stuck with the wire mesh material and cut it in half. It's pretty easy to cut with scissors, but you can use wire cutters, so now I'm going to take that piece, measure it on top of the basket, and just cut it off. Remove the sides that I need and then I'm going to hot glue that piece to the top edge of the basket and cut the excess wire around the edge so it's even and then the other piece was enough to attach. over the other side of the basket and hot glued it as well and then cut off the excess wire.
Now there is still a small opening in the middle of the basket, but that's okay because this will be the bottom of the turtle and it worked out in the end because I had to change the lighting so that small opening doesn't matter now for the turtle legs. I'm going to use four of the smaller clay pots that Dollar Tree sells and I'm just going to turn them upside down and glue the bottom of those pots to what used to be the top of my basket that I covered so it was a little difficult to glue that wire to the basket, so I just used a small wooden dowel to glue. through the wire and pushed it into the bottom of the crock so the hot glue would stick and it worked well with the last basket I used to shape my turtle's head and tail, so I just cut a piece of that wire mesh and then I just rolled up a piece of it and made it look like a turtle's head and neck as much as I could, in the end I ended up changing this one, um off camera because I didn't like the way it formed when it was all put together, but I attached it the same way, I simply ran the wires from the turtle neck opening through the basket shell and then used a little hot glue to secure that neck. to the shell of the basket and then for the tail I just rolled a piece and flattened it and pushed each side to a point and then hot glued one of those points inside the basket on the back and it's finally starting.
To look like a turtle, the next thing I did was take some white spray paint and I just gave it two coats of white spray paint. Now that the white paint is completely dry, I'm going to hot glue some of these glass gems from Dollar Tree all over. the turtle shell to make it stand out so I started at the bottom of the turtle shell and went all the way to the top and the hot glue secured them really well, they didn't fall off or anything like that. and I'm sorry, I can't tell you how many of these bags I used because they were all left over from last year's
projects
.If I had to guess, it was probably three bags or two and a half bags, something like that, but three. To be safe now for the top of the turtle, I was going to make a hole and put a solar light on the top of the turtle so that the solar part was sticking out and the light was on the bottom and inside the shell um, that way it would light up, but that didn't work because the dollar tree, my dollar tree, didn't have solar lights, so I'm going to do something different, so I ended up sticking some more gems on it. up to cover it all, next I'm going to use this all-purpose white caulk from Dollar Tree.
It comes in these little tubes. All you have to do is cut the tip and it comes out like frosting and it's very easy to fill the spaces between the gems with it. I just tossed it in between the gems and then used my finger to spread it out to make sure it was even and then also wiped it off the gems if it got on. About the gems it was very easy to clean. I ended up using two bottles of this caulk to make the entire turtle and it looks like it's grouted. I gave the caulk 24 hours to dry completely and this is what it looked like, it turned out really nice. um but I thought it was missing something so my son gave me the idea to give him some eyes with these green glass gems and I thought that was perfect because I think it really made the turtle come to life so I just glued two of them together with hot glue.
I put the gems on the top sides of the head and I think it worked really well. In fact, it made the turtle come to life. So the last thing I did was add my lighting and you can see here where my little hole in the center actually works. It turned out perfect because I'm going to introduce some of these fairy lights inside and make it light up second.
If you have any copyright issue, please Contact