YTread - Let's Read YouTube videos as Articles

#MSM blame #princeharry + #meghanmarkle once again #katemiddleton ...
MSM blame princeharry meghanmarkle once again katemiddleton princewilliam princessdiana oh and here we go I was waiting for this the Press has now come...
Read More
#jenniferlopez 2000s LIP SYNCHING SCANDAL #diddy
jenniferlopez 2000s LIP SYNCHING SCANDAL diddy part seven of the JLo blinding them deep dive um this is that super long blinding about her lip syncing okay...
Read More
Pochettino FURIOUS With Chelsea Players! Manager Threatens Against ...
Pochettino FURIOUS With Chelsea Players Manager Threatens Against Kids Behaviour its gold Palmers world and were just living in it so with that bad boy Im...
Read More
'They KNEW Cole was the penalty taker' | Pochettino and Palmer react...
They KNEW Cole was the penalty taker Pochettino and Palmer react to Chelsea penalty controversy um one of the goals was a penalty which he scored there...
Read More
Boston Marathon 2024 Live from Heartbreak Hill
Boston Marathon 2024 Live from Heartbreak Hill show I apologize for all the technical difficulties but here we are on the top of the Newton Hills...
Read More
Winning Wordle: The Best Starting Words To Use and Why | Mashable
Winning Wordle The Best Starting Words To Use and Why Mashable were not here to judge how you play wordle maybe youre like us picking a random five-letter...
Read More
How To Win At Wordle Every Time
How To Win At Wordle Every Time hello watch yours truly david kwong speak about daily games using words which total five okay that was pretty terrible but...
Read More
NHL Highlights | Canadiens vs. Red Wings - April 15, 2024
NHL Highlights Canadiens vs Red Wings - April 15 2024 arm me and Pon trying to sneak in early on the draw theyre told to step back out by referee fris...
Read More
Canadiens @ Red Wings 4/15 | NHL Highlights 2024
Canadiens Red Wings 415 NHL Highlights 2024 Kane trying to dig it free and get it away from gallager came back to the point though for SAR just held in...
Read More
Salman Rushdie on censorship in America today
Salman Rushdie on censorship in America today 60 Minutes Overtime the human race has a very very powerful survival Instinct and when your survival is at...
Read More
Salman Rushdie: The 2024 60 Minutes Interview
Salman Rushdie The 2024 60 Minutes Interview Salomon rushi has been a Marked Man for nearly half his life in 1989 Irans leader ayatollahi declared his...
Read More
Mark Goodier Showreel 2024
Mark Goodier Showreel 2024 and we get to spend time with another British m music legend here on the show who started out in the late 70s but in the 80s...
Read More
CBBC UK Top 40 - Mark Goodier interview 2002
CBBC UK Top 40 - Mark Goodier interview 2002 thanks Connor yes welcome to the BBCs Maida Vale Studios on the here with the legend that is Marks regime I...
Read More
Chelsea vs Everton LIVE | Premier League Watch Along and Highlights...
Chelsea vs Everton LIVE Premier League Watch Along and Highlights with RANTS e e e e l w oh oh do oh w guys I cant believe it only 146 of...
Read More
6 THINGS WE LEARNT FROM CHELSEA 6-0 EVERTON
6 THINGS WE LEARNT FROM CHELSEA 6-0 EVERTON yes guys welcome back to another video Welcome to the George Benson football channel for six things that we...
Read More
Becoming an Artist: Etel Adnan | Tate Kids
Becoming an Artist Etel Adnan Tate Kids artist and writer ettel adnan was raised in a world full of languages born in lebanon in 1925 ettels mother spoke...
Read More
Blippi Learns Trucks at the Fire Station and More | Educational Videos...
Blippi Learns Trucks at the Fire Station and More Educational Videos for Toddlers hey its me honey and today were at the Bellevue Washington fire station...
Read More
Podcast #262 - Playing Incohearent
Podcast 262 Playing Incohearent welcome back to the Julian podcast these marvel cosplaying here ladies and gentlemen we have Kermit on the table today who...
Read More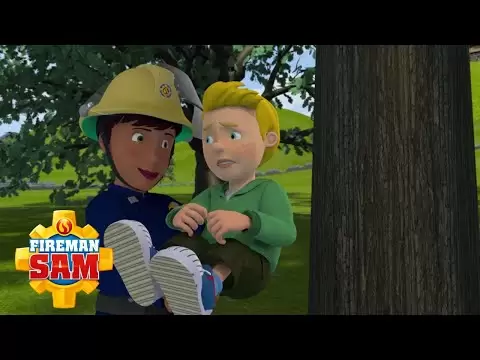
Ellie Saves James! | Fireman Sam Official | Cartoons for Kids
Ellie Saves James Fireman Sam Official Cartoons for Kids yes james how many actual fires have you put out lots james i bet she hasnt put out as many...
Read More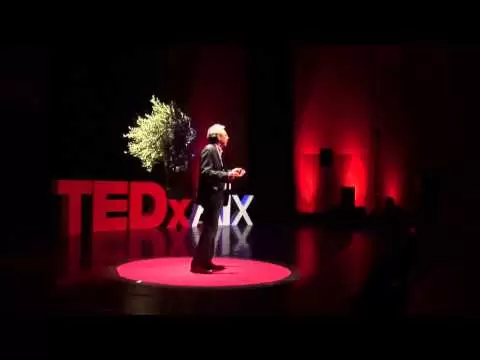
The myth of globalisation | Peter Alfandary | TEDxAix
The myth of globalisation Peter Alfandary TEDxAix I sometimes describe myself as a culturally conflicted Englishman I am first generation born in the UK...
Read More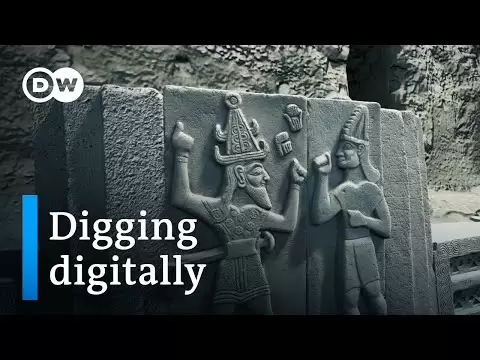
Archeology - exploring the past with modern technology | DW History...
Archeology exploring the past with modern technology DW History Documentary the technical technological advancement is rapid so rapid its almost...
Read More
From landscape architecture to conservation agriculture | Thomas Woltz...
From landscape architecture to conservation agriculture Thomas Woltz TEDxCharlottesville the conservation agriculture studio at Nelson Burt waltz...
Read More
1000 COMMON ENGLISH QUESTIONS AND ANSWERS for beginners | English...
1000 COMMON ENGLISH QUESTIONS AND ANSWERS for beginners English Conversation me are you American no Im not Im Canadian do you speak English a little but...
Read More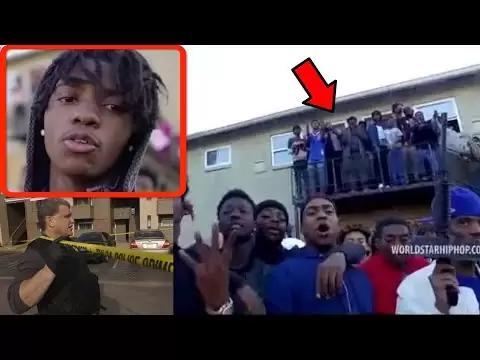
Pull Up Wit Ah Stick: The Music Video that Took Down a Neighborhood
Pull Up Wit Ah Stick The Music Video that Took Down a Neighborhood police are trying to find the shooter or shooters involved in the murder of a man in...
Read More
Finding f(x): Why I teach for the Philippines | Delfin Villafuerte |...
Finding fx Why I teach for the Philippines Delfin Villafuerte TEDxXavierSchool Im gonna try something Ill say class and you will answer with yes but you...
Read More
Magpakailanman: Revenge body against my body-shaming crush | Full...
Magpakailanman Revenge body against my bodyshaming crush Full Episode Adrian goes to beta the ease of course in the mutual understanding at io that...
Read More
I Found a MILLIONAIRE Only Server in Minecraft!
I Found a MILLIONAIRE Only Server in Minecraft I have found a millionaire only server in Minecraft look at these millionaires on the server always coming...
Read More
Cathering mcbroom ass - Catherine Paiz | Before and After...
Cathering mcbroom ass Catherine Paiz Before and After Transformations Plastic Surgery Transfor A few of you requested that I do a Beforeand After vid on...
Read More
Desert Survival, Tame Craft Build | Starsand Gameplay | First Look
Desert Survival Tame Craft Build Starsand Gameplay First Look how is it going this is game edge and thank you so much for joining me this is star sand...
Read More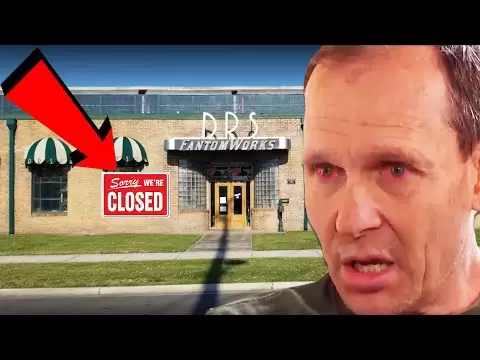
FantomWorks Officially ENDED After This Happened... IS FANTOMWORKS...
FantomWorks Officially ENDED After This Happened IS FANTOMWORKS STILL OPEN IN 2021 phantomworks officially ended after this happened i pull into the garage...
Read More
IELTS LISTENING- ITALIA BREAKS - EBENZ DAY 51"},"lengthSeconds":"2246"...
IELTS LISTENING ITALIA BREAKS EBENZ DAY 51lengthSeconds2246ownerProfileUrlhttpwww section one you will hear a man telephone a travel company to book a...
Read More
PORQUE MARK SLADE ( BLUE ) DEJO LA SERIE EL GRAN CHAPARRAL ????
PORQUE MARK SLADE BLUE DEJO LA SERIE EL GRAN CHAPARRAL hola amigos que tal soy jota y bienvenidos a mi canal hoy veremos porque mrquez ley de abandono...
Read More