The Coolest Radio You've Probably Never Heard Of
May 30, 2021Foreigner, did you know that for less than $40 you can buy a portable, lightweight
radio
that you can take anywhere and listen to almost anything you have nearby? I'll introduce you to thecoolest
radio
you'veprobably
never
heard
of. Everyone, Tom the dilettante, I hope you are all well. You know there are still a lot of cool things I want to do with the Crosstrek, but there's no room in my garage shop right now and the weather outside sucks, so as a hobbyist in many. things I thought I would pick up where I left off a couple of weeks ago and continue to share with you some of the interesting things I find about the radio hobby.
Now I'm pretty new to the radio hobby and if you were to ask me what's the
coolest
radio I have, that would be tough, they're these versatile little FRS handhels from gmrs that I can throw at almost anyone and get the comms working, No, it has to be some amateur radio equipment, right? What's cooler than the ubiquitous baofang? uv5r, the workhorse of the entry level ham radio, maybe it's one of my mobile rigs, this Kenwood tmv71a that I use as a base station or the Yaesu FTM 400xd mounted on the Crosstrek, how about a nice HF rig and antenna 20 foot radio that allows me to communicate with everyone from my garage, they're all great and all, but I think the best radio I have is a newbie radio, it's this little one, this is an SDR or software defined radio dongle .
More Interesting Facts About,
the coolest radio you ve probably never heard of...
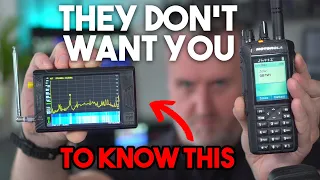
I bought this on Amazon for about 35 bucks and With this thing, my laptop, and some free software, I can listen to almost anything from my garage. Seriously, I'm sitting here in my garage with this thing on my laptop and I'm listening to local radio stations. Everyone needs a place to trust. Traffic control from a nearby airport with local police and EMS Communications SDRs do almost everything a normal radio does except transmit. You can use this to listen to a variety of frequencies and remember that no license is required to just listen to this particular SDR I got.

Amazon for about $35, it's called RTL SDR blog V3 and it comes with all the hardware you need to get started. It comes with the SDR dongle, a portable dipole antenna with two pairs of extendable whips, a suction cup mount, and a small tripod. I'm not sure why it comes with a tripod, presumably it's for mounting the antenna in horizontal orientation, but I've
never
used it that way yet. In addition to this kit you will need some SDR software, the dongle captures the radio signals and converts some to digital modes for your computer, but the software does all the necessary demodulation filtering and signal enhancement so you can hear things.
I use a program called SDR Sharp, it is free to download and has many features. I'll leave a link. to the pieces of software and reference videos I use to get started in the description below. Now, using this is pretty simple, but there are a few critical things to keep in mind when you first start setting it up. an RT type, but as I understand it, if you install the drivers for this thing wrong, one you won't be able to use it and two, you could mess up the USB drivers on your computer, so rather than risk going off track with my no-that advice I'll go to advise you to do what I did to start.
I followed these amazing instructions from this smoking ape video and it got me up and running on the first try, so if you're going to give this a try. One chance, I highly recommend watching his video before starting. Well, I'm going to assume that you've seen or are going to see those videos on how to properly install the SDR dongle and what we're going to get to now. is how to actually use the damn thing, the first thing you're going to have to do is set up your antenna and the first part you're going to have to do is this dipole antenna.
Now there are a couple of tricks to setting this thing up. top right, so let's take a closer look at this thing under the GoPro to start, let's take a look under this cover when you remove this cover, you'll notice that the coax here splits in two directions, the center conductor is splits in one direction and the shield ground splits in the other, not the center conductor, which points upwards in its dipole. This dipole is going to be set up in a vertical configuration, so what we're going to do is just go. Go ahead and mark this somehow with the grease pencil so we know which way is up and put the cover back on.
The next thing you'll want to do is figure out what length you want your antenna to be and that will depend on what frequency you want to listen to. For our example, we're going to set our antenna for the 2 meter handheld band or about 146 megahertz. Now to calculate the length of a dipole antenna, it is a simple formula, the length in feet of your dipole antenna. is 468 divided by the frequency you want to tune to in megahertz, so for example, if I want to listen to 146 megahertz, I'll take 468 divided by 146. and that gives us the length of the dipole in feet that we are.
We will multiply that again by 12 to get it in inches and then we will divide it by 2 to find the length in inches of each end of the dipole. In our example, it's about 19 and a quarter inches for each leg of the dipole, so grab your tape measure, grab one leg of the dipole and we're going to go ahead and measure it so that each leg is about 19 and a quarter inches. You'll do that for each whip or dipole and then when you're done, go ahead and screw it into the T dipole. Now the cool thing about this T dipole is that it has a standard quarter by 20 connector and since I'm installing it in the garage, I'm going to use this little one. equipment clamp, screw it on and clamp it to a pole I have here in the garage, then untangle the antenna cable and connect it to the dipole, connect the other end of the cable to your Str dongle, connect the dongle to your computer and run your software in this case SDR Sharp, okay, I know what you might be thinking, it's a lot of complicated stuff, installing software, connecting a dongle, measuring an antenna, for God's sake, those 19" measurements really aren't that bad. inches and a quarter that I gave you. will let you listen to pretty much anything, sure you can tune your antenna depending on the frequency you want to listen to, but to be honest, to start with the measurements I gave you, I'll let you listen to almost anything, so let's jump into the software that defines the software defined radio, there's no way I'm going to be able to cover everything here, so the intent of this video is to really whet your appetite and send you down the rabbit hole like me to explore this. and everything it has to offer, so when you open the software you will see this screen, it is quite intimidating, but be patient, once you have everything set up, all you really need to do to start receiving radio signals is press. play and the first major menu that I want to take you to is just this radio menu and here you will have options for the different modulations like narrow FM, wide FM, AM or amplitude modulation, lower sideband, upper sideband, Morse code, etc. for the majority.
The things you're going to listen to are going to be narrow or wide FM or AM. Right now we have too much static, so we're going to turn on our squelch and we're going to turn this up. mute until the static goes away, okay, we've got a lot going on here, let's start with something we're
probably
all familiar with. I'm going to tune into a local radio station and to do that, you can click up or down on these things here, so if I want 105 9. you're going to get a radio broadcast, so let me pause this for a second so we can see what that we're looking at, so this waveform will show you the signal strength across the part of the spectrum that you're looking at and at the bottom here we're going to see that we're in the FM broadcast spectrum.I have signs here and here and if I want I can go ahead and move this. all about left and right while it's playing so let's go ahead and turn playback on again we're going to turn the volume down and if you left click and hold you can scroll back and forth up and down on the FM frequency. spectrum, okay, here you can zoom in and out, so if you want to take a closer look at a particular waveform and select it, you can hover over this waveform, click on it or you can even go down to what we call the waterfall chart and clicking This waterfall chart is very useful because it basically shows you where the signals are strongest and right now there is a lot of noise.
I have a very high noise level here, so to increase the contrast of This, I'm going to turn it down a little bit so that everything else is in the dark and only my strong waves come through you following so far, basically, it's just a visual representation of the radio spectrum and the signals that are coming in now, this is where the fun part begins, you can search for any frequency of anything of interest, whether it's NOAA weather frequencies that you could get on a ham radio or on a gmrs radio. You can go ahead and tune to the gmrs and FRS frequencies, you can tune to the 2 ham radio frequencies 70 centimeters and 70 centimeters etc. to get started.
I recommend visiting this site radioreference.com. From here you can look up things like your local municipality's frequencies, your EMS, police department, and fire department frequencies, and whether they are publicly available and not in digital format. encrypted, you can tune in and listen to them, believe it or not, in Chicago. I can hear all the police frequencies in the city. The radio reference will also allow you to look up things like local airport frequencies so you can tune into things like Tower terrain and zoom in and once you tune into those frequencies, you'll be able to save them as favorites, just like you would in a web browser, so check this out.
I already saved some favorites and you will find them here in the frequency manager and in the frequency manager for For example, I have gmrs EMS local repeaters and even NOAA weather stations. I click on them. You can double click on one of those frequencies and you can see that they appear here as highlighted vertical bars. These are my saved channels now if I want. zoom in on these I can go ahead and enlarge, let's go ahead and turn up the volume, that was bad. Bloomington was partly cloudy with a temperature of 12 and you basically just turned your computer into a scanner, so I don't know about you, but I can spend hours on this armed with this setup and the internet to scan for different frequencies.
You can start tuning in and using that waterfall chart. All you really have to do is navigate left and right and look. to get a signal, click on it if you're curious and start listening, it's a little Orwellian, maybe even a little creepy, but I think it's cool, okay, honestly, we've only scratched the surface of what radio software defined has to offer and the purpose of Actually, this video was just to introduce you to the concept and the fact that it exists and hopefully whet your appetite to start learning more. It's an extremely low barrier to entry, just $35, and if you already have a laptop, you're good to go.
Check out the links I put in the description below for some additional resources and go crazy, so I hope you liked this video and I hope I inspired some of you to dig deeper into this whole radio defined by thing. software. I think it's super fascinating and I think some of you might too, so thanks for watching. If you have any questions or comments, please leave them below as always. I'll do my best to answer questions to the best of my ability and until next time, I'm Tom. The happy dilettante exploring in SDR and I'll see you next time.
If you have any copyright issue, please Contact