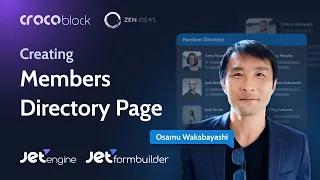
How to work with Crocoblock Profile Builder | JetEngine from A to Z course
Jun 09, 2021The WordPress dashboard has many options, but it's not always the ideal place to allow contributors or clients to add or edit their content. This is where the ability to create your own custom interface panel can really help in this video. We'll show you how to get started using the powerful profiling tools in Jet Engine. Now don't let the name fool you, although this is not just a set of tools to allow your users to edit their
profile
s; no, you can practically create any type. of a sophisticated custom front panel with all the super useful features, so I will split this guide into two separate parts.
The first part will show you how to use the built-in features by using the import options for a quick view. Start building our custom dashboard in part two, although we'll expand on what we covered in part one by creating our own custom post type and then creating an easy way to manage content in our new custom dashboard before we start building, let me introduce myself quickly, my name is paul c from wp tets and I've teamed up with croco block to create a series of tutorials on using dynamic jet plugins like jet engine and jet smart filters, okay now that we've got that out of the way out of the way, let's get started right, so the first thing we'll need to do is activate the features we want.

More Interesting Facts About,
how to work with crocoblock profile builder jetengine from a to z course...
Now for the
profile
builder
, we need to have the profilebuilder
enabled and the forms option enabled. Then it allows us to create that front-end form option where we can do things like edit the content of the posts, you know, the user profile, all those kinds of things to do, which are actually very easy, go down to the option of the jet engine and simply open the jet engine inside. there you have modules, now modules give us access to all the great additional features that we have available as part of jet engine, as you can see there are a lot of them, as I say, what we want are forms, so we'll just enable them. scroll down and we'll also say we want to enable the profiler, press save and that will activate those options for us once they're activated then we'll have more options available so if we go back to the jet options area, we can see that now we have a profiler and forms there, if we go back to the top, we go into the skins manager option and we have presets, let's open that and since we have enabled the profiler, we can also enable them. quick starts, so things like user profile with editable content and editable user settings page for user profile, we can import some pre-designed and pre-configured page templates, that kind of thing this just speeds up thework
process And that's what we're going to do. do it in this video though just keep in mind that you don't need to do this you can manually create anything you want this is just a quick start so let's go ahead and import so we'll choose the first option and you'll be able to see this . a preset that will set up an accounts page with three subsections, the main one that will show us all the posts, we have the edit post and the new post, we can change any other options we want, you can see, we also need to finish the process. going to the permalink settings and resave the permalinks, so let's do that, close that option, head over to our settings option, go to permalinks and we'll save them now, you can see we have the post name set, but you can have something different, you can set this to whatever common options you want, leave it as is and just say save changes, go back to jet engine again, go back to our skin manager under presets and this time we'll choose editing. user settings page for the user profile, click on that and you can see this will now do it for us and we'll click close.
We don't need to do anything with permalinks again, we just need to do it when using a profile. we set up some editable content and we import those settings so once that's done we've done the first part we've enabled what we want to give us a quick start so let's take a look at what's being created if we head over to Templates Elementor and go to the save templates area, you will see that we have four different sections: edit user post, ad post and user post, so these are templates that have been set up and that we can use, we can edit them and do whatever we want with them we also enter the pages section and if we enter pages and we have all the pages, now we have an account page inside, which is a kind of home page where now there are all the different options that we can make for our user . account adding new posts that kind of thing, all that information will be located within the account page.

Also, if we go down now and take a look inside the forms, we will see that three new forms are being created. Edit User Edit Post A new post opens there and we'll see that everything has been set up for us again. We can go in very easily and change any options we want here so we can add additional fields. We can link them through the custom fields we set up. Within the jet engine there are a lot of things you can do once you have the fundamentals in place and that's what this video is about, explaining those fundamentals so you can expand and grow what you want to do with these features.
Now that we have seen what is being created on the dashboard side, let's take a look at the front of our account section and see what's inside, so we'll jump over to the test site and just log in to the account. whatever your domain is, it's a slash account, so what we have is main, which will show us the list of all the posts associated with my particular account when I log in, I can add a new post if I want from here. and you can see we can put in a post title, upload the featured image, put in the content and that's what we currently have, but we can say let's add more to this if we want and jump over to the user settings which you can see inside here. we have our email address, the profile picture you want to use, name and about me.
Now it's worth noting that the profile picture and about me are unique jet engines custom fields that have been associated with user profiles, so let's go back. to the dashboard and I'll show you what I'm talking about, go back to jet engine and let's go to our meta boxes option and in there you can see that we have user configurations that were created using that import option in At first, we open this, we have two meta fields, the profile picture and About me, just a media field and a text area field. If we come and take a look at my profile and scroll down, you can see there's our custom meta. profile picture and about me fields and we can say that they are to make a jet engine because the style is the jet engine style, so those are custom fields that have been configured as part of the jet engine and associated with users which now we can if we want to set things up and manage the content that includes this and we can add more fields if you want to create a more feature-rich type of user profile, you may be
work
ing with authors or contributors and you want to put more information such as links to your own website bios, all that kind of stuff, this gives you the ability to do just that, so let's go ahead and quickly test these additional fields, so first of all let's do the profile picture, so we'll choose a file and pick my picture and we'll say okay and if I want I can let myself go unless the load put my name in pull c and we'll just put this is all about me okay we'll send it and that's now. has been saved to my account now it knows it's my account because it's set to work with the logged in user.I have logged in. I know it will be associated with my account, so let's go back to my profile. We will update this page. and there we go, there's my profile page that was added and about me. The good thing about this is that you usually have to link with wordpress to use the Gravatar service which is free to get a profile photo and this shows up everywhere. your site, however by doing it this way we could use this instead and reference this in any custom layouts we might set up and we're no longer reliant on gravatar which is something not everyone wants to use so it's cool that I can do that and like I said, it's very easy, everything is done with that simple wizard, so now that we've seen how this kind of thing works, let's take a look at some of the things that we can do, how we can customize things and then we'll also take Let's take a look at how we can create our own custom role inside our new custom profile area.
Well, this is where we are at the moment with the default settings and as you can see it doesn't necessarily look that great, it's picking up fonts from the theme that's being used, but we might want to customize it to make it a little more interesting. Too easy. All of these options are fully editable using the functions that you have come to understand and use, and that you know when working with jet engines. listings and things like that, so let's look at the way it looks, first of all, this listing of all the different posts that we have associated with my particular account, going back to the dashboard, let's get to the jet. menu and we'll go into listings and inside we have the user post items, this is the list of oh, this is the template for the list of our items, exactly what we can see in each of these different sections, so What What I have to do is edit this with Elementor and once we upload it to Elementor and I'm using Elementor Free so you know none of these features have to do with the pro version, this all has to do with Elementor Free and Jet Engine in its own so you can see pro is not installed because we have a little lock in the corners, so what we want to do is go down to the list items and in here we have all the different types of metadata that we can extract.
From Jet Engine we also have the profile menu and the forms. Now, the reason I want to draw your attention to the profile menu is because if you remember at the beginning of this video I said that you don't have to use the import method. If you wanted to create the entire account completely manually, the profile menu would be what you would use to display the menu items, as you can see again by jumping to the front, this is what I'm talking about, this is the menu settings. so you can insert that into your own templates, your own designs and be as creative as you want.
We've done it. It's already set up as part of that import process, but it's there in case you need it. Okay, let's just make a couple of adjustments to this to make it look a little more interesting just to show you how easy it is to adjust the layout. Let's make it a little bit bigger so that the image has a little more features, so let's select this section and We'll just set it to 25, there we go, let's change this font because it doesn't really fit what we want to do, so we'll just use the typography options and we'll adjust the size there.
I don't know, we'll take it as 18, we'll set it to such and such and we'll just set it to something like Montserrat so it's a little bit cleaner, there we go, okay, let's set it to 400 and 18 is perfectly fine. Okay, we have our edit post option. If we want to style this, we can do exactly that so we can hover over the style and we can make it look more like a button instead of just a text link. It's very easy to do. we adjust our style, so we're going to set the padding of the top and bottom style margins, I should say five, the left and the right to 15 and we're just going to set a background color to a solid color and we're just going to choose primary. color from here the text color we will set it to white for example and if you want to place an icon there you can do that and we will also adjust the alignment of that if we want so back to content for example we can adjust the alignment popup to the right side, really simple, now if we want to add additional information here because we have the title, we have the edition, but we may want to do things like review the number of comments the date it was created, you know a whole series of different things, well we can only reference dynamic data, so let's go back out of this link, I'll scroll down, I'll say let's just add some metadynamic for example we will place it under the title and you can see that it is included in the author date and comments, now we know it is the author because this only shows the posts associated with my particular account so we can remove the author from there , but we can do it now, if we want, we can put prefixes so we can say posted on and we can also put the comments and we'll just say comments.
I have two points there and again we can style it. all of this we can format the date if we are using the date set and we don't want to use that date setting we can change it to whatever we want so there are a lot of different options and you can see there is a link that we can specify. What do any of these links do, whether archive the post or nothing? I'm not going to edit them. I'll just leave them as is because everything is set up to work fine anyway if we want to adjust the styling. there we can do just that so we can say go into the elements and we'll adjust the typography, we'll set it to be monsterat and we'll also set this to be something like 14 pixels, let me go somewhere along those lines and we'll set a weight on 400. and if we want to adjust things like padding and margins etc., we can do all of that, so finally we'll select this entire block and we'll just put a little bit of space around it so we'll go to advanced and put a little more padding, so we'll say 10 pixels of padding over there and we'll come to the style, we'll go to the border and we'll just put a little bit. of a shadow box there just so we can see some kind of separation now, like I say, I'm not trying to make this look really pretty, I'm just showing you how easy it is to make these edits to completely customize it. again, we'll update this and voila, now it looks a little bit more in line with what we're trying to achieve so you can edit this and do whatever you want with it, that's how easy it is to edit them. listings, the same goes if you want to edit any of the templates, so we'll exit this and we'll just go to the templates section, so we'll exit here and go into the templates. save the templates and let's say we're going to open the edit post, we're going to edit it with Elementor and that's going to open Elementor and then we can edit all aspects of this again.
I'm not going to go into too many details. just select this block and we'll do it, we'll just put a little bit of padding, so we'll say 30 pixels in there and we'll do the same thing again, we'll just put a little bit of a drop shadow on this. just so you can see very easily exactly what's happening, increase the blur there and we'll adjust it slightly and hit refresh, so now that we've seen how easy it is to customize these pages, we'll jump back into editing this post and you can see it's our drop shadow effect, so it's really easy and all the features we need are within you, well most of them, let's take a look at how we can add more right now.
We have the featured image, we have the title, and we have the content, but we don't have anything like the category or tags, so we need to add them again. It's very easy to do. jump back, exit this and we'll come out to our dashboard, what we need to do now is go back to the forms and this is where we make those changes, so we'll open the forms option and We're editing a post right now, like this So what we're going to do is edit this and there are all the different fields that we currently have.
The post id is hidden, that is the id, the unique identifier of the post. which we are currently editing the featured image thumbnail, post title, post content and a save button, and you can see that all of these options below are pre-populated and then below we have what happens when you click the send button. First, we need to perform two actions: insert or update the post data, title, content, etc., and then redirect to a page, so if we click edit on any of these, let's take a look at the redirection to the page. for example and you will see that now we can choose redirect redirect page redirect to static page select the page you want for the account page in other words it goes back to the account list which will show all the different posts we currently have but you can set this to any of the different pages that you have created as part of your site, you can take care of the sequence of the process however you want to do it so that it is totally unique and personalized, okay, so now let's go ahead and insert the additional field that we want, like this There are a couple of steps to this.
The first thing we need to do is add the field to the form itself, so we'll just click Add Field and you'll see that it now adds a new field. We can rearrange it wherever we want. we want, so we'll place this above the Save button. Obviously the Save button needs to be the last element inside the form for it to make sense and then we can edit it, so we choose to open it and now we can fill out the form. details that we need and tell it where we're going to get the information from and what information we want to put in that type of thing, so the first thing to do is tell it what type of field is currently set to default text.
We want to change this in this example to be checkboxes because we want to allow someone to select multiple different categories to put their post into checkboxes. This allows us to do exactly that. Next we will give this a name. we're going to call this category and we do the same thing for the label we're just going to put the exact same thing inside of this it's going to put the category in there if you want to put a description you can do that you can set this to be required if it's a field optional just uncheck that option, then it says fill options from and these type of options that you will see will be different depending on the different types of fields that you will insert, so we have this checkbox. to get data from somewhere to create the list of checkboxes so we have manual input so you can enter them manually if you want and create any type of checkboxes you want however what we want to do is use terms, so terms are exactly what you can use for taxonomies, in other words categories and tags, or if you create custom taxonomies you can reference them in the same way, then terms are what we choose, then we choose which taxonomy you can see, we have category tags and a custom tag. one called formats, let's choose categories, it says metafield value, well we don't need to do anything there because you know you're extracting the term from the categories, you know that, so with that in place we can take a look.
Is there anything else we should do? The only thing I want to put here is the visibility of the field. We're going to choose this for logged in users only, so to get access to your dashboard, your account needs to be logged in, but this. it's just a little extra step that gives you an extra level of security and you can do this for all the different fields, so if someone was logged in or someone got access to this page because you hadn't set up security correctly, you could do that in Al less set it so that no one can see the form fields that they can edit, so we'll apply those changes and it's important to apply them, but the changes once you've made them, that commits you, okay, so now We've done that, we have an additional field called category, so all we have to do now is tell it what we want to do with this, so select the category post property, we're going to select that and we're going to say this is a term, so let's choose that from there, we have categories, labels and formats exactly what we saw, we created the field, so we're going to say categories, so we set those sizes, now we have to tell it what to do. and how to use it when we insert the data, so currently we have created the form element but we haven't linked it to anything to do anything when we update or insert data to do it, we will click on the little edit and I'm going to go down and we have exactly the same stuff here, you can see the post id thumb and so on, exactly the same thing we can see there, which is pretty much exactly what you have in the form at the top, so what? what we need to do is just do the same thing again post terms choose categories apply changes now we have done everything we need here so the last thing is to click on update and that has now created the link it is also set so that when we update or create a new post item whose data will be inserted and saved along with the new post or if we are editing a post, let's now go back to my account and update this and we should see our new post and there we go, there is our category checkboxes and you can see that currently this is on hills and waves, so let's uncheck that and save so now you can say that the form was saved successfully and it took us back to the account page, let's go back and edit that again and you can see that the waves are gone so we've created the link between the taxonomy and the post or edit the post so that everything is set up there and it's very easy to add so you can do it over and over again so you can say you.
I wanted to add tags, for example, well, you could also do the same thing in there using the method I just showed. Now we have seen how to use the import option to get a quick start configuration. Let's go build something. a little more unique, there are some important steps you need to follow to set everything up the way we need it. If you feel confused at any point, feel free to rewind and rewatch anything you find confusing or just want to. to refresh a bit, okay, let's now move on to creating our custom post type.
Now that we've seen how we can easily import key pages and key sections into our profile builder, let's take a look at how we can To create something of our own, we don't rely on the import process, so we'll use a jet engine to create a custom post time and then we'll see how we can add UI functionality to that custom. post time, so the first thing we need to do is go to jet engine and we'll get to our post types in there. We're going to create a new custom post time, so we're going to add new ones and we're going to give this a name, so let's call this custom post type, we're going to call it album, we're going to use it just to create a really simple collection of music albums, the labels we'll leave it when we get to the advanced settings and we just need to tweak a few things here, first of all let's change the icon to something a little more suitable so it makes a little more sense and we'll add the extra option for the thumbnail or image highlighted just so we can use it. then for the CD album art, we're going to leave that setup as is, we're just going to add a couple of meta just to augment what we have, so the first thing we're going to do is call this artist and we're going to use that for the album artist and finally we'll add one more field and we'll just call this duration and leave it as is and there we go, so We'll leave it as is our post type and we have our custom post type settings.
Come closer. You can see there's our list, so we have the title and the date. We can customize this to our liking if you wish and the jet engine offers. We have a lot of control over how this works, but today we are more interested in how we can tie this to the front end and create the whole process, so next on our list is to create the form that allows us to enter information from the interface , so let's go back to Jet and forms and we're going to add a new format so we're going to say add new and we're just going to put the new album in order so you can see it automatically creates a couple of fields for us we know we have the id of the post and we have the submit button and then we have the basic action of sending email, we can edit all of this and that's what we're going to do, so let's start by adding in the fields that we want to use to create and link to our post type custom, so we'll add some fields in that first field, we'll just reorder this under the post id and we can click to edit this now. we can set all the different options, so let's start by using the CD cover, so let's change this to text and we'll set this to be multimedia.
I'm going to give this a field name that we'll just call. underscore thumb and tag itwe'll give it is album, so we'll set it as user access required, we'll tell any registered user and the important thing is we need to make sure we click on if it's checked, new. attachment that we insert for the uploaded file, so we'll click on it and then we can say what is the value of the field that we want to use, so we'll set this as the ID of the attachment. Now we will make sure that when we upload a file. a media file, then it will insert it into the database, save everything and be available when we want to edit things and see them on the front end of the site.
Next, we can choose the number of files. This example is just one. and you can set the maximum file size, which we say five megabytes for this example, and then you can choose what file types are allowed, so we'll set these for all image types and then once we've done that, there you go. we have everything in place, we can click on apply changes and now we have our first custom entry inside before we go back and add all the additional fields and let me show you how we now link this to send this data so that the first What we need to do is go down to post submission actions and change this submission email.
You can have this. You may want to notify the site administrator that there has been a new addition and then they can review it and make sure they are ready. I'm happy with it and you can set it to non-pending, for example, or to draft status, so it's in something that's published and actually available on the site, that's up to you. We won't worry too much about that right now, so what I'm going to do is click to edit this. I'm going to change this now from type send mail. I'm going to say insert or update post.
So let's do it. I'm going to select. that option and then we see what type of post you want to link this to. We've created a custom post type, we'll open it up and you can see there's our album so we can choose that option and set up the post. state I just mentioned so we can say draft pending review private etc, and one thing that's cool to see here is keeping the current state, so if it's an update action, someone is making a change to a existing post that has already been published. and published, you can keep that status if they come in and make a change, obviously if you want to change it to be pending review, if a change was made, you can do that here as well, so it's great to see that we have options to keep the state current. status which is pretty helpful, okay, so let's What we need to do is say this is first of all because it's a new post, we're going to say it's pending review, so it needs to be reviewed by an actual administrator of the site below and now we have to assign the fields to these. fields mapping areas so you can see currently we have the post id and thumb this is your post id and your thumbnail and the submit button obviously won't appear inside you so all we have to What to do now is to choose how we want. to link them so that the post id can see the post id, this will update the post but obviously there is no update, this is an insert option, this adds a new item so we will leave that post property selected, leave it as is. thumb, we're going to set this to be a post thumbnail so we can now go through and add more options, so let's do that, let's apply those changes first of all, so now we've committed it to our action, our post action, and now we can repeat this and add some additional fields, so let's add the rest of the default WordPress fields that we're using, which will be the title and the actual content itself, and then we'll add our custom fields, so add two new fields for reposition them where we need them and we'll get to the first one, the text is perfectly fine and we'll set the field name to underline the title, we'll put a label and we'll just call this album title and then we can leave almost everything else except well, actually We can leave everything else if we want, we will apply changes to that and make the third of the default fields, which will be the real one. content we'll change this so it's not plain text, we'll have the wysiwyg editor, so there's some styling options inside and we'll call it post underline content, I'm just going to put post content for the description in there and we'll leave everything else as is, so we will apply those changes, so now we have set the post thumbnail, title and content which we now need to add in our two custom fields, so if we don't know or can't remember the names of those, we can go back to our custom post type and in there we can see this artist and this artist and the duration, so that's the information we need, so we'll go back in. add two new fields, place them where we want them, and let's edit them like we just saw so the text is perfectly fine.
The name of the field is: We'll call it our first custom field, which is artist and we'll just put album. artist like the description or the tag, I should say and we'll leave everything else there, we'll apply those changes and do exactly the same thing, then for the end we'll edit this text, okay, we'll leave it and We're just going to call this duration, I'll call it album duration, there we go, so we set those options, everything is where we want it to be now we just need to update our embed posts and let's map them. custom fields so the title will be the post title, the post content will be the post content, the artist will be custom or post meta and inside there we can just put the artist and the duration is the same again , post meta and we're Let's call this duration so we basically link everything except the post id because this is a new post we'll look at the edit a little bit later but that's basically all we need to do if we want to apply changes and add another notification, we can do that so we can say, let's add a notification, send an email as default and we can say where it will go so that the administrator receives an email, that's fine and responds, well, we could set it up like custom way there if we wanted to have a response, we're just going to say there's a new CD album added for approval and then you can enter some information there, you know, and you can see there's a bunch of macros available so we can put the id of the publication.
Make a thumbnail of the title so we can easily create an email within you very quickly, let's do this quickly, just say hello admin, there is a new album waiting for your approval and then what we can do below this, we can simply say the title from the album and then we can just just use the shortcode so we can say there's the title, we'll just take that shortcode and copy it from there and put it there, so now we can repeat this process to set everything up the way. that we wanted any information that we wanted inside there and then once we've done that we can save this so I'm going to apply this notification or the options that we just set up there and now everything is basically set up for us so now let's quickly publish our form and now we can move on to the next stage, which is to create the template that will host our form and then we can see how to add it to the custom panel that we are creating.
What we're going to do is go to our saved templates and inside of there we're going to add a new template, so add a new one, select this will be a page and we're just going to give it the name of our album. create our template and then we can add the form, okay with element or open, let's just create what we need in here. The first thing you want to do is just add two columns and once we've done that, let's adjust this slightly, but they'll work fine, so we need to add two separate widgets.
First of all, we need to have the navigation for our actual profile area in our custom account section and then we need to place the form on the right side, so let's go to our widgets scroll down until we get to the engine options. reaction and there, first, let's take the profile menu and drop it on the left side. You can see that now you only enter the basic information, we'll just change this. to vertical and I'm just going to apply the style that we have, so I'm just going to paste my style inside of this, this is going to plot the same styles that we already have in this section, okay, once that's done, We've set the navigation as You can see, our new section is missing and we'll rectify that in a couple of moments.
What we need to do now is just put the form on this side, so we just find the form and we want the form option, which is the jet engine, you can tell by the color of the icon, let's drag and drop it on the right column, select our form from there, so we're just going to say album, start typing it in you. Look, there's a new album, add that and we can see that everything we need for our new form element is included. We can configure anything we want here. I'm going to change this reload submission type to ajax, but you can choose whichever you want. option you prefer, I don't see, you can go through it and style it to make sure it looks exactly how you want, add padding, etc., so we say let's add 30 pixels per pad, for example, so you can style it as you saw. we fit, so let's publish this page, let's use the template and once we've done that, we can now add this to our custom dashboards.
We need to add it to this section on the left side of our navigation again, it's really easy to do that. Return from Elementor, go to the jet engine section and go down to the profiler. This is where we can control many aspects of the profiler's overall functionality outside of the forms, etc. that we build independently. pages account page and advanced, you can see that if we don't want to use the default created account page, you want to use something different, you can set it within you and all your pages will be displayed here as well by default.
If you use the import option, the account section will be displayed. We can add user pages. Single user pages. We can use template mode. There are several different things we can do. One thing I highly recommend is to restrict access to the admin area. this will prevent people from accessing the normal default admin if they log in to your front profile area to add content etc, but if they know it's a WordPress site, which they will, you don't want to do that, so just change it to wp. -admin and then be able to access that, so this gives you the ability to disable it based on user roles, so we can say that only selected roles can access this.
It's up to you to set them how you want, but we could set it to editor and so on so you can select it and set it how you want. If you want to hide the admin bar, you can also do this to remove the bar you see at the top. the screen to save the changes there, jump to the account page and this is where we can now go in and easily add additional pages or additional subpages, so what we're going to do is add we can set up a new subpage, then the title for who can have access to it, etc., so you can still limit several different functions to different user roles, which is great to see, so let's complete this now, so the first thing I'm going to do is give it a title to this and we're just going to say add album, the slug is filled automatically, but you can change that if you want, the template is the item or the template that we just created, so just start typing in the album and you can see that There's our add album template, so you can choose to hide this from the actual menu for the profile area.
If you want to do it, you can do it. The link is still available. We'll leave it. as is and then we'll leave this available for all user roles so you can still choose exactly who has access, but we'll leave it as is for now, okay, so let's save these options and now we should have that new section. added so we can add our custom CDs and albums, okay, now we're in our account section and you can see there's our new add album entry. If we click, we'll go in and now we can fill in the relevant details for an album, so let's do that, let's just add our first album andlet's see how it all works so I've already gone ahead and filled in the relevant details to make it easier let's just submit this and that's it the form has already been submitted successfully so now that's been added in our dashboard but also sent an email to the admin and set it to pending review.
Going back to the dashboard, you can see that we entered our custom post type for albums. There is the title of our album that tells us that it is pending. and we can go in if we want, we can edit this preview, whatever we want to do, there's our album title, there's our information, the featured image is embedded and also our custom information underneath and if we open the emails we'll see exactly what appears , then there is our personalized email Hello admin, there is a new album waiting for your approval, then the album title and it is inserted dynamically from the macros we saw, so now that we have seen how to insert it, we now need to go through a very quick process . to create a way to list the albums and then also be able to edit and update those albums, so let's take a look at those options next, so let's start by setting up the format that allows us to edit any of our albums, so let's go back to the form now from Jet Engine we're going to add a new form and we're just going to call this edit album.
This works in a very similar way, but there are a couple of steps we need to keep in mind. To know how things work, first of all we need to have this to know exactly what post we want to edit, so we need to make a couple of small changes to the way this form works compared to how we insert new information in So, first nothing, let's go to the post id section because in the first example, and we kind of set it up, we started inserting a new post, I didn't need to know anything to do with the post that we were trying to update or edit because everything was new, so we need to change this a little bit, we can leave the post id hidden, the current post id, all those things are perfectly fine, but we need to change the value of this field from the current post id and change this to be a URL query variable so Let's choose that and then we have to put in a variable key, so all we're going to do is use the underscore id after the underscore, so this will be the identification that will be overlooked when we believe. the edit link button for this album, whatever we use, it will override the query variable for the post id, so underline the post id underline, that's it, we'll apply changes there and now we have edited the post id so we know exactly which post. is what we're going to edit next, let's make the submit button a little bit more obvious, what we're going to do, we're going to edit it and we're going to change it from submit to update and apply changes, nothing else needs to be done.
It's going to be changed there, okay, so those are the basics of our form. We will come back and take care of further shipping actions. We need to do the same thing we did the first time and link all the different fields that we want to be able to. edit, so let's add a couple more fields, so first of all we'll need to add the title for the thumbnail and finally for the actual description or content, we'll come back to our custom fields in a moment, so just place them where they are. we want above the submit button and let's edit them so that the first one we want to do is for the actual thumbnail like we did the first time, we need to change this from the type to go down and I want to choose media as our option could change the name of the field again because this is one of the built-in fields to underline the thumb tag.
If you want to place a label, you can do so. We're going to uncheck it because this is it. edit things so that as long as there is one there we don't have to worry about user access, we'll say any registered user like we did before, if it's checked we'll check this and the field value we'll set to attachment ID for So now you know that you are going to upload the file and insert the attachment ID information into the database. We can set the same values here so that only one file is a maximum of five megabytes and whatever. image formats that you want to apply for this once we've done that and everything is set up there, we can make sure to hit apply changes to confirm those options.
Next on our list is the title of the post itself, so let's edit this. field and we'll do the same thing the text is okay, the text is okay there this time we're just going to put an underscore in the underscore title and if you want to take a label, you can do that here also uncheck the required one and just make sure that everything is set up the way you need, obviously you can modify this to make sure it's exactly how you want it to be. The most important thing is to make sure you have things like the post title and the right links in there. so we're just going to put a tag, we're going to apply our changes there and our third and final option is going to be for the actual content or description of the CD or the album that we're actually putting in the same as we did first. of all field name wysiwyg underscore underscore content tag will be post content or album information, whatever you want to put in there and we'll leave everything else set as is and just apply changes now without those two. additional fields for our custom fields and place them below so we know the first one will be for the artist text.
Okay, we just need to change this for the artist and we're just going to put the album artist into the required tag. I'm going to uncheck that option and apply the changes there so you can see this is repetitive, but it's pretty quick to do, just change this one and let's call it duration, okay, I'll uncheck required and visibility, that's okay, okay . Now we have set up our form but there is one more thing we need to do and that is to check this option, it says preset form value or form values field, so now this has a key purpose and that is to extract the post data that we are editing in the form fields so the title, the thumbnail, all those things will be pre-populated because we are editing a post instead of creating a new one, now we have to do something that is important if not If you don't do this, You can get yourself into some hot water because things are just not going to work.
The source post is fine and there are some other options there, but we're going to leave that set to post, but we're. I'm going to say get the post id from the current post, it doesn't know what the current post is so we need to change it to the URL query variable. You can see that it prepopulates the post underline id for us, so we don't need to do anything there, so now this just says to prepopulate these form fields using a post's URL query variable and then extract the data from the database using the post id as a pointer for this particular post, hope that makes sense, now we just need to map those fields, so the post id, let's change that and it will be the thumbnail from the post id, it will be the post thumbnail, whoa, come on, let's pull this up and we have the post title. the content artist will be the post meta and the artist will populate there and then the duration will be the post meta and the duration there now if you're wondering where we get these values from, they're basically the field. names that we set when we created our custom post type, artist and duration, so again I hope that makes sense, now that the first part of the form is ready, we have created the fields we want, we have set up how they want to work, we have extracted the information from our database using the query variable and we have pre-populated each of those field entries, now we need to go through and tell it what we want to do when we hit the submit button like we did. when we create a new post, let's remove this option to send email and change it to insert or update, so insert an update.
Your post type in this example will be album, the status of your post, we can set this to go back to draft or pending review, whatever we want or if you're comfortable we can set this to keep the current state, so we'll choose that option and now we're going to map those fields again because now we're mapping where that data is. it will be inserted into the database when we hit the refresh button so the post id will refresh the post so that's really important we need to set that and then we just have to do the same thing again so its thumbnail will be the title of your post because the content artist, so we know it's going to be artist, is the name of the custom field and then postmatter again, which is going to be the duration, which again is the name of the custom field.
We've basically done what we need to do now. create that updated version and insert the data into the database for us now, once we have done that, now we need to do one more thing that will be useful and that will redirect us to a page, so let's close this. Let's say apply those changes. I'm going to add another notification. We're going to change this type to redirect to page, so redirect to the page you want to redirect to. Let's say we want to go to a static page. and you can select the page you want to go to so once refreshed you can go back to your account home page or if you want you can say custom URL or current page so we choose current page and we add a query argument to the redirect, so do you want to enter the post id etc, what would you like to do?
It's up to you or if you want to deal with this, what we're going to do is we're going to say this is going to go back to our static page and we're going to set this back to our account page, okay, so we're not going to pass any query variable or anything else, we'll just say once someone has updated the album. I'm going to go back to your accounts page, so now just make sure you hit Apply Changes and update or save the form, so that's done, we need to create the template, so to go back to our templates, save the templates. to create a new one and we're just going to set this to be a page, this is going to be edit the album and we're going to create that template now.
I'm going to quickly go through the process that we're just going to add. in our two columns and we're just going to insert our form and our navigation, so we'll go back to the left side, scroll down until we find the profile menu and drop it. inside, set it to vertical and just style it and then we'll do the same thing we did before, which has come down, choose our form, choose this to edit it and we have edit the album and set up For this to be ajax, all we have to What to do now is to press publish in this section, go back out of here, go out to our control panel and we will go back to Jet and from our Jet menu we must go down to the profile generator because What we have to do now is insert this in the section of account in our profile creation section, but we don't want anyone to be able to see it, it just needs to be there so we can reference it and I'll show you what I mean.
As we move through the process, what I'm going to do is go to the account page, we're going to add a new subpage and we're going to call this edit album. It's as if the template we have is perfectly fine. I'm going to search for edit and we're going to choose edit album from there. I'm going to select the option that says hide from the menu, choose that and what that means is that the page is accessible so we can still use it. I just don't see it in the dashboard where it wouldn't make any sense because I would click edit and there would be nothing to edit so we'll hit save there and go back to our account page and just refresh this and we'll see that link doesn't appear which is exactly what we want, so now we need to create a page that has a list showing all the albums, including an edit button to Do that, I'll go back to our dashboard and this time we'll go to the listings and from there we'll create a new listed specifically just to show and allow us to edit the albums so let's just create add new and post okay we're going to change this to albums for the pro from the post type because it's our custom post type and we're going to call this list albums and We will use Elementor for thisdesign purpose. so we'll say create list and then we can build this now.
I'm going to keep this really very simple. I'm just going to place a simple design on the left side that we're going to put. the album image itself on the right side, the title and the edit button, so to do this, we'll go down to our widgets for jet engine again, take the dynamic image and place it in the first area. and you can see that the post thumbnail is being embedded, which is exactly what we want. If you don't see what you expect to see inside you, which you may not see, if you're working with a custom post type, you can simply go down to the settings option at the bottom left, go to the listing settings and then set what you want inside here for your listing source and from the post source and you can adjust the width of the preview etc. so we'll leave it as is.
To get back to our widgets, we'll scroll down to our jet options again and grab a dynamic field and use it for our album title. Now you can see. this pulls the data because it's smart enough to know that you probably want the title, but if you want to change it, you can wrap it from the source and from the object field so we can choose between the user object after the term. data, then metadata options, etc., and within your object field, this will change depending on what you choose as a source, but for this example everything is exactly as we needed to be fine, so the next third and final step is to add the button that allows us to edit this particular post, so we'll come back to this and scroll down.
I'm going to take a dynamic link widget, put it under the title and there. come on, so it says read more doesn't make sense, so let's say edit album makes a lot more sense and now we need to specify where it will go when you click on it, so first we need to make a couple of changes here. What we want to do is just specify where the permalink is going to go now the permalink would just take us to the post, we couldn't edit it we would just see the post which wouldn't make sense so let's change that and go to to choose the page profile because we need to send to that profile page the edit album template that we just created, but we hidden it from our navigation, so we'll just choose this and say edit album, so we've created the link now, but we need to tell that edit page what URL do we want to work with, in other words, what post do we want to edit and this is where we take a look at sending the query URL, so now we need to send the query argument or parameter through the URL to do that, we enable adding query arguments, so we select that and that will give us this option below which you pre-populate what you think is correct in this example, is exactly the post id that you have used is correct. several times in this example the post underscore id will have this little section added at the end which is one of the typical macros, if you have ever used anything to do with macros within the jet engine you will be familiar with these, you can see there's a list of them above, but what this basically says is that we're going to add this to the URL.
The post id is equal to the current id, in other words the current id of this particular post we are on. Clicking to go to edit again, I hope that makes sense, it may be a little confusing at first, but we are literally creating the URL parameter from this individual list item, so with that in place we've pretty much done it made. what we need, we can style it and make it look more like a button if we want, so let's do this quickly so it makes a little more sense, we'll set it to white, we'll set the background color to be a solid and we'll use this blue like we've used before and all we're going to do is add a little bit of padding around this so we're going to say at the top there's going to be five bottles, you're going to have five left and on the right you're going to have 10 each so now it looks more like to a button and what we'll do is just to make it a little bit easier to see what's going on, we'll just zoom in and specify this. to be aligned to the right side, okay, we'll hit update this, so now we've created the list through which we link it to the edit link and we're getting to the end of what we need to do.
Let's exit this exit to our panel and we're going to create one more template, so we'll go back to our templates to save templates. I'm going to add a new page template and we're just going to set up This is going to be a page and we're going to give it an album list name, we're going to create our template and once we've done that we're just going to place our list, scroll down until we get to the album widgets. our jet engine, drag our list. grid inside, I'm going to set this, we're just going to do an album list search, there we go and we're going to set this to just be one row, okay, so you can set this to as many as you want, so let's say that we'll set it to 12 and if you want you can just put any type of navigation over here, anything you want to do to make this stick and have all the features you need, press publish there and now the final stage we need to do to make this work is come.
Back in the profiler within Jet Engine, we'll go to our accounts and add another subpage. Right now, we'll call this list albums and then we just need to find the template. we just created what was the album list template, there we go to the album list and what we're going to do now is just hit save there and all of that should be done so we can go back to our accounts page and we just go to update this make sure everything is updated there is our album list click there and there is our album we can click on edit album and now we can make whatever changes we want to that particular album that we want to add to a new album, we can add a new album, this is how you can create your own custom settings within this panel so that you don't have to use it with the built-in functions that you have as part of wordpress or to handle just your real profile, you can use this For anything you can create with a jet engine, there are so many options you can use with this, it's a little crazy.
We've covered a lot of ground in this video and it's pretty easy to get confused with all the steps we need to follow to get everything. set up correctly, so feel free to use the timestamps in the description if you want to go back to any of the sections of anything I've covered or just want to recap the general topic now. If you found this video helpful, please consider it. by subscribing so you don't miss any of the future tutorials I used for the croco blog. Now all applicable links are included below. If you have any comments, questions or comments, please post them in the comments section.
My name is paul c, until next time, take care.
If you have any copyright issue, please Contact