HOW TO | Powder Coating at home | DIY / CHEAP / EASY
May 01, 2020What's up guys? This is Brad, a fabulous hourglass and in today's video I'm going to show you how to apply a coat of
powder
athome
. I'll tell you what you need. I'll show you how to do it and we'll put in another skill. your toolbox, let's get into this, there's a new photo with little cracks and a rusty frame stocking, but it's okay, buried in the night, come on, Marcus persuades vicos, he's still standing next to you, Sisco, the I got okay guys so when it comes to working on yourhome
shop maybe you're working on a project maybe it's made of aluminum steel or stainless steel or something like that maybe it's corrosion resistant maybe it's aluminum and it won't really do anything except develop a layer of rust, but if you're working with mild steel and that steel can rust, then you'll want to put a protective layer on it now, in the past I used to use a rattle can and just put in what I needed to make sure it didn't rust.
It wasn't a very good solution some people are very good with spray paint. I'm not one of them, so you might as well mix the paint and shoot it with a gun. I've done a couple of things. so it's a long process and for small parts it's not really worth it, finally something you can do in your garage just apply a coat of
powder
paint now, the only thing I'll tell you now about the powder coat is that it's also very complicated and you must do it too. wear a respirator, we're going to go over everything you're going to need to get started on this and I'm going to give you a couple of pro tips that I learned after powdercoating
probably all of the twelve thousand parts in the last year and a half or so, the most important thing that What you're going to need is a powdercoating
gun and a power source, that's where this comes in handy.
More Interesting Facts About,
how to powder coating at home diy cheap easy...
This is a powder coating gun and power supply from Eastwood. Now I'm not looking to get super fancy. I'm not looking to build a huge oven. I don't want to put a coat of dust on your car wheels. This powder is purchased from Prismatic Powders com. They offer a consistent quality powder and are the only place I can purchase it. things you will also need a regulator now you can have a regulator on your gun or you can have a regulator on your compressor now in addition to the regulator what you will need is an air and water filter to be able to filter that The moisture that will be in your lines will simply be will accumulate inside the tank, which is important.

The moisture that will be in your air lines will affect things much worse than you think, especially when it comes to powder coating if there is moisture in the air. line and that moisture hits that powder really very fine, it will disturb it, make it heavier, make it extremely inconsistent and it will not give a good finish in the end, we will also need some type of air, you can use a very small air compressor because the Powder coating does not require a lot of air, you will need a place to apply the powder coating and I do not recommend just applying the powder coating in the middle of your garage and letting everything float in the air and fall to the ground it is a very messy process, so what I do since I'm not powder coating all the time and it's here and there.

I make a large Tupperware container with a powder coating booth. I cut a hole in the back. of that, I put an AC filter in the back, tape it down, and then I put a box fan in the back that will pull all the air through that booth and blow all that fine dust out of the air into that filter and out of your lungs this is not going to replace a respirator so don't think it will be okay guys besides the powder coating gun, power supply, powder, regulator, air separation device and water, air compressor and powder coating. stand, you'll also need an oven, okay, whether it's an
easy
bake oven that you got at the dollar store, just kidding, it at least needs to be able to reach up to 400, maybe 450 degrees, so one thing you can do is a solution reallyeasy
is to use a Target Walmart toaster oven, just a good size pizza toaster oven that will reach those temperatures.The only downside to using an oven like this is that you won't be able to put a lock on it. okay so the first step for powder coating is the preparation of the material before the powder or anything sticks to what you need it to stick to, it needs to be clean, it needs to be oil free and it just needs a good preparation before. anything else so this piece is a laser cut mild steel plate now it's got a little bit of rust there's a little bit of water spots there's not too much slag or anything so it's pretty close but we have to hit it with the DA very quickly and clean it with acetone before doing anything else, so something as simple as using a DA or an orbital sander to finish a piece before applying the powder coat works just as well as polishing with sandblasting now for flat parts or anything easy to get to a DA works well by simply cleaning the part making sure it is free of oil, grease, rust and has a good finish so the powder coat will adhere to your key now if you have two frames or motorcycle frames obviously if you're in a production location that powder coated the frame they would sand it all down before filming it and that's how it works but you can definitely get by if you put a good finishing on your part and now it is clean after DA or sanding.
Take it down or just put a good Universal finish on it, hit it with a little bit of acetone, so after you finish doing your part, making sure it has a good Universal finish, remove any slag or anything from your Part D burr and make sure it's nice and clean. you'll get some acetone on a rag and you'll clean your part now make sure you wear some acetone resistant gloves, acetone super aggressive on the skin and make sure you get everything as good as you can, you don't want to leave any fingerprints of oil or anything If you want it to look good, so after you have prepared your piece in your da and cleaned it with acetone, if you don't have a DA or an orbital sander, I recommend that you go and pick one up.
The Dewalt orbital sander from Home Depot is reasonably affordable and It gives you almost exactly the same finished look as a real dual action sander, so when you look at your powder coating gun and want to set it up, one of the most important things is how much powder you put in the hopper. Now you'll want between a fourth and a fifth fool if you start getting to the middle of the range or somewhere above that you'll have some major powder problems and nothing will work. suitable for you, make sure you have an inline regulator and water separator, which will be important.
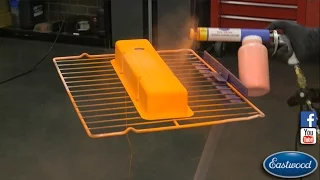
You don't want any fluid or any type of liquid in your line to come into contact with the fine powder in this gun. You will have a switch, these come in finger switches or pedals, it just depends on the powder coating gun you use, basically you have to hold it down the entire time and that will actually complete the circuit and do the whole process. it works, if you don't hold this down, currents don't flow through the part, your gunpowder no longer has a static charge and won't stick to what you're shooting at, you'll also have this little alligator clip and basically when you hang apart from something, It's going to be hanging from metal, maybe it's a metal rod or it's hanging from a hook and that's going to be connected to a rod and you're going to want this little alligator clip attached to the rod or directly to the part of it if that's possible and that's what will really complete the connection now when you get into this dual voltage powder coating gun the power supply will be dual voltage and you will have an option for one or one option. for two now, if you change this to your option for one that will be for your smaller parts, your thin sheet metal supports, things like that and then the configuration for number two will be for your larger panels that will cover a larger area . and you're going to need a little more power guys, so after your part is d8 and you clear the pass, the hopper on your powder coating guns will be filled with gunpowder at least a quarter to a fifth full. what you want to do is take your part, find a good place to hang it, whether it's a hole in the piece or if you have to wrap some wire around an inconspicuous area, place your piece on a nice and secure hanger, you can move it and that's it.
It's not just going to fall over and you're going to hang your booth now what I'm using as a booth is a Rubbermaid bathtub that I cut the back off, put an A/C filter in the back and then a box fan behind it. that. and what that does is it sucks air cycles through all of that and it keeps all those little particles out of the air and into the filter and that's what you want because this is a super dirty process now that your part is hanging. there you will have to hang your piece from something and the easiest way I found is by using some 3/4 square tubing, drilling a couple of holes, tack welding some quarter twenty nuts and then just using some threaded eyelets which are room twenty, you screw everything in there, you have five, six different places to hang small parts, you will want a good connection, so if there is mill scale from being hot rolled steel, etc., you will want to grind everything. take it off and make sure it's a shiny metal, so now that your parts are clean, your powder coating guns hopper is full of powder, your air compressor is charged and ready to go and you have something to spray, you can Use this idea if you want.
I think it's a very good idea, it keeps everything nice and clean. Make sure you have something solid and strong to hang the parts on and make sure the alligator clip on your power supply is connected to that or none of this will work, so before you start shooting you want to make sure you have a regulator connected and you want your psi to run between fifteen and twenty, that's all you'll need, if you run anything more than that there will just be gunpowder coming out of the end of your powder coating gun will hit the bottom of whatever you're shooting at, it's just a huge waste, you'll get too much powder on your part and then you'll start introducing little particles and things that are imperfections after you bake the piece. so 15 to 20 psi, a very light mist while you're shooting and that's all you're going to want to do now, when you're filming your part, you don't want to just sit there and cover it with dust, just sit there. in exactly the same place you want to move back and forth, rotate your shoulder, move your body and try to cover that part with your weapon.
Well guys, one tip I can give you is that you have to be very consistent when applying the powder. you need to move that gun like we talked about and really try to get an even amount of powder across the entire front of your park. One way to check it once you're done is to use a high powered LED flashlight shining it into your parking lot and if you have a reflection coming back at you through the layer of dust, you have a light spot that needs fixing guys like that that after you take your piece out of the powder coating booth and have checked it with the light to make sure. that you've got a nice even layer of powder on your part on both sides of the edges and everything looks good now it's time to throw it in the oven.
Now most powders are baked at 400 degrees for 20 minutes, so 400 degrees for 20 minutes. minutes after your part starts to get wet, meaning it looks like it's melting or looks like it's wet on the surface, it will start its timer as soon as it sees that happen and continue for about 20 minutes until dry out, so let's go ahead and throw this piece in the oven. A couple of pro tips guys, when it comes to powder coating number one, you're going to want everything to be extremely clean, no grease, no oil, no acetone, clean all your DEA parts. or apply some type of whiskey brite or something to get a nice universal finish and then clean all parts with acetone.
Try not to touch them. Any grease or anything left on your dust layer will look like it's stuck on, but as soon as you cook it, there will be an extremely large blemish wherever the oil or grease stain is number two. Be creative when you are hanging your pieces, don't just hang them from the most obvious area you can because remember you have to hang them. Pieces and sometimes dust won't exactly cover where you hang the piece from, so keep it discreet and hang the piece somewhere you can't see it. Number three, be careful when you walk. around with your pieces, any hitting of the pieces, any falling of the pieces, obviously it's going to knock the gunpowder off and you might not even notice when you walk by and your hand hits the thing and your piece hits and throws a bunch of gunpowder around. off, but you will notice that after your parts have cured and you take them out of the oven, okay guys, after you have cooked your part for 20 minutes in the oven at 400 degrees after you have dipped it, you are going to take your part leave it cool and then check it.I mean, it's a fantastic finish, it's extremely scratch resistant, it's very professional, it looks so much better than most cans of paint or amateur paint jobs and it's super easy so if you want to get it. a good finish like this at home on the pieces you are making follow my simple steps listen to the couple of pro tips I mention there if you like this video give it a like guys if you want to subscribe and learn tips and tricks on things like this and solder the next one channel, I think you will enjoy it beyond that, thank you all for watching another video.
If you have any copyright issue, please Contact