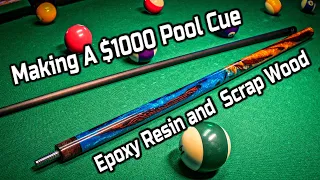
How To Make A Custom Hybrid Epoxy Pool Cue On a Wood Lathe Plus Trick Shots 4k
Feb 27, 2020today i will show you how to
make
acustom
epoxy
hybrid
pool
cue. I started with some black walnut that was originally intended to be firewood
, thewood
was to be split into pieces that would fit into acustom
mold made to cast the However, this is a bit of a pain since the handle of my ax broke, so I grabbed a small sled and the ax head and got to work since my standard pressure tank was too small for this 30 inch mold I had. I built a custom pressure vessel using 4 inch diameter PVC, the PVC would work well for the 45 pounds of pressure I planned to use to debubble theepoxy
while curing so the mold would fit, although I needed to trim it. the corners The band saw with the table set at a 45 degree anglemake
s quick work of the corners and the mold would now fit perfectly The mold was specifically designed to allow the walnut chips to be placed around a solid center peg, this It would give me a solid core to install the pen joint and a holding bolt for later, as well as allow for vibration damping through the butt of the cue.
The goal of this was to give the cue a nice, crisp hit but not send too much vibration to the shooter's hand. Now that the mold was ready, it was time to start putting in the nut. Now this was a little more complicated than you might think due to the fact that all the splinters are really crazy shapes and sizes and they all had to fit. this mold around the dowel and it had to fit almost like a puzzle. This took a few different tries and a different orientation each time, but I finally got it ready to pour the epoxy.
More Interesting Facts About,
how to make a custom hybrid epoxy pool cue on a wood lathe plus trick shots 4k...
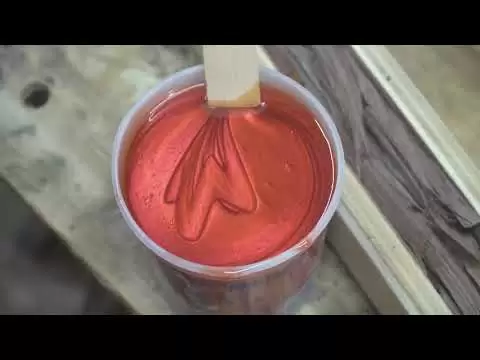
I estimated I would need about 40 ounces of jar total. epoxy for this particular pour, I made sure to use exact proportions of hardener and resin that way I could guarantee a perfect result from the epoxy and make sure it hardened perfectly all the way around the end of the cube. Now it's something that people overlook. Many times it is how they mix their epoxy. Two or three minutes of constant mixing is worth it to ensure how it sets and how it mixes. After mixing the epoxy properly and making sure everything was good, I added some of this beauty. chakra read from KP pigments, this is probably one of the most beautiful red pigments I have ever used or seen in a colored epoxy and it is crazy, it blows me away every time I look at it, now there is something else to do with this mold.

Because of all these little splinters sticking out and strange angles, the poor guys had to do it very, very slowly a couple of times. I tried to speed up and had to stop what I was doing to prevent the epoxy from running over the edge of the mold. As you do this most of the time you just pick out the little gaps and use a small squirt of epoxy to allow it to penetrate all of the wood pieces and this also helps push some of the air out of the mold as you do this. I was pouring but with this one in particular and that was very difficult because of the arrangement of the wood pieces in the mole because my mixing glasses could only hold about 30 ounces, I had to go back and mix 10 ounces more than the total. epoxy bottle and finish filling the mold.

There were a couple of small marks on each end of the mold and this would give me an idea of exactly how far to fill the epoxy to get a good fill around the blank. Since it's winter here in Mississippi and it's a little cold outside, I didn't want this to get too cold, so I decided to bring it inside and bring the pressure vessel with me as well. Now this pressure vessel, as I mentioned before, is a 4-inch diameter piece of PVC with both lids sealed and one with a twist on the lid with some thread.
After placing the mold inside and securing the lid, just add about 45 pounds of pressure and let it cure for at least 24 hours. Once the epoxy was fully cured, it was time to remove it from the mold. Now I had designed this mold so I could cut the end caps and have the dowel along both ends of the mold and then everything. What I would need to do is remove the three side pieces with some chisels or screwdrivers and I also lined the inside of this mold with packing tape which made removing the epoxy blank much easier.
With the blank removed from the mold, it's time to clean up. Lift the top and remove the corners. There are a few different reasons to do this. The main reason for cleaning the top of the blank is to remove excess epoxy wood and give it a square touch to work with before removing the corners, although be sure to find the dead center of the ends of your bite to find the center of your bite place a ruler from corner to corner and simply draw a line and then again from the other two remaining corners the point where the two lines intersect is your center mark, this is extremely important as this center point is also the mark To install your joint pen, if the joint pins and all the sinners are not perfectly straight, it will cause the glue to work poorly or appear hot after marking its center on both ends of the blank, it's time to remove the corners, This is done similarly to how you would remove the corners of the mold this time, although it is to make the rough turning of the blank easier and cleaner.
I have found that turning a blank square corner with epoxy usually causes the epoxy to chip or even crack. This is something to avoid as if it chips or breaks enough it will affect the final product and can also make it harder to get a smooth final finish due to high and low spots. From chasing chips to removing the corners of the mold, I set the bandsaw table at a 45-degree angle and use the guide to cut the four corners of the bike. Now the fun part is to start turning the blank on the
lathe
like most do. turning projects until they reach the shape of a row.I keep the speed a little slower around my average lane speed using a spindle gouge. I start removing material to round off the blank, as you can see I am using the smaller tip of the gouge this is to reduce the chip as much as possible. Also make sure your tools are as sharp as possible and be prepared to sharpen them frequently, as the sharper your tools are, the cleaner the cuts will be. You'll also see me using some carbide tools and that's not the case. a bad idea to rotate the blade and find a new edge before you start cutting an epoxy blank make multiple light cuts and do not cut a section of the cube to its final diameter all at once progressively shape the entire length of the cube before continuing, this will require moving your wrist back and forth repeatedly, the center of the cue is the most difficult, pressing hard on the cutting tool will cause the plane to bend slightly and skip tearing off some of the best tips that can i find epoxy: Take your time and don't rush, remember you can always remove more material, but you can't add back what you already removed once the dowel is rounded.
I use a flat sanding block and a piece of 80 grit sandpaper to get the bench completely smooth. Two things make it easier for me to identify high and low areas and also using the flat bench allows me to achieve a nearly perfect cylinder, the closer it is to a straight cylinder with the same size all the way around, the easier it will be to build. the tapered part of the end section of the hub, be sure not to hold the sanding block with the sandpaper in one area for too long as the heat can cause problems with the epoxy or could burn the sandpaper as well if you hold it. keeps still.
By itself, you are actually removing a good amount of material with this 80 grit and can cause a low spot; You want to use the flat side of the sanding block so that the entire portion of the blanket is as straight as possible as a cylinder after the preliminary phase. When sanding the blank I noticed there were still some high spots so I went back and used the carbide cutting tool and slowly worked them up until I got the correct dimensions. Now it's time to mount the gasket cover to the key head, the gasket cover. I'm using, accept a tenon with a small lip on the outside end and epoxy it in place.
I measured the width of the gasket cover and marked it on the bench, as well as putting my calipers on the widest diameter of the gasket cover. opening this is a very tedious part of the build and must be done very carefully, remove small amounts until you are very close to the final diameter of the tang. You should enter the gasket cap once almost to the point where the tang is in the correct spot. I actually stopped using my calipers and started testing the gasket cover fit. In my opinion, this is a much more accurate way as you can get an idea of how exactly the cap fits and if you need to make small adjustments to the tang, do so. that way in extremely small increments you won't cut too much and then cause the joint cap to move on you while it is on the tenon, once the joint cap is properly fitted to the tenon it is time to apply it Epoxy now, in my opinion, should remain. on the
lathe
and once assembled you should leave it on for at least 24 hours before doing anything else with it, it's a bit of a long process but this is how you get the best adhesion to the cue butt. and you don't have to worry about the fit or any problems with the joint cap moving, cracking or coming off later, simply place the epoxy on the spigot and also on the inside of the joint cap and while installing the actual gasket cover turn the gasket covers back and forth slightly so that everything is well covered and let it sit for a minimum of 24 hours.Now it's time for the most critical part of the build and the part that made me the most nervous during installation. The joint pen has to be perfect, if it isn't you may have to start completely from scratch. I used the step drilling method, starting with a countersink bit and working my way up to the appropriate bit so I could install 3/8 by 10 threads for my joint pen, take your time and in no way rush this part. It's okay to double and triple check everything before moving on to the next step. The reason I say this is that your joint pen is the heart of your cue if the joint pen is not directly in the center of the cue or if it is not perfectly straight once the cue is put together and the shaft is added, the The shaft will actually be off center and not hit where it is pointing or the shaft will appear warped or the entire cue will appear out of place, this will greatly affect how well it plays and how good it feels in the hand.
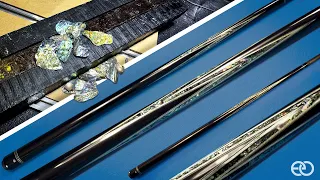
Another part I highly recommend is using a self-centering pen. I used one from Atlas Billiards and it worked great once everything was tested. Properly place the epoxy on the pen in place and do not move anything and wait a minimum of 24 hours for the epoxy to fully harden before moving the dowel, much later now to install the cylinder head cover which It goes on the opposite end of the cylinder head. the dowel as the joint cap, that's why it's called a butt cap now which, that being said, is installed in an almost identical process to the joint cap just to measure everything, it goes to a tenon with a small step up down on the end and epoxy it in place, be sure to also cut your bite length to where the end of the bike length is exactly yours or just a little longer than your desired finished length, that way will have enough room at the end to where you can trim the bottom and the length of the base section of your cue to be exactly what you want it to be to gain the full length of your tines now, just like with the cue cap. the joint, just add epoxy and let it sit for a minimum of 24 hours to fully harden much, much, much later now it's time to give it the final shape, start with a glue joint section and work slowly the end of the joint cap to where it is just a little larger than the end of the joint section of its shell.
The knee joint cap is a small amount larger than the axle joint section and will allow for final sanding and finishing to achieve the perfect diameter. If you cut them perfectly at this point, after shipping them, the joint section of the end section will be a little larger. too small, the section of the joint is the smallest diameter of the base of the hub and the rest of the tail has a conical shape, this means that from the end of the joint to the end of the hub there is a smooth conical shape of a small torch like you.
When cutting the cone, remember that you can stop and use 80 grit sandpaper with a flat sanding block to remove any rough edges or anything you need to do to find high and low spots or to smooth out the cone, somethingwhich you should definitely keep in mind. Please note that you should periodically stop removing the tail end section and weighing it, as the shape, size and diameter will affect the weight of the hub end. The more material you remove, the lighter it will be. It has a removable holding pin on the back of this tail, but those only go so far, so you want to make sure you dial in your weight as best you can and with the material that's on the tail, just take your time and check it repeatedly. and you'll be fine, the process of adding removable weight bolts to the end of the tail is almost identical to making any joint, so the only real differences here is the size of the bits and threads you're installing.
It will allow you to add a removable weight bolt with an Allen wrench that can be attached to add weight or removed to take weight off the tail. Also, when it's done, we'll drill a small hole that's big enough to fit. a rubber stopper, this is so that when you place your tail on the ground while playing, you don't break the end of the tail or cause any damage to it when installing the rubber bumper, we simply use a 3/4 inch host bit Drill to the intended depth of the rubber bumper pin and then take 80 grit sandpaper and slowly smooth the inside of the hole until the rubber bumper fits very snugly.
You don't want the bumper to come off and you don't want to glue it on. place to make sure this setting is very, very tight. Now we are in the home stretch using sheets of sandpaper or a flat sanding block, sand from one end of the blanket to the other, this is where you are going to mark your cone, take your time and watch for the high spots or bass and also check your cone repeatedly. You want to be able to place a ruler on the shaft and align it all the way down with no light under the groove, repeat this process several times until you get to 1500 grit. 1500 grit sandpaper.
I use a wet sanding method to make sure the end of the bias be extremely smooth and have an excellent surface to apply my finish. I decided on this cube. I was going to make a nice thick finish with CA glue. This was going to be a multi-coat finish that I was going to polish with micromesh on each coat until I was happy with the finish. With the micromesh I'm using, it goes all the way. up to 12,000 grit which I wet sand from one end of the glue to the other and if there are any imperfections I start again with 1500 grit and come back and repeat the process until the imperfections are gone, this can be a very very tedious process and takes a long time, but the finish is just great, it comes out like glass and feels great after that, I use some Turner wax or polish as you might call it, and ultra glossy, and I use that to polish the CA glue finish and give it a high shine, what's here, yeah guys, I had a great time making this
pool
cue, as you can see in the video.I love playing. I'm an avid gamer and I think I need to make one of these for myself soon, but with that being said, go check out Total Boat Epoxy, you'll love their Foxy products and go check out KP pigments, they have over 200 different pigment colors. The guys are lovely, they have a color change too so I'll be doing some projects before the release, they'll kind of show it off, that being said guys make sure to subscribe and follow me on YouTube and if you want to show your support. Head over to Patreon, there's a link in the description and I'll have some cool stuff there before I get home, so guys, thanks for everything, thanks for your support and I'll see you around.
If you have any copyright issue, please Contact