DIY How To Renovate an Unfinished Basement A To Z
Feb 27, 2020In this video, we'll show you everything you need to know to transform your
basement
from anunfinished
concrete place to a beautiful space like the one you see behind us. Video tutorials on how to build, how to drywall, how to make the floor, how to build. a bar how to make countertops how to build your bathroom it's all in this video so stay tuned we'll teach you everything you need to know welcome back we have a really awesome project this month we're doing abasement
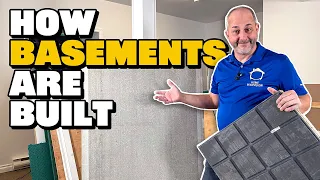
renovation from scratch to a 3 year old house so that the process we're going to use here is really simple: we're going to put down a subfloor system that gives you an air barrier, a moisture barrier, and then something that's wood that you can build your structure on. you don't have to bond everything to the concrete and that's because most of this area will be done with a laminate finish, a very nice laminate finish, but in some of the other areas we will do tile in the hallway and in the back area.
We'll have a bathroom here, so that area over there we'll frame it a little bit differently, so we'll show you contrasting techniques and then you can decide which one is right for your job, so a lot of us in the building. In history, we have come across this dimpled plastic before it was called plateau, but the reality is that it is not the name of the product, it is just the brand name of the product, so it is actually DMX and it is available at my local hardware store. I usually bought it. I use this for my subfloors under five-eighths tongue-and-groove OSB plywood and we can screw it to the floor with tapcon screws and that's my traditional basement system, but what I was curious about was this little thing here, so this is another product from the same company DMX is blue it's a three and one so it's insulated it's a vapor barrier and it's soft and padded so you can make your subfloor with this and laminate right on top of it.

More Interesting Facts About,
diy how to renovate an unfinished basement a to z...
They have taken the trouble to test it. and obtain approval to place laminate flooring directly over this product. I'm not a big fan of that, especially in this setup because I'm building interior walls and I don't want to put walls on top of this and I don't want to build my walls first everywhere and then fill my entire cavity with this because I'm on strike and we have this for the season, if and if we run the risk of a thaw-freeze cycle and moisture under our concrete pour. I want to have an air space that transfers that moisture through all of my interior walls and allows the building to absorb all of that over time.

If I build my walls first and put this up, it will trap moisture and get moldy. It smells no matter what you do, so this is a good product if you're just doing one room and already have walls, but if you're like us and building new walls, go for this system. The funny thing is that they are both plastic and at the end of the day, it is the same cost per square foot to install this and plywood or this alone, so it really comes down to what is most convenient for you and your situation, but I would recommend both products, they both work very well.

It's just going to be easier for us to do the layout this way a little bit more than I need, but okay, let's do the same thing again on the other side of the room so you can see that what we just put here is square. . In terms of footage it's almost 400 square feet, it took about 10 minutes which is amazing, we taped it up with new blue masking tape. This material is the same as the red one, only it has been tested and approved for wet areas, so it will hold to the plastic. plastic even when wet, so now we have a vapor barrier for all of these areas, which is brilliant.
You'll never get that. If you use a dry core traditionally when laying floors you would use a square like this tape measure and we're basically working with whatever is pre-existing, now we all know we never find anything square in a house so what we're going to do is use the techniques laser level and they can see that I have it aligned correctly. now and this line here represents a straight line from one steel post to the other and we're going to use this to set our square for the entire project this way we're going to build a wall in each of these areas and we're going to start everything square in that line because when you build, if you have something that's always going to be straight and square and everything builds off of that, the rest of the project moves a lot faster.
What we've done is we've marked our laser line and our laser line goes from stud to stud and it's off this point here, so we cut our plywood from our end wall to fit our door frame. plus three inches and then we also have some kind of plywood. Also, add a little bit of an extra half inch here because when I put these doors on the door, they're going to go here, they're going to open on hinges and when it's closed, the center of my door is going to be over the transition from the first floor to the Next, I'm going to move on from the laminate. to the mosaic, so by doing this ahead of time, I'm going to make my life easier in every way, one, two, and then three, so we finished drilling some holes just to give you a little demonstration of how to do it. we secured this to the floor it's an SDS machine it's amazing it's a really good hammer drill you can see there wasn't much effort you didn't have to put your body weight behind it if you have one of these drills In fact you can change this equipment to hammer it will work It will take five times as long to do the job, but if you are doing a large space like this and you don't have one like this, go save it and rent it twenty five dollars a day it is definitely worth the investment we are using tap screws with the coated screw not It rusts pulls everything nice and tight even though we have tightened it or keeping our air space under the plywood, it doesn't have to be a lot because the air that moves will take any moisture that may one day get under this floor and it will transfer it throughout the house and it will stay driven forever and you will never have mold or mildew.
There is a mold type of problem, so you can see the system works very well, we need about six or eight screws for each sheet of plywood because it is tongue and groove, if I put a screw a foot from that joint, I am also compressing the other sheet. so you don't have to exaggerate much, just make sure that when you walk you get rid of the spongy spots, if you need to put some extra screws somewhere, that's fine, also while drilling, you can notice it. where you are you may have softer concrete and depending on the driller you use when you are drilling the hole, if the screws don't grab just make a small change, drill straight through, don't clean the hole as you go, sometimes the concrete it may be a little too soft, so if you just push down and leave all that dirt in the hole, then you'll have something there to attach that screw to the hole and it won't lift up now as we're going to look at how to frame your basement.
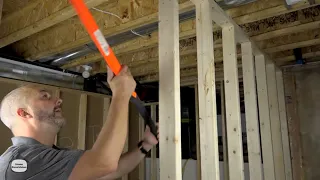
Now there are a lot of different situations downstairs, so it depends on where you live and where we are. We all have concrete basement floors and then wood frames. Sometimes we have walls with combinations of concrete and then wood. There are always different building materials here, we also have a steel frame, so we have to be able to join that, so we have a wooden roof, we have a steel frame, we have concrete floors, in some places we have the subfloor that We build and once that's anchored to the floor, it's really simple, you can make a pallet wall, which is basically laying out the boards, measuring, cutting, screwing and nailing them, lifting them, leveling them, squaring them, gluing them in place, the another option is to go directly to the concrete after doing it as an art.
The District Building Code requires that we have a vapor barrier between the wood and the concrete so that it does not absorb moisture from the concrete, that is important, it will prevent premature rot. I want to build something that will only last five years when it can last 40, so we have normal wood and when it comes into contact with the concrete it rots, really the wood is where you find the mold in your house, it's already in the wood, well, this one place. On earth it's the forest, what we're trying to do is make sure that the moisture content in our wood never gets to a point where mold starts to grow, so putting this in contact with the concrete will cause it to mold in our district. we're allowed to use a pressure treated wood that's right up here, this is a sienna brown, it's not green, okay, it's the same thing, different color and we can go right to the concrete with this without plastic, no, you know , sill gasket, no wraps. we can just screw it directly to the concrete floor and we can do it in two ways: we can place it first with our laser level, put a bottom plate on this top plate on the ceiling and we can put the frame in place because there are many cases where you pour concrete, your floors go all over the place in height or we can do a deck construction as well as put the bottom sill plate in, nail it in and stand it up.
I generally like to do deck construction, keep all my frames about 1/2 inch shorter than my roof and then we just shim and screw or nail into place as needed, so we'll cover both. In this scenario, we will go on top of our timber with a platform made of wooden tackle. and then we'll go on top of the concrete using one of these and try a couple different framing techniques to cover the bases. There are many ways to do it well. He has to find what works best. So this is a partition wall for our living room and a storage area.
It's our engine room. So what we're going to do here is a platform framework. All spruce wood doesn't need anything special because we have our sub. floor with our vapor barrier comes in and into our air space underneath this construction which I consider to be a 40 year construction, this wall will be here years and years after someone has bought and sold several times and what we will do is we will to build Stick it in our hole and then we'll use these bolts. They are incredible. We are going to pre-drill the steel. We're going to attach our frame to the steel with screws instead of just glue or maybe. some exploding ramsett nails hold the meat, make sure your woods are not twisted, you buy the same room with this cloth and here what is twisted, you can sit on the wood and you can manipulate it even if you are working alone, that's why I bought it because Sometimes I find myself eating a second pair of hands in the situation there we go now the way we're going to operate this to level this is really simple chords like the king of lasers so he likes to build lasers and I love it the system because He sets a level line up and down, you just can't mess it up so all we have to do is know that our top plates will level out for this because that's where the laser line hits well.
Ready, we have a wall. So the way we're going to attach this to the steel and you really have two options that you can use like a Remington impact nailer, but if you make a mess in there, then you're going to have to fight to get it out, this is a little bit simpler. Pre-drill a hole and then we'll drive the self-tapping screw directly into the steel. Ready, set, set, and then we'll build this wall right in front of the steel. Let's go with the top. and the bottom plate we'll cut a little bit for the door once we're done, but first we're just going to go into the wall so we can drive the screw into the wall and it also becomes our drywall backing.
You have to be careful because all of those studs seem to be in the same place, they are not aligned with the wall we started with, remember we put down our subfloor, we made this straight line, so this carries this stud, this carries a different part of the structure and as a result they are about an inch apart, so we will build a door in front of it instead of between them, we will reach the steel, which is our lowest point, so all of our measurements were based on the lowest point low, so that makes it easy for us and we're just going to nail this all down, this would be our header, we're just going to stay framing this because it's easier at this point, oh yeah, baby.
We will prevent this bad boy from moving with us since we are using our laser level. You don't have to stop and check the level and the square continually because we already know we're there, so now we basically have our photo frame. our outside frame on this wall I'll take care of this I'll anchor it now it's not going anywhere Gord is cutting my kings and jacks for the door, that's fancy carpenter talk for a piece of wood that goes from the bottom plate to the upper part. plates the king and the platform is a little smaller going to the top of the header let's nail themI'll probably put it flush here the door will open and then it will open come to whatever we're doing 35 inch hole for a 32 inch door that leaves you enough room with a 35 inch gap you have a 32 inch door 5/8 jamb on each side a little bit of space a little bit of suede a little bit of I'll give you a little bit of wiggle room in case you haven't made it as square as you should probably have some good practice getting started, so just I will align so as not to waste space on my door.
Now I only know when. you're doing something like this, leave the wood sticking out above the plate when you're screwing in a little bit an angle, we're going to have that screw, if it hits the wood it'll start pulling on it. nice and tight you can line it up flush damn, I have the line for the laser level, here we go because now I'm going to stand in front of my laser. I need to see what the hell I'm doing right again. Move it away from the wall a little bit once you make contact move your hand out of the way you'll squeeze it right into a pinch of your face okay I'll use a laser level you don't have to rush and let's say you hit the edge you just measure outside off the line one inch off the line okay throw that sucker read so what we do is we have a 34 inch gap plus the jacks your three inches make a 37 inch head so if we have We got the bottom level squared off and just put the jack in place, it should be on our laser mark BAM, perfect, there you go, whatever you want to do with it is working fine.
Well, the couple, hello, we'll go over the process on how. to build a concrete wall, so we have our pressure treated plate for the floor, our spruce plate for the top, the top plates will be interrupted with some pipes, so what we did was measure our footprint for the bottom and cut another piece a little. shorter so we have room to glue it in, we've marked our boards so we know where our uprights are going to go, okay just do the speed squared, measure it out of the market now we're going to put this on the floor, we've got our laser level lined up so that we can mark all our mentions here.
It is important that this is right on the money. Put your hand there. You can check your line because when we put the top plate on, we'll turn off the laser. level line on the ceiling, screw that real quick, then we just cut and measure and just stick the frame on the wall, so we've used a square here to know where we come off this wall. It's good to have things square. level it up now what are we going to do grab our gun Jeffrey has a gun so we just take our screw just like we did with the plywood for the floor you drive it into the concrete this is how we attach it to the ground we will make one of these every couple of feet on the plate, screw on top and then all we have to do is cut and measure the sticks again, make sure the level on your marks will have a wall, mark the wood where the laser is, so now we have the ceiling mark where the header goes is we're just going to run this in front of the laser below let's help with the ceiling place this edge of the board on that laser mark and it will be level with the floor plate with the ceiling plate place it in the pencil lines that we merged earlier and I can give it some weight because I'm short, I'm only 5 10 and a half Goliath here ready I'm fun, money is good, so now we're just going to mark this with 92 and a quarter.
Now don't forget that the reason we can do it this way is because the plate is beautiful in number and in our jurisdiction it meets the code of having something that is not going to rot. contact with the floor we are simply lining up with the marks we made on the two by fours before installing the top and bottom plate and as a result I don't need to worry about using screws, I can use knee nails all day so just one more framing summary we have a couple of your rules right we want level we want square so we get a laser although when you were involved in the laser level in your building technique it saves you a lot of time You don't have to stand around with a rod level, no matter how beautiful it is the bubble, it is never as accurate as using a laser, so this is a great way to work alone.
If you're working alone, this is now your second Hansel pair. all you have to do is continue to build these individual walls and where they meet, you know you just have to join them in the corners keeping everything flush, straightening out any warped wood back framing so that all your drywall has something to screw into. so when you've finished your room, stop and think about how I'm going to sell my drywall. I have all the wood I need and before you leave, back the frame and make sure everything is ready to move on to the next step.
There's nothing more infuriating than ordering drywall installed and having nowhere to screw the drywall anyway. If you liked this video, be sure to subscribe to the channel. We will show you all the steps in the basement, how to put up drywall and how to put down tiles. It's how to get it all done, then hang the doors and woodwork, and most importantly, the look on someone's face when they walk down the stairs and see the perfect finished job. So today we will install the new real Bell pro line shower hood. On this bad boy here, it's a new product on the market, the new Pro series, this is a hot cold mixing valve and then one outlet and then the second outlet.
Now interestingly this one comes with a three quarter inch crimp line or it's a half inch piece of male copper here so you can put a copper line right on top of it and extend it into a tub or you can add that little plug in there with solder, the other option you might want to try is shark bite, but upon closer inspection, I found that when you compress it as hard as you can, it doesn't allow the inside of that valve to really work and that comes out without any use. Do not use the shark bite on this valve, this is not enough. real Bell Pro tube, if you want to make a modification to make this valve a little longer stem then we could use your shark bite in this situation, the back of this wall is the storage room we would have access to.
It would be a perfectly legitimate installation, so what we're going to do instead is because we're going to open this valve and this is just a temporary thing. Here we're going to take it out because it has a rubber gasket and we don't want to overheat it, so we're going to solder our half inch copper cap, okay, and this is how we're going to do it. We'll do it first before we start construction because we wanted to give it time to cool down again before we handle it now at the hardware store or you can buy a little dummy soldering kit, it's a pretty new thing, it comes with solder, it comes with flex, okay, so we'll just light our torch. really simple, you'll hear the gasps, how to light the flame, okay, so here we go, so what I do is I just place my torch on the ground, we lay concrete, if you're on top of any other type of floor, put some protection when the solder drips it's actually pretty hot on the floor so we're going to scrape the inside of our lid just to create some grooves there where my solder can sit and you have some flux paste we're just going to wipe it off and that acid it basically prepares the copper so it's nice and clean, so we're just going to heat where we want the solder to go, so we don't want to heat that part that we want to heat here because that's where we want the solder. go so put that on the flame you know this gas in this system is a little slower than a mps gas or a plumber's charge an acetylene torch we want to heat the copper to the point where we heat the copper and the brass when the brass is hot enough around here that the solder melts there and starts to absorb it.
Now I'll just push my welding rod to the side when there's enough left for it to fall out. Now we finish. cleaning up a little bit, here we go, so when I do a job like this I like to think ahead and prepare. I know my waterline is going down, my centerline will be here, it's very difficult to bring water. down and attach it, so I'm going to drill a hole, bring the water on this side so everyone just put my accessories in, make sure I have everything I need before I start. You have to pay attention here because you need something to mount this diverter to this valve body you need something now, so the middle of this plastic line, which is basically, tells you anywhere here, okay, that's where it should end up. your wall so I'm going to put this back three inches and two and a half inches plus my wall board and then I'll be at 3 inches done plus tie off is cool the way you set this up is if you pretend you're standing in the shower and you're just going to grab it, boom, real high, okay and we're going to back up two and a half inches with my wood at 38, so we're just installing our 2x4 on the wall.
Now you wanted the space to be sturdy so it doesn't twist. You don't want the valve body to move inside the wall. Mark our centerline for our valve body right there, okay, so that's the centerline for my valve body, so we're going to hold this on that centerline, that's where we're going to mount it, here are my mounting screws , there and there and this. It's where I need my hole for my water supply. Well, I would use this drill bit. Here it is 3/4. It's big enough, but since it's so close and so tight, I'll be able to move around a little more using the self-feeding auger bit.
It's very simple guys, we're going to put our copper ring on the pipe and it's nice that we have this color coded hexagonal line here, we're going to go up a quarter of an inch and this is this wonderful little tool, now you take them off and opens up nice and then it's also a crimper so once we have the crimper in position turn the fitting and then tighten now there's a position of this handle that I would like really or stiff and then once you get past the point where you have it just collapses on you so we take it off it has this wonderful little plate here and it says let's go or don't let's go it has different dimensions 3/8 3/4 we're using half an inch so let's just see if that fits perfect you see , you know, that's how you measure it, it's a little meter to measure that your curl is the right size, awesome, give us that quarter of an inch, okay man, double check, I'm ready to go, so now we have. that one set up here we go so now we have a lot of line to play with we're going to cut it on the short side first look at that ring installed and then we're going to make it a little bit shorter there we're going to put our personally I find it easier to connect my plumbing before reassembling.
Come check your connection with your meters. Make sure it works well. I'm going to install this supply line because all these guys on YouTube were upset about the o. -rings I used before this system, I mean yeah great, seems to work great, has good compression, but this is a two handed operation and these rings slide up and down off the pecs too easily so you would almost need a third hand to operate this thing so this is not just a simple shower valve so it's not a valve with a shower head what we're putting here is a suggestible slide bar so we're going to have our hoe attached to the shower The head that releases from the slider bar goes down below and over and attaches to this drop here, so now we have to get our water supply from here through the other side of the wood and then to this place.
I usually like to have it. knowing somewhere nearby to make it hang well is not a big deal so we have to drill another hole here we go there we go okay now using this test meter may seem a little monotonous but this is a great way to know if it is not certified the lock one of your joints, so I have some flooring screws here. I'll use them to set up my drop here. They are much stronger than drywall screws and yet they don't stick out the other side and cause friction with my life. When you buy a system like a rebel pro, a lot of times you'll get the eraser or valve body and then a trim kit, you buy that separately at hardware stores and you'll get it all in the same box, the eraser.
The inlet valve comes with this temporary plug very similar to a Delta system and if you don't have the finished kit when you install it and put it together this is a great temporary solution as you screw it on, it's now airtight. You can increase the pressure, but now that area is shared with the hot water in the cold water line and the hot water will win, so the heat will return to the cold water line and presumably the toilet, then put hot water in the toilet. the toilet starts sweating a lot and then your client calls you and says how come my toilet is making water all over the floor, get thetrim kit at the same time and install the finishing valve immediately when you are dining during all your work.
You may want to open it again and rinse it just to make sure there is no debris in the line for it to work properly. What we're going to do is just check the documentation very quickly, and that was warned to finish the valve. Yes, it requires it. a for installation, okay, one just slides over the other ba-ba-ba-ba-ba, okay, no, I don't suppose it's quite simple actually, but I don't want to guess, okay, that lines up like this and these lines. up like this these two holes there okay this says finger tight and then a quarter turn with a wrench find the wrench now all that's left to do is pressurize the lines make sure it doesn't leak and we can complete our installation on the wall and our tiling and then we'll come back and put up the trim at the end of the day so when we're renovating the basement we want to add a lot of warmth to the floor and the secret here is this when you have your rough basement done by a builder, they're going to fall in there, there's a code requirement of so many square feet for each heating run and they're going to throw them at the ceiling and they're going to blow hot air up to the ceiling and it's going to get about halfway there.
They go down and then they start going up again, so what happens is when you're sitting watching TV your heart is below that heat level, so it's actually about ten degrees, which is the temperature around the basement in our area. If you're only sitting at ten degrees, you're going to get hypothermia, so you need a blanket, so what? What we do is we take advantage of the side of our heating ducts, we want to put a couple of extra lines right near the floor and we want to reduce the size of the ducts five to four inches and that increases the pressure.
It blows hot air across the floor and now we are heating the room from the ground up and not just from the ceiling, so you will need to add a couple of runs to the room you are heating, a space that has never been heated before. to that degree, in order not to upset the balance in the house, we will simply take the heat level around the ceiling and bring that heat level closer to the floor, is the way we do this and We are lucky because in residential ducts the metal is quite thin, all you have to do is grab your knife, let me come up here and show you and you, the reason I show you this technique is because a lot of people don't have the proper cutting tools to get the ducts in and I understand that. , so it works great, it's a nice little trick, so what we have here is a five inch side takeoff and it has an adhesive gasket that basically sticks directly to the ducts. so we just want to make sure that we're cutting our hole big enough to open up the back space that's here and we're just going to notice that the lines are not there yeah we're going to keep cutting once you have your hole all you have What to do is remove the plastic gasket that exposes the adhesive, once you've pressed it onto the duct over the hole, you're going to get a couple of these little number eight screws and you're just going to want to screw them in.
For good measure, you don't want to rely on one piece long term, but it's useful for working on your own to have that there because you don't need a second pair of hands to hold it in place, there we go, we just open the shock and now we're ready to start, so here we are, we're going to finish one of our heat races, demonstrate the whole system. The idea is that we wanted this to blow across the floor, you can set the height wherever you want. I got this set so that after my flooring and baseboard are in place, I still have a few inches of space between them.
I don't want my heater to run right on the baseboard in case the measurements are a little I'd like to have some mercy so I have a four by ten boot and a four inch collar. I'm taking this piece of pipe and I'm going to join it together. We're going to paste it here. This is probably the easiest. production that you will get sooner or later while doing duct work, you will run into this problem. Duct work, when it comes pre-cut, has a smooth edge and a corrugated edge, we'll call it and sooner or later you're going to have to put it on something like this and we'll use it to go from five to four inches to increase the pressure or you can see it doesn't fits, this will be one of these.
In situations where you will want to go to the store, you will want to have the right tool for the job. Don't be one of those guys who comes out with a pair of scissors and cuts this whole thing into two fins. and then folds them together, that's just ridiculous and a good way to get hurt. This tool here is a crimper and everything you do is slow and monotonous as you go around the outside of the pipe crimping the pipe and you're basically taking whatever that diameter is and you're forcing it in and out into the crimps to create a new diameter of pipe to fit inside the next fitting, there is no real skill involved in this just patience, here we go, now we take this, perfect, so Now that we have our extension up to the roof area, all we What we have left now is to place a five-inch pipe from this reducer to my side.
To do that, I need a piece of pipe here and I need an angle for 90 degree angle and then another piece of pipe, so there are two ways to cut the pipe that comes from the factory. We can use the regular pair of scissors and we can cut around it, so we'll set it up to demonstrate it here. I need a six inch piece, what I like to do here is less use a black marker, mark both sides that I'm cutting and get to the back and mark the middle on the back of the duck that way when I'm cutting here.
I remember that this doesn't have to be perfect. We'll put it together and finish by making dimples on both ends of it so that that's out of the way. Here we go. Now, this is it. sharp, you can wear gloves if you're not comfortable working with sharp metal, here we go, so now we just fold this like a tongue and groove horse that's shaped like a heart and then we put it together to form a round. It's locked and we're going to dimple the other end as well to make the maximum. We should be playing some really good music right now, maybe we'll add it later, maybe elevator music, you know, and like one of those thriller movies where the guys in the elevator are on their way to kill someone at all yours, here we go, we take that piece in ba boom, now we have a five inch elbow in the way you do 90 degrees because you have a white end and a shortening.
In each of these sections you simply connect all the dots so that all the short pieces go together, take a small puzzle, be very careful, do not put it in and turn it. There's a little metal gasket on each of these rings and as you move your finger, it's just going to pop it open, so if you're going to grab it, we're just going to pinch, grab the outside again. Wear gloves if you are not used to doing this, you are not comfortable. BAM 90 degrees, now we can put that in. Here above the dimple that's facing the right direction, we can put a couple of screws in now just to make sure this assembly doesn't come apart.
Now I'm using a really good little self tapping screw for duct work. which is pretty handy because it fits nicely for the next piece of pipe that we want to measure from here where the collar is to here where the collar is and since it's already corrugated on both sides, we don't have to use those fancy ones. scissors again so we take out a tape measure from where we want to go to where we want to go and I get a reading of about 15 inches just for fun, first we'll create this pipe and go down to the bottom.
I'm going to show you another tool that you can add to your arsenal and it looks like another pair of scissors, but it's not, it's really cool, it has two blades in the middle and it's actually used to cut pre-existing ductwork. There is more than one application. I'm going to get down on the floor and show you how it works. First we stab it and then you start cutting. Now this is not designed to be very fast. You only get about an inch for each Cutout, you can see we are actually cutting a quarter inch wide strip right outside the duct.
Now this is really useful because there's no point in getting your hands anywhere near sharp metal, so let's say you want to put in a hatch or add something to existing ductwork. This is a great way to enter. You can also use this when you are doing the lateral takeoff. What we're going to do is put it on one side first and just bend the metal. around to help you shape it around the fins, there we go our five inches just isn't small enough when you cut the metal, there's just all these fragments and everything else, so instead of trying to clean up the cut metal, We're just going to destroy it. ramp with these bad boys because they make the mop hole smaller than the factory group.
Put a couple of screws in here so it doesn't cause any pain in the future. Generally speaking, I like it, there is a lot. Here we go, this week's video. We'll focus on a couple different techniques for doing bulk work. One of them involves a laser that you may or may not have. I highly recommend getting one if you are renovating your basement. $150 goes a long way to get things done. Perfect, the other technique is just a little bit of common sense, I'll show you how to use it, just leveling, okay, here by the door we're going to have a bulkhead, we need to cover some steel, right now, this is nice.
It's great because you can go out and buy a piece of wood that basically fits inside the hole. No, it doesn't fit perfectly. It has a tendency to fall on your head, but what you can do is fit it so that it is above the door. here this 2x4 represents the bottom of our bulkhead it's at the same height as this steel is off the floor okay so what I wanted to do is if I hang drywall from here to above the bulkhead that's too much space big. I need to have another piece of wood that goes down the middle.
Now you can buy two 12 foot 2x4s if you want, but in general, in my experience, twelve foot two by fours are never straight and we'll just support them in the middle, so what? we're going to do, we're going to glue two by four on top of here now here's the idea of increasing the speed. I want to have this 2x4 fitted into the entire level on each side so that when I place my 2x4s from the outside edges I just glue them in the middle like a sandwich, this is actually pretty simple to do so here is my leveling system, It's two by four, don't say it's not a level, what I can do, yeah, I just touched this. until my 2x4 is flush with my metal, so now I'm sitting at the same height on both sides.
I'm going to dial in there on the system, you can do it on your own, we're just going to keep screwing it in, maybe or not. Move around when you do this, so now just tap it a little until it's below your mark. Install the screw. Now we will simply tighten the screw and head at an angle. He will lift the board up to the mark. it looks like it was before perfect i really need a new drill, now i built both sides of this little area here exactly the same so they both have a two by four flush against the joist which is level square so now i can add my extra support for my drywall and before putting it in I added the screws correctly, if you are working alone sometimes before you do the screw it's your second pair of hands so now let's put this in the middle put the screw where I need and drive it home, here we go, we leave it level, square and flesh and tie them together, then we'll just throw a couple more screws in here just in case, one of the cool features here is if it's not. all level and square when you lift them up together they won't be flush they will cut off so that's another way to tell if your stuff is building straight so now we just want to anchor this down we don't want it. floating because I knew there is a 2x4 on that wall behind the drywall.
I could have cheated. Well, each screw weighs about 80 pounds, so I have my beams laminated together. Here it's just two by four, so it's actually a beam, so I have four. screws to hold them together I have two screws up here, one on each end, so if I built this correctly you should support my weight, yes, so we built this more structural. I mean, you could hang a Jolly Jumper or something on this, no problem, but all we're going to carry is the weight of an ultralight drywall, so it'll last a thousand years, so here we are, we're using that Dewalt laser to connect the dots.
What I did was measure my steel beam with the same measurement here. and the other end of the room and I put a mark on the ceiling and I put a mark on the wall so this laser self-levels and I just move it around until I connect the line there with a point on the wall at the other end. beautiful now i have a laser line across my room like thisthat all I have to do is transfer that information from the red line to the ceiling, so I just use the ladder and everywhere my red line touches the wood I make a black mark. here we go and this will represent that my 2x4 will be here and then my bulkhead will be here.
What I'm using is I'm using a 2x4 which is never perfectly straight. You could use metal if you want, but I'm making up for my Supply of 7/16 Lumber that I pre-cut at the hardware store today. They have a big saw that cuts it exactly the same, so each one of them is exactly 9 and 3/4, which is the same depth as the bottom of my steel. projector, so once I have this box built I can run my rail through wood, steel and lumber again and that will hold all the way up to my bulkhead, so we'll just use dry wall screws to connect this all back together.
We don't hang anything from this bulkhead except the drywall, so we don't need much strength. We'll put a screw in every 12 to 16 inches just for posterity. One of the benefits of working on these new houses so that I can see that the floor joist bundle is actually an engineered wood, so again it's like an aspen, covered with a lot of adhesive in twos and threes and when they put those bundles in from the steel to an exterior wall, it's really flat. There's not much movement there, like I said, a traditional house that's all made of wood because the crown is up and down and the whole place here is nice and flat, so we really have an advantage, because I'm working alone.
I'm going to put a screw in the middle and I'm going to start there we go. I'm going to start hanging my bulkhead in the middle of the room. It's much easier for me to add something once I have the first piece in place, so I take my screw and I'm just looking for the line of your beam. X marks the place. I'll use a ladder. Well, my goal here is to basically align this. You see, here is my laser line right on the edge of my wood. So first I'm going to put this screw in.
I'm not going to tighten it too much yet, so now I'm going to place this here, place it right on the laser line. Okay, now I have it on. My laser mark is fine. I can put in the rest of my screws. You can pre-assemble the bulkhead as before. We'll take any two by four start a screw in the middle place it on your laser line now because I'm overlapping my two by four they don't have to be in contact with each other it's not necessary because my laser line already tells me which one it is Here we go so now I don't have to connect my points with my wood because my plywood will do it for me so I just want to place this on my laser line mark so I just want to check each end of the 2x4 make sure it's in the right place we're good there make sure there's nothing on top why your pipes are before you screw that's a mistake you'll only make once it's okay if you put all your two-by-fours up first and you can come back with some plywood and then hang your preset plywood, your 2x4 screw is an inch and a half, so you have plenty of room to play here.
Can I say your points here? That's not going anywhere, so once we have all the plywood screwed down, what we're going to do is simply screw this plywood to the bottom edge of the plywood. Okay, with these screws all the way in and then we have a mounting surface for our track now. We're just using a metal rail, it's shaped so it will hold a lot of weight, we run it to the other side of the room and then we have something to screw to or drywall, but that's the basics. build a bulkhead okay so we're in the basement bathroom now we have a drop ceiling and our client bought this house three years ago and knew they were going to convert a bathroom down here so in their scope of work for the Builder asked them to add an exhaust vent to the foundation wall.
I'm not sure why it's not very difficult to start from scratch, but they did it. Now we have to find it. What we did was simply measure from the edge of a window on the inside. and outside, so we know it's in this area here, so we're going to do a little exploratory surgery, oh yeah, you can feel the cold air, there we go, okay, so they have a four inch line that goes through here and The cold air is just a breath. So what we are going to do is remove some staples from the electrical installation.
Remove all this wiring. Cut a hole and this, now it's not against code, drill holes in this Aspen II, now four inches. it's a pretty big hole, but I'd rather cut a 4 inch hole here and run the exhaust for that just because we're so close to the outside wall and these studs are really. I have extra beams up here, I'm not even worried about that and we can place this here like this. I'll be out of the way, so I'll make a fairly large hole here to have room for my insulated conduit line to pass through.
I'm going to use this Diablo blade I love Diablo blades it's a little awkward in place but I know a lot of you are wondering if it's okay to cut that out I kinda like it so to get a little exercise Find a place in your house. where you have it, you can put a six inch piece of two by three and then lay it over that space and then figure out how much weight it takes to bend that two by three, even even even an eighth of an inch, I bet it would probably be safe to say it would be in somewhere in the neighborhood of one to two tons the curvature that two by three over the six inch space when we're doing structural numbers for decks, for example, two by six will travel five feet by two by eight will travel about seven feet, so I'm sure i won, sorry, a two by three can hold six inches, like I said, the subfloor above goes through the outside joist for this choice as well.
I don't have to be an engineer to know that this is not going to be a problem, okay, now we are going to install our line of insulated ducts and they are all basically the same, it's just accordion plastic, that little table at the end will drive you crazy, make sure you loosen it restricts the size of the diameter of the pipe, so you want to get this solution out, the insulation for now, get this into your cavity, we'll take it out through the hole and then slide it over the top. of that extension of conduit coming from the outside, it's unfortunate that you have these tight spaces, you can't really work very well, so this crimping tool will make the diameter of that pipe smaller by forcing the number of inches around that pipe in a smaller space. by bending it nice, now the very insulated conduit line is going to slide on top of that very easily, we're just going to make sure our ring is open so it's nice and easy to work with, so I slid the clamp off the gear. over my exhaust pipe Play now, so now I'm going to put my exhaust pipe on top, there we go, that's a lot easier now that it's all done like this, slide it down as far as I can and then I'll try the impossible here and I'll go let's tighten it now, if you're worried about this slipping you can always wrap some vapor barrier and tape it a few times, connect the plastic to the duct, here we go, I have the red one and the blue duct tape, the difference is that this is good in humid areas, so since it is better tape, we will use it in this environment.
I would recommend just cutting small pieces about six inches. I always fold the duct tape on the roll, it's hard to start over once you lose the edge, so we have a couple pieces of this son, yeah, we'll pull this insulation through and encapsulate the rest of that duct line over it. as much as we can, okay, now we have a nice straight run around the outside, so I'm going to seal the screw in place and then it's time to get the tray, so we're going to install it today. The new tone is from a replacement fan, but you can use it in a new build.
Also, this is pretty cool, they finally found a replacement product that you can install with a hole in the ceiling left over from your old fan, so we can literally install this as a replacement. fan or as a new fan, which is amazing, this fan is an 80 CFM fan. 1.1 seeded in sound rating, which basically means if you're installing fans, the lower the numbers, like golf, the better score you got, how quiet the fan is now. There are other fans on the market that are quieter if you are close to an area. It's so quiet at that level that it won't be a problem whenever you install something for the first time.
See the installation guide. This also reaches the reducer. to a three inch line, if you have a very old bathroom line, three exhaust ducts will still be good enough for 80 CFM fans, which I should basically mention, look at that little template here if you want to put it in the drywall . cut the hole in advance, that's helpful. 80 CFM is cubic feet per minute and what that basically means is that you take the measurement of your space, its length, its width, its height and that gives you a cubic foot of the bathroom and what you want from a bathroom fan. clean it in five minutes and the reason five minutes is so important is because all these little timers that are available on the market, the smallest level is five minutes, so if you shower here and you want to press the fan timer from the bathroom and press five minutes, it's the smallest on the timer, you want to know that all the air in this room has been exchanged and moved so that only moisture is coming out of this room within that five minute period, so we're. seven by seven by seven we're under 400 cubic feet so five minutes at 80 is 400 so we're all good to go so what we're going to do is remove the fan from the case.
It should be this easy, here we go, that's a lot of weight, it's good to get it out of the way for now when you're working with these things every time you remove a screw from a fan or a hinge from a door. or a cover plate from a hood fan while the screws in your hand put it back into place, you will never lose it if you put it back in this housing it has a hole so you can run the ducts through and then once it is installed , then you can connect this to the conduits and then push it back into place boom boom and that sounds like a really good idea so we've wedged it under a little plastic grommet here, well it's just a plastic connector from the department electric.
It fits, you just push the wire in and that allows the electrician to come back later and do what he needs to do. I like to leave the wire exposed a little for him and that way he doesn't have to come out. there and crimp it later, so the idea here is to leave enough room for the escapement to turn the corner. Install a couple of mounting screws. I'm going to run my first sheet of drywall up to this point and then be able to tighten these screws right into that drywall joint and that would be perfect.
The goal here is to try to have as straight a route as possible. It's okay, it looks good. We've got a little bit longer run than we want, so we're just going to Cut the insulation, so once you've exposed the heat, a couple of side cutters, wire cutters, any type of cutting, really on the job, you have to cut that cable because it will continue to unravel in you and the same thing we did. at the other end we just pull back the insulation, expose the ducts, take them into the case, voila, here we go, no, this damper goes into the fan position, like this, there's a backdraft, hold on, hold it closed, it's at the upside down, don't let all the air in.
You don't want that so make sure you place them correctly, there are different types and designs, this one is oval so you have to bend everything to make it work and this one, yes it will work amazing, the same process uses your equipment. clamp on this send our exhaust is now over the top of the trunk we have our gear clamp in place we're just going to tighten that down now. The good thing about the gear clamps, so they weren't even in an oval set, so it's fun now, the reason there is an oval set on this fan is because it's a slim case and it's designed to fit in pretty much any space you can find which is really great and just to continue we're going to use this masking tape again which is really good in wet areas just to help make sure that nothing wants to slide later on sometimes it's helpful but right now it's the Time to put our fan back in, so let's take out these two screws that had put it back in the mouth, here we go, okay, what is it?
The electrician doesn't open this up and plug in the wires, then we just plug it back in and our exhaust is done. The only other thing you might want to do hmm is outside the case where the insulated line comes into contact with the fan, just a nice little touch, lift it up nice and tight against the fan andthen just start at the top and cross the insulated casing and then go back over the frame again, just outside the hole dial. which in the position there we are going to install a little bit of backup here, so just to summarize this video, it is a lot of work to run a bathroom fan and do it right, so first you have to get everything outside, bring in the duct line, find a way to run your insulated exhaust line to that hole connected to your fan, connect the wiring, install the fan housing and do all that so you don't have too many bends in your housing so you want to stay nice and efficient.
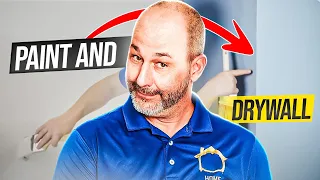
If you have too many turns your 80 CFM will quickly drop to 50 or 60 and it won't work well for you, so if you're a fan of our channel, please subscribe. I had to say it right, so the next thing we need to take care of when you're renovating your basement is the drywall, it's time to tape off the finish, sand the primer, but all of these things we've put together in another video A to Z instructional just for drywall, it's comprehensive, it's over an hour long it's everything and all my tips and tricks so what I'm going to suggest is that after the video is over if you have anything of time and you want to watch it, click on the link that will take you to that video and then you can become a drywall. master is also titled a welcome job back to the basement, we are looking at finishing all the floors that are not laminated and are not on a subfloor system, so because we have our subfloor system that you've probably seen before, which We're What we're doing here is we're recreating the same tile floor that's upstairs and we're bringing it down here so that we have a nice constant flow through the house.
You see the same floor patterns emerging over and over again, it gives you the feeling that everything was fine. The forethought, right, is very intentional, they didn't just go to the store, find something and put it in the basement, so now this becomes an extension of the upstairs, but what we do have is a different elevation because we have subfloor and then concrete. So what we've done is pre-prepared this concrete, we used Map High's Eco Prime Grip and that's a brilliant little product, basically what we have is raw concrete that hasn't been painted except when they primed the basement originally, they used a spray machine, so there's spray powder everywhere and that's going to interfere with our adhesion with our cement, so what I did was I used the Eco prime grip and then I used the protego.
This is an uncoupling membrane. This is not a Detra product. This is red, not orange, so you don't have to adjust the color of your screen. This is what you know the world would call an imitation. It hasn't been tested to the same degree for working in areas with deflection and that sort of thing. but for me I'm comfortable saving a couple hundred dollars by using this here, it's on concrete and when you build on concrete the only thing you're really looking for is elevation. I don't need a lot of performance from this product and so I'm more than confident that it will work well, so let's prime it, put the subfloor down now, we did it yesterday.
I don't like the mosaic right away because it seems to me that the cement dents when it dries, so today what we have to do now is measure the set that we have to lay this out. You can't just start a project in the fire corner and go left. right and fill it all in, you need to think ahead of time where my grout lines will be, what pattern I'm using and where the square versus non-square walls are in the house, remember this is a retrofit to an existing space so used to be a wall, we delete it this exists in the Builder this exists in the Builder and we just finished measuring and we found out that they are not parallel, so it's very important now that we think about how we place our tiles so that we don't overemphasize the fact that they are offline, we don't want our tiles to end up here with no grout line and then open up to a grout line and say, what a really ugly looking tile job!
Keep in mind who people are coming down stairs, what's in their line of sight, what the most common traffic flow is, and then where we want to have our grout lines and interrupt them, how it's going to meet the other floor, all of these things. . we have to take into consideration, so let's start, these are our tiles, they measure 12 by 24, this is a porcelain, it is Pedro, so it is not flat, it is not shiny, it is something like semi-gloss for painting, it has a It has a little bit of texture to it and it's really nice on the floors, especially if you're going in and out of the hot tub or getting out of the shower because it'll give you a little bit of grip and it's also really easy to clean now. the tile floor upstairs, which is what we are going to imitate so that we have the same continuity.
There is an eighth of an inch offset pattern here, but it is not a brick pattern. This one is a little different, so I'll lay it out real quick. so we can see what this will look like as a finished product, okay, this is the offset that they are doing above, okay, so here is our pattern, this is an eighth of an inch offset, but it is not a brick pattern no it keeps going down in a way that it comes back again so we end up with two grout lines and then two grout lines with the largest gap in the middle and this can be very beneficial for us so what we are going to do is using our laser level, we've already set a line down and we're going to take a quick look at what kind of cuts we'll get if we start. in that particular spot, so here we are okay, it would be nice if this wasn't more than half a tile, yeah, that's good, because this wall is going to give me half cuts, but it's not square, I'm just going to measure. from both ends, make sure you start in a place where I can use my cuts again and I'm not going to throw away tiles, but I like this pattern.
I like where it's going down. I'm not going to end up with little splinters against the wall. I could end up with something here yeah I'll end up with about a three inch piece there and that'll be fine but that's out of the way now if I do the same thing down here because it's on my laser line I can find my laser line put down my tape measure check my two foot tiles see where I end up so there I'll hit the wall at one foot there I'll hit the wall at sixteen inches and that'll give me relief, right? in my bathroom Wow, that doesn't happen very often, but I think it will work well, so here's the secret.
When you are doing a tile job, you must first identify where the grout lines will be, what the condition is on the visible edges. They will be like this so you can adjust your main line to turn off your laser. Secondly, you also need to consider where you want to end up, so down, at this end, we're ending up at a door, it's a transition under the door, so it doesn't matter. the conditions to go to the storage room over here we have an entrance to a secondary bedroom door is out of line of sight from the main living room but here is the main living room the french doors leading to the great room now let's go one type of floor to another, so we'll have a cap transition, but we don't want to end up with a piece where we have a 2 or 3 inch chip, so what we're going to do is measure from there because I need to start here there is a two day tile installation so today I want to do the entire floor and tomorrow I want to do the shower and the rest of the bathroom floor but I need to have tiles that go into that room so I have something I can put on the wall infinitely in space, so my tile is actually a little strange, it's actually 11 and 1/2 inches including the grout lines, so it's not a true 12 by 24, so I need to measure from where I want finish up to where I want to start and then I can set my line, okay, so I go down here, there we go, there's 19 feet.
I'm going to make a mark and do my calculations. I have 19 feet minus half an inch per tile okay so there are 19 tiles and a half inch half of 19 is yeah nine and a half so buddy your wine is nine and a half inches so my mark minus nine inches and a half is where my tile will end and then I can go back 11 and a half. This is where my first tile will go. Now I'm going to take my square, bring it here outside of the laser line, draw my mark, and then I can start tiling.
This is not too difficult, but you have to pay attention. Here we have our square, we have our laser line, we're going to build the entire floor and that's actually our grout line, so each of the tiles that we have here come down one by one. The tile is going to touch that line so I'm measuring by putting the lift square on that line with both fingers perfect and I have the other point here with my measurement that I put in just a minute ago and I'm just going to draw my line up with my black marker, make sure that I'm ready to get started here we go and that's where I'm going to start so just a quick lesson on how to mix the cement but first where to buy it.
I use mat byproducts because I go to a local wholesaler. for tile and flooring products the company name doesn't really matter at this point but the point is my bag is new this is a LFT large format tile cement and when I buy this bag I think it costs like sixteen or seventeen dollars if you were to go to the local hardware store to buy this bag, now you're looking at more like 35 to 40 to make this type of cement on that type of 12 by 24 tile, you're probably going to get 60 or 70 square feet per bag, so In a project like this, I'm going to use five bags of cement, you can do the math, it's about a hundred and fifty dollars, you'll save and it'll be better in your pocket.
Now, what you want to do starts by adding a little bit. a little bit of water ends up being about 20 percent water or so it doesn't depend on the tiler some people like it more or less this particular batch is a little warm I only have access to it from hot water to overflow of the tank so I'm going to have problems with the cement drying quickly so once I start I have to move fast okay so since it's warm water I have to work fast I'm not going to earn as much willing to do a half bucket I'm using a low speed mixer, it doesn't spin as fast as many other drills like VSR and it's designed for mixing cement and mud so I can already tell it will be a little stiff.
You want to add water if you are adding more at the beginning of the mixing process, once you are done mixing it should sit for 10 minutes before using. If you add water during that time, you are only removing the cement. there we go, that's what I like to see, it's got some ridges, some looks, it holds its own shape and still looks nice and loose, so once again for the DIA wires, we're using a half inch by half trowel inch. works great with large format tile cement and the idea is we want to fill these holes in this to transfer the contact point of the stone to the concrete below if you don't fill them or you have a There are a lot of bags of air and you risk breaking the tile and I used my trusty little cheap tile cutter from a hardware store.
I always put a good wheel on it and it works well when you install it this way. I want two tile installations in a day. I will almost always choose square footage on the first day, so I will make my cuts square. I won't even pick up my grinder. I won't do details around the doors and that kind of thing. I won't get the wet saw out until the second day. I don't like setting it up and cleaning it up twice, so here we go, we're looking to fill these squares. They come from a couple different directions.
You sure don't bury your line. You can see that you're going to end up going through a lot of concrete, so what we're going to do is try all of this real quick and then I'm going to knock it all down. in the same direction so that when I lay my tile I have a nice consistent underlay because it's a large format. I'm going to steal my tile a little better and we'll place it on my opposite line. to be there and I'm going to check my laser level. I'm too far above perfection, a little pressure, slide it to my line now, in our last few mosaic videos, people have commented on everything, you don't have enough grip anyway.
So, with one of my viewers, listen, why don't you hold up the mosaic and show everyone? There you go, the industry standard for flooring is 80%, this is about 97. It should be fine, there we go, there's our cornerstone, no, I have to do it. do is the same thing over and over again until the floor is down so flip this box over there it's basically the same science as all the clip systems that break just put them under. The idea here is that you simply get rid of the extra cement in the area because you don't want cement showing up between the joints.
Now some people use a margin trowel. I'm a bit old school. I just like to have a tool in front of me all the time, so I used that test. AlwaysI visually inspect your corners, make sure everything is okay, remove the packaging like this and it is usually installed with tiles that have some type of polished finish to protect it from scratches during shipping once again. rear butter, we'll put it in position and about a quarter away, we'll put a little bit of pressure and push back to collapse the ridges, okay, I'll go this way and this way we'll go both directions just for the purpose of the camera now.
I usually try to get those wedges on my fingers first, but here's the basic idea: the clip goes over the top, here we go, sorry I'm backwards and you just squeeze the wedge through the clip causing compression and it should create a nice flush surface roughly there. we have an 8 inch offset there we are and pressure and I will collapse my ridges now the only thing I will do differently is zoom out and I used a different tile clip system. You see, this works pretty quickly, here we go. to everyone who has been messaging me about my PPE, I have to wear eye protection.
This was given to me by that crazy Russian hacker. I love the glasses on it, so for those of you who have never done this before, this is a continuous edge grinder, so if you touch it, you will burn your finger, it won't cut your finger, which is lovely. The idea here is that stone is a sensitive thing, especially when it's porcelain and I know people get upset when I call it a stone, but it's a bad habit, you want to cut everything. through each end and then you basically want to make a plunge cut here so the weak point goes both directions so if it breaks, turn and cut the piece you want to keep stays intact here we go to the inside of the corner , it's very important to make sure your clips are pushed all the way in, guys, that's basically it, I'm sending you the techniques, we're going to scrape the corners, we're going to fill in as much of this as we can without using it on the grinder so we can get a lot of square feet done today, this will allow us all the space we need to be able to walk around and finish the job tomorrow, so today I'll be around half a day, we'll put in about 150 square feet and we'll be back tomorrow. to wrap this up, max isn't available tomorrow, so you'll have to wait until the final reveal, probably to see the town's welcome.
Jeff remodel my layout and build here again today, I'll show you some tips and tricks on how to do finished carpentry for Windows what we have is we have a construction window with Builder Jam, this Jam got to the point that that's what it came with the window, they screwed it here, you go to the
unfinished
basement, now it's up to you to finish it, so there are two options, one we can break the jam that is here or we can just extend it, so what we are going to do is just extend it . It is a slightly simpler production, we do not run the risk of damaging the window, so, to start, we have to clean a little.A little bit of this extra plastic from our hair here, make sure your site is clean because what we're going to do is install a little bit more of the same three-quarter inch pine as long as you can see what's there. existing, I will feel comfortable because I can install the new one. We have to do four custom moldings here because you can't just buy this standard, you want to finish right on the surface of the drywall, so what I do is I take something flat in the corner, I'm going to measure and make a mark of that depth and here we go, that's three and three quarters, simplify your life right in the frame, okay, and that's going to be the same mark for that. depth in this piece of wood, at the end of this we're going to take the same measurement here, it's the same and the reason we have to do the four corners is because when the builder installs the window he's in a hurry and I'm just going to make sure it fits , it's in the relatively right place and a lot of guys have basement windows that they angle to help water drain.
Don't ask me why I think windows are built to drain anyway, but if you turn it, here it is, it comes three and a half or it's installed crooked like this, it's still going to look good from the top side, so if you go to a stamp it will work fine, but you won't be able to finish it. go to the store and just buy lumber and this is still half the reality, if it were half past three I could go buy a piece of one by four that's three and a half inches, if I do that now I'll have In this corner From here I'm going to have big gaps, it's going to look like junk, so what I do is buy a bigger piece of wood, I usually go one in eight and then I break off the four pieces, nail them and then I'll make it perfect every time. , so what we have here we have the thickness of our wood.
We also need to have the actual dimensions, so we'll take an outside dimension of the window outside of that jamb to the outside of the jamb. 55 and 7/8 we are going to add 1/8 on each side 56 and 1/8 ok so what we are going to have is that our pine is going to go in a little bit and it leaves me a place to put caulk because every time You are ripping wood and going from different dimensions you can't use the table saw to guide your clean cut by hand so you will need to add some caulking so make your new window Jim a little wider than what it is now and it's not very easy for you here, it's a real 23 and a half, so we're going to use 23 and 5/8 because I want to keep it as aligned as possible at the bottom.
So now that we have our numbers, we're going to go to the table saw, cut all this wood and then I'll come back and put it together so you can see how to build. and glue it into the hole, so now we have my wood cutout. I just wanted to show you what I did. I marked it all up so I got the bottom top left and right, so I'm going to build it like it's on the outside of the building looking in, keep that factory clean edge down there, there's the top piece, okay, on the right and left, very important, we get it right and left, that cuts so well I can barely tell which one it is.
And here we go and the reason we want to build it like this is because the floor is relatively flat, so all the factory edges will be flat and that will be the surface that part of the other side of the drywall will be placed on. casing so that it holds all of these elements properly, you can see that when you use a freehand angle table saw, it's not always perfect, it doesn't matter because we're going to caulk that joint anyway, so the most important element here is what do this. It looks like when the casing comes into contact, square it now, all of this together is very important, by the way, when you use this type of nailer, I'm using a two inch nail, I don't have fingers or anything within two inches of where you are. nailing these things they have a tendency to have in their own mind that they can shoot and well, you don't want to have a finger there on a nail, it appears here, okay, now that we have this, let's just make sure it's a nice trail and brand square.
Now I'm going to measure my casing, so I have external measurements. Sorry, the inside measurements are 22. We want to put an 8 on the top and bottom, so we'll use 22 and 1/2 now you want to add the thickness of your casing multiplied by 2. We're using a three and a half inch border, which is beautiful, so seven says 29 and a half inches and then we'll do the same for this side. Check the Inside Measurement 54 7 8 Now, I'm taking that measurement. I'm adding them a little bit about an eighth on each side so that my casing reaches the edge again to have a joint there that I can have. nice clean finish add the 7 inches back so MUP 261 7/8 is good, I love using shims as a scrap pad, we'll cut out the four pieces of molding and reinstall them nice, so now we have all of our casings cut out.
We're going to take our jamb extension, turn it over and we're going to nail all of this together now, so the reason I do it this way is because the walls are incredibly uneven, even when you frame them yourself and make your own panel of plaster. There are always little imperfections, so what I found is that if I build something like this first and then install it, my joints are always perfect, so what I do is I put the glue there second first on the perfect joint and secure it with a nail . I always glue my joints first because wood suffers from the effects of expansion contraction, especially on a window and on the other side of the house, so if you put glue what you're doing is putting all of that together, so it grows and Expand together and win.
I don't get all that cracking and if normally the window trim breaks over time and the reason I try to do this on the top of the box is because I've had problems before when I nailed it all together, I'm against the subfloor. and like I've talked about those two Brad nails that shoot in different directions, they go straight to the ground and then you stay stuck to the ground or the phone rings and someone calls and they and the window stick to the ground, okay? I'm going to put my window position, get consistent again, yeah, start in this corner now, which square of the frame below is labeled so traditionally with this type of wind installation, you build your dam, you install the jam, you shim around your nail, everything in place and then add the casing, but the reason I like to do this is that it's quick and simple, no one is going to crawl out of this window, so now I'm going to build my shim package in each side when putting the window in place.
I'm going to sit on this, my spacing should be perfect and then I can nail it all into place at once, here we go, let's see if we know what we're doing. I am very satisfied with that maximum. I'm over you. Using two inch nails shoots through your shoes and into my 2x4 wall, so let's trim some plastic sticking out, all you have to do now let's take your gun and make it GAAP, your space , fill your nail. Hole the edges and then paint, you know. Now I'll show you a couple of tips on how to install the socket.
If you are using wood, it is a quality product. You'll see something like this 3/4 inch thick, you need to know how to use it. use your tools correctly when you work on things like this or you'll end up with a really ugly job when you buy economy, trim things really thin, colonial, lots of molding, you can basically cut that square, glue it in a corner. on a cocking line and paint and walk away, but when you're working with things like this you really have two options: you're going to have to miter cut the corner where you're just putting the 45 degree angles in or you're going to have to get out the jigsaw. and trace the line, cut it and then place it over the top of the design on the wood.
I like to miter the corners and then continue to rely on a little putty, but I like to glue the wood corners back together. shrinkage I'm going to show you a couple of tips when you're working with thick wood because wood tends not to be straight, so what I do would be take some Scrabble and throw it at the wall right away, that's what I'm building. Whenever I work with wood like this, I want it the same thickness as the floor because the materials available are nice and easy. I'm going to lay the floor. I'm also going to have a base shoe that sits on so I don't have to worry about space and that space is really convenient for me.
It has a bit of back and forth with the curvature of the wood. It will still look amazing. It keeps the base in place if you purchase a six-inch molding. you don't want to put your floors down and you only have five inches left, so install it off the floor when you start, it gives you room for your floor to expand and contract under that molding and then you won't be restricting, you know, the floor causes buckling, so I'm going to take a measurement of the entire length of the wall right now, here we go, this wall is 118 and a quarter.
I'll cut it at 118 and 1/8 because there's never room. square, no corner is wonderful and where I measure is right under with a mud joint on that wall, so if I cut from the drywall, the drywall will be too long, so I'll have to fit it in tight, so we're. We're going to adjust our saw just to support the weight of that wood. We have a real measurement of 18 and a quarter. I'm going to cut the board 3/16 smaller than that to account for mud buildup. the corner and that will also give me the opportunity to make any adjustments that need to be made to the floor when I'm installing the corners that you were going to see when I put this all together, there's an advantage to cutting it small, okay, now I'm using a compound miter saw. 10 inches is not high enough to cut this way because my edge is actually higher than from the tip of the blade to this tree here, so I have to cut it at an angle so my saw has an easy adjustment. make sure your doors are out of the way, your saw can pass freely and all I'm going to do is run it all the way through, keep it flush, so I know that when my saw goes through the wood, it goes into the hole of the sauce, so I lined up my wood right on the edge here, okay, and this isgreat advice for people who are learning this for the first time.
You will see that there is a little meat left, but nothing. You know exactly where the blades need to cut, so we're going to pull them forward a little bit perfect, so once you're comfortable with your saw and where that blade is going to go, I know I'm going to go through 1/8 of that line could just set it up right on the edge, perfect, ready to install, so when you put this up, be careful at this point, your walls are usually primed and ready to paint, you don't want to put holes everywhere, okay? here we go, like I said, it's a little tight even though I took 3/16, it's surprising how much someone builds up in those corners, there we go, so now you're off the ground, great for floor expansion and contraction when When reinstalling the outside corner, now take that little block, turn it, take both corners, okay, always measure and check things first, that's beautiful, no, you can see the space looks pretty good, but if it were putting a nail and pressing, it will open. above the hole, so what I can do is put a shim behind that and then I can manipulate these sockets enough if I want to have a little more manipulation, cut and break the shim, open the gap, put the thick side down . underneath and that can give you even more ability to manipulate it now, when I put that nail in it's not going to move well, the best thing of all is now you can open this board again, use a little bit of glue on the corners, okay, not too much, just enough to make contact, that's where you want it, find that happy spot again, trim everything out that way, that's the process you'll need to use on almost every corner because every corner has the same phenomenon, you'll have two pieces of panels of plaster joined together If you build the room perfectly square, that's good for you, but as soon as you put mud on the wall, you ruin it, so you'll always have this concave action in the corners, so have shims on hand to nail the corners when you use them.
A big fat cut like this will help ensure that your joints are always nice, glue them down first because you can't get in there to nail them in and then once you've got this side joined together we'll use the same technique with the shim all you need to do It's just fill in the gaps and keep the baseboard straight and that's it, so a little spike went through your pneumatic nailer, don't press too hard, it will make a dent when the nail goes through, but if you press too hard even the guide here is going to make a hole in the wood and you will end up filling two holes instead of one, just another quick tip when putting in baseboards.
I always like to do this when I prime the wall before painting because I want to be able to get to this joint and then I want my paint to cover the caulk with the wall first and then cut clean with the finished paint when you're nailing when you have a drywall surface , you will actually be able to see your frame because you will have spots on the wall where there is mud on the screws, especially next to the electrical boxes, you know where the wood is so just line it up, you are on your 16 centers and tighten again when you get there to the corner, feel free.
To nail that in, manipulate the other side to close the gap the way you need when you join that piece of wood together. Hi, I'm Jeff from Otto. I design and build. I'm here to give you a little tutorial on how to install. laminated floor, we are talking about a laminate of medium density fiber or high density fiber. Traditionally this came out as a picture of three different pieces of wood, it has developed a lot over the years and now we have something that looks like a wide board. plank flooring now, this is a product for flats for rent or rent it is of fabulous quality, the joints in this click come together and are very tight, you will not see gaps over time, there are many products on the market, many ranges of different prices, from a dollar per square foot to five or six, so you get what you pay for, so if you have a ten year project and you are just looking to do something clean so you can sell your house by all means, you know , go to the cheaper end.
But if you're doing new construction like us, we hope this floor lasts a long time. This will be a 30 to 40 year old apartment. We will also install a bar on top so we can't cut. Any corner with the quality, so since we are not skimping on quality, we also use a high quality bottom pad. This is a very thick piece of rubber. It also has a vapor barrier. It's always that vapor barrier on the subfloor. This product. This is good for basement floors and residential use. If it really is a laminate floor and you are in a situation where you are in a condo or apartment, you should get a different floor that eliminates sound.
There is a sound transmission rating. on that bottom pad it's a little more expensive but generally speaking if you go to a wholesaler you can get this type of product for less than 20 cents a square foot it's not a big expense so by all means get the well if you go to a building store you'll probably pay three to four times as much but never spend a lot of money so the bottom of the pad is the gold side that has an adhesive strip so when you make the next joint you can stick the pad with adhesive tape. to this bit of leftover aluminum foil, so I always install the pad in the right direction so you can add the next layer, we basically just roll it up and cut it to fill the space.
Now this room is a little dusty, so let's go to some prints, how awesome, okay, so the way I do it is: I just push it towards the wall, find my mark, roll it towards me, cut in both directions , get it out of my way, I'll just shoot it under the drywall for now. so you hold it tight and we're ready to go so the basic tools we need for this project are pretty simple you should have it your tape measure a pencil a hammer this is what most people don't have the cutting tool, dun dun.
This is the next generation in laminate floor cutting machines. Also good for commercial vinyl tile. This thing has an extension on the arm that multiplies the leverage, so it works like a guillotine principle, it just squishes into space and snaps the board right in. the cutting line, the good thing about this is that one person can operate it without having to go up or down and it does not create dust on this type of floor if you are ever going to work for the before and you are using your size in an incredible amount. of dust, so one of the biggest drawbacks was that you always had to cut outside or you had to wear a mask or you would just get sick and get a sinus infection and we all learned the hard way, but this tool here is worth its weight in gold .
I think it cost me about four hundred dollars. It has been through the mill several times. It still works here. I haven't had to sharpen it yet. I don't have anything bad to say about it. I'll give you a demonstration because I'm going to need a little piece. To start here, when I start laying the floor, I want to cut just a first piece about five or six inches from the end and I'll use this as my nailing block. It's okay, because you will find that installing this floor is not an easy task, we will go from left to right, if you do this alone, I will recommend that you start with the first and second row with a medium offset, so cut the board in advance , no need to measure, okay, here we go.
As with any other type of flooring, you need to pay attention to its aging, which is where the joints meet now. Traditionally, these locks are nice and simple. He just lines it up and moves it, it clicks into place, he heard the click. that's the sound of a good installation, you can see, we have it installed so that it slides under the baseboard, we don't want to start against the wall right away. I want to start here, let me show you why if you're working. alone or even if you have someone with you, this can be really complicated.
You'll see a lot of guys do this, they'll put that side down there, this fits well too, they'll drop it in and then they go to the next piece and there's a bit of a conundrum because this type of flooring is not a locking system. I can't just leave it in place. You'll see there's a tab here so the way this works is this piece actually has to go back a little bit you have to force it down and then you have to get it into the space from the other side when you start just trying to keep the things in order having this board here in your way so don't do that keep it out of your way you want to work back and forth in your first and second row we are going to cross your room important to note traditionally you will find that people like it plus the floor look there's that click again if you're running the grain along the longest wall in the room know that piece I cut from the beginning.
I'm going to lock it now I take my hammer arm which fits very well. I will never have a problem, no, I take this board, the benefit of this tongue and groove action is that it actually locks from both different directions, so you have it tight, put your weight on it, oh, there we go, very okay, so now. We have reached the end of this wall. I want to get my knife out and trim this on your pad a little bit back and this is just to keep the noise down so it doesn't matter if it goes all the way. the wall or not, it's okay to be shy and this is what we're going to do, this is not facing the same direction when you want to measure your cut, you want to do this by eye, okay, so we're at the end we want.
To get our piece, make sure the room is facing the same way, then take it and rotate it, so now you will measure the actual space with the same piece that will be cut and installed there and since nothing. in this world it's square, you want to take the shortest one or where the contact with the wall is and mark the floor to cut it within a quarter of an inch of that now, because we're using 3/4 baseboard, we have a lot of mercy. I mean, I can make this floor come up almost an inch from the wall and it will still be covered until I'm done with all my molding, but for good measure I like to leave about a quarter of an inch in there for expansion. contraction, take it to the cutter, put your mark right where the blade comes down crushing and now instead of trying to hammer it in like this, you can just drop it on this piece, however, it's going to be a little trickier because you don't have the space to get it. the hammer from the end so you have to hammer in this direction not this time and every time you cut a piece start the next row with the cutout feel your product save time here is our piece turn it over make contact with the wall come back here measure cut and be careful all the time not to break the corners, break the corners, that piece is of no use to you, no one wants an ugly piece of floor in the middle of the room, it's not like I was trying to show here, I can't just leave it fall. that in I don't have room for a hammer, what I can do is the same concept from this side, I can leave it there, okay, I don't know when you're working with us, floors, keep an eye on the corners of the back, if you have debris and they get trapped in these spaces and you force them inwards, you're going to break everything, your floor is going to open up on you, so leave this, put it in place now we take our hammer block, put your weight on it. this other piece of wood sees that it doesn't sit very well against the wall now, after you've finished about four or five rows, take a minute and pull it forward from under the baseboard and then move the flooring from the other side of the room where you have it stored, stack it all on the floor so that you put enough weight on it so that when you hammer those end pieces it will no longer slide and maintain the space you want under the floor. and around your perimeter try to keep a half inch gap wherever you go and your floral will last forever now really all you need to know now is that it will take about an hour to finish this room not bad no dust no mess , there is almost no garbage and it will be new and beautiful, so if you have enjoyed this video, please feel free to contact us.
Write a comment below. If you have any questions, hit the like button. We would like to know if you like it and, of course, if you don't. subscribed to our channel please, we have a lot of cool stuff coming up, a lot of great stuff we've created in our library, so check it out too, thanks for watching Hi Jeff, here with Max again today. We're going to talk about something that may seem a little overwhelming, but I have a cool little trick to make it simple. I'm talking about installing crown molding, so in this environment that we're working on in this basement, we have some mechanical elements.
In the races we built some boxes, we only needed two, so we designed this whole shape, so now I have a raised ceiling in the hallway, so the way we're going to finish it we don't tape it because we're going to put molding ceiling. From corner to corner, close all thisand this is really simple. What we want to do is measure, of course, the inside length of this box 67 in the corner. Yes, again, it is very similar to making baseboards. You will have taped joints. You can make things move a little smaller, use shims in the back to close the gaps and then you can do the rest to finish.
He will always have a good ending if you overcome your space instead of trying to force things, so he soon did. you start forcing things together that don't quite fit, your alignments will go off, it'll look ugly so leave a little extra space, it's good for you, sixty-seven and a quarter, that's one of our first measurements. I'll show you how to install this. I have the cheat sheet for you, so today's material reason is a pre-painted finger joint pine. A very simple line, it's not colonial, it's very modern and we're not trying to draw attention to the style of the molding, but we just want to have that, if you can see that on the ceiling, there's the image that you're going to get a nice and simple scoop and will tackle it well, so before we get into the trick, we need to cut our measurement once and then read the measurement twice.
Look at you with the pencil line and what I'm doing this because it has a strange shape. You know, you usually work hard enough on the saw. You know where they will cut the leaves. Just leave it open a little. On your first cut, make as many adjustments as you can. You need until you get to that point, go ahead, okay, because you don't want to make a mistake. Get to know the world of miter saws. It has the ability to bend and cut in different directions when you make crown molding. Traditionally, you have to do it.
For a double compound miter, you have to adjust the table angle and the saw blade angle. There is a board you can use to do all of that or you can go to the store and get a 95% quality job as a homeowner using one of these og cuts they are fine simple inside and outside cuts are listed here this is the part top, just put that on the saw, put the material on that guide against this here which sets it at 45 degrees, this is the ceiling, so the top or this is going to be like an inside cut, except the SATA 45, the same way we were cutting the length Inc., because now this is perpendicular and that's where the angle needs to start so I can turn on my saw and I can crawl like this until I find. that perfect place done the same thing change to the other side okay I have to come here because I'm right inside and if it helps you can put a little pencil mark where that corner is when you're done just inspect to see Here, that wasn't right to the corner, there's a little flat spot there, so we want to put it back in and just trim a little bit of hair again.
Make sure you hold it nice and tight. fence that holds the stocking crimping of this guide so you get your angle, here we go, the reason this is a ninety percent solution is because this plastic guide is not going to work perfectly for you, for the average homeowner , this will save him. It takes a lot of time and money to get this piece of wood to fit and not cut it too much and push left and right and give or take an eighth of an inch. Now let's take a lot of people who do it the way they do it.
They'll glue it here, they'll roll it up, oh, that looks good, it fits perfect, they'll nail it in, but what you want to do is take a short piece with the same cut on the other side and place it against it. roof, look at that, that's not how you want to do this, so what you do is roll that piece of wood, slide that one now, that's where you want it, prop that one up, lose that piece of help, mark your line, I remember you. I haven't cocked or painted it yet, so this won't hurt. I'm not worried about what's happening on the other end.
I'm going to make this fashionable first, so I'm going to remove it now, generally speaking, when I'm doing crown molding. I love having my teenagers help me because they are tall and don't need a ladder, but it's nice to have someone holding things in place if you don't have the luxury we need. to do and I see this all the time, honestly the reason I marked this in pencil is so I could have put my cocking on the wall and ceiling ahead of time. I had so many years that you get calls from people, oh, may the crown molding never crack. everything is falling apart and what you find this guy is cheap, they come here, they nail it all down, those little Brad nails, they don't use adhesive, they use a surface cocking line here to finish it all off and they use the cocking type. that doesn't have any elastomeric properties at all meaning it doesn't expand or contract so the wood moves but the cocking doesn't and there isn't enough to bind it to the surface so what I like What to do is put a little bit of hammering right inside those two pencil lines, okay, and if I put too much, okay, we'll remove it the way we haven't painted yet anyway, now I'm going to place this right in that sweet spot .between those two pencil lines and then I'm going to get out my nail gun generally speaking, I don't have anything to nail this in, there's no wood anywhere, I'm going so I'm going to that angle and I'm going to follow that angle that's going to hold it up nicely now it's at its place and we have to move a little quick here so now I'm going to take this piece.
I'm going to do the same thing in this corner that I did in the other one and I'm going to rotate this until I find that happy spot that's right here and I'm going to mark it with a pencil as well. Brilliant. I'm going to open this up a little bit again, same advice here, don't push too hard with your gun, try not to make too much of a dent, and then just make sure you keep your lines, if you go outside your lines your next piece is going to look ugly. , pull the cocking at the same rate as it comes out, give it or take it well, I prefer the dry finger technique instead of the wet one, this is raised silicone eyes and I don't want silicone in my system, it's not healthy for you, here we go, you can see that it ends very well, note, no. use putty to fill the nail holes, it will shrink and show something fierce.
You want to use something here like a dry product and then use a sanding sponge to remove it later, when you paint this, you want it to look like the surface and never had any blemishes. If you use putty it will shrink and dry out and then you will have little dents everywhere and the way a little light works in the room and the way it is curved will make you scream that someone did it themselves so this is it how we want to do this: we want to measure the next piece directly to the wall and behind the edge in the corner, okay? to the other wall and if you couldn't catch that on the tape it says 46 and 5/8 now I know from experience it's going to be a little tight so we're going to go 46 1/2 just takes a little bit to get it to fit again on the run we'll go to the saw cut both angles ahead of time and come back and put it back on keeping everything nice and tight now here's a trick I don't know if I've ever mentioned that when you use these saws I always run the blade before entering the meat.
Increase the maximum revolutions before you start cutting what you like. I have given the shelf life to your blade and it will not start to burn as much to chain. We just want to make sure it gets to this corner. I have rolled approximately in the right direction. This is what I'm talking about. It is the ninety percent solution. That's why I love it when you buy a wooden wreath. molding each of these pieces that go to the mill will be slightly different. I don't know why it drives you crazy, but the width, the curve, the thickness at the ends, the details, each piece is a little different and it has something to do with the amount of wood it takes to cut this, it's like that, so no matter how meticulous you are with lining up the corners there will be a problem so get them as close as you can and then just You'll have to be really good with your cocking so here I'm going to prove my point here's the piece I cut to install it here good and I line this up and my lines are not bad it's close here is the piece we cut like our template much better still not perfect same saw same tool same corner different crown piece will never be perfect nice - let's cock the business there yes, very important if you have a misalignment problem, maybe you can force it a little by pressing that quarter in and roll it down if that helps, they told you before that there is not much wood here to nail, to pull a couple of nails Extras might be enough to help you close it a little more, this is where to be.
Up with you and your gun, who will be useful? I'm just going to clean up our excess here. I'm not sure how that looks on camera, but it doesn't look bad to me, no, I want to come back here tomorrow and check it out. again because like I said this will shrink so give it 24 hours come back and check it again don't be in a hurry to paint this let it dry overnight come back do another fill if you need to but this is the rule in the construction in general. Speaking, if you can see the defect from six feet away then it's a defect, if you can't then it's wonderful, so we're not really in the business of making things perfect for the business of making things look the best. well enough from one point of view. some distance call me crazy but that will look fantastic from your distance a few more coats fill in the gaps paint it beautiful great cheap saves you a ton of time you don't have to hire a carpenter you can do crown molding in your house I I want it to look absolutely beautiful for only a few hundred dollars.
Oh yeah, if you liked this video and you subscribe to our channel, we have a lot of great things coming or hit the like button. I would like to know if you like it. No? No matter what kind of videos you offer in the future, today we are installing a custom sliding glass door system for a 5 foot shower. Now it's not custom glass in the sense that we didn't have a glass specialist come in and measure this to order, but in the fact that traditionally I would say 90 to 95 percent of the bathtubs in this world are custom. 5 feet with a bathtub, so a few years ago the market began to create replacement products so that you can take out the bathtub and put in a new one or just a shower tray and this is where the 5 foot shower tray became very popular .
You see them in hardware stores everywhere now you even see them in other outlets and you can buy a shower tray with a sliding door kit that looks pretty sexy. It comes with a solid fixed panel and a large top rail, you know, the stainless steel chrome rail rollers look pretty good overall, this product costs between eight hundred and a thousand dollars, there are varying degrees of quality and that kind of thing brushes nickel chrome, but for the most part anywhere between eight and twelve millimeter glass you will get the same result, it will keep water out of the rest of the bathroom and it is made of tempered glass so it is not a safety hazard, so what I recommend is opting for eight. to ten mil glass products instead of 12 mil ones, a 12 mil product is very heavy, so we recently installed one that was available for sale at a local store and it took four grown men to carry it up, so yes want to do it yourself, what can you do?
Can we show you how with the smallest glass, eight or ten thousand and you can handle it on your own, no problem? So before we start, let's open the package and see what we have. Well, it's Christmas. let's open this box and see what we have, okay, so this shower door comes in two different boxes, thank goodness, it's ten millimeter glass, so it's very easy for two people to carry, you're not going to sweat and take the risk of dropping this bad boy. like I was talking about in the intro, if we made twelve million, it would be a lot heavier and the whole product in one case was just crazy.
I don't know who designed that, but they should shoot, so here we go. I'm going to confirm that I'm looking for the fixed panel, yes this one has the holes drilled in it, so this is my first panel that's good and then here I am with the actual door panel, like Fort Knox didn't blow up here. all the rails I need are very interesting. I need to get some of this out so I can put some in this well. I better get set up and organized, so here we go, we are ready to install our glass door, but the first thing we do is We have identified the parts in the box, we find our hardware kit and our instruction manual.
You know, you've seen me in these videos, probably reading instruction manuals like this one. Yes Yes Yes. I was a little stumped on this one. This is a new one. The installation generally on these glass door systems has a top track and as you see in this diagram there is a bracket that is attached to each side of the wall and then the track goes inside the bracket, but in my experience the bracket It has a small piece that attaches to the wall and slides up and down the rail, put it in place, slide it over your allen wrench, everything is fine, it's a real pain in the ass, it looks like an installation really simple so I'm gladhaving read this. or I would have felt a little confused in the future.
I always take the time, you never know, someone might invent something new one day, okay, if you've never installed this door kit before, here's the first step, well, that made a lot of sense, there's not much. There's a lot of instructions here plus a couple of diagrams so if you've never done this before you really need to watch this video because this is not going to do you any good here we go always carry your glass from the bottom and don't do it. Don't assume that just because you feel like you have a good grip that you're going to be okay, so this is the door.
The first thing we want to do is place the door in the room. He has to go to the back of the shower. I don't want to try to do this when you have the fixed panel and the top rails installed, okay Nate, so what we'll do is I'll go up, you'll stay down, we'll try to hold on. Vertical glass like this as much as we can and then we'll take it to the shower, so I'm as high as I want. I'm going to put my hand on the ceiling and we'll play like that for a little bit. a little support there, okay, take it right to the foam, now we have a tarp on the floor just to protect the shower pan and those foam blocks, you're fooled and I put the little corners in my pocket, Nate, when We're doing a shower we're going to put a fixed panel from here attached to the wall and then the door slides from the back on a top rail if this glass isn't here before we start you saw how small our space was to start. because we have a folding roof, can you imagine trying to squeeze that interior out?
By the way, in case you forgot, this is Nate, you probably remember him from the deck project we did with Hello Roll images and that's why he joined me for the game recap. which is amazing. I'm glad to have him back. We will teach you how to do some of these installations. I have installed about 20 or 25 of these glass door systems so far in my career and they are all basically the same. the door goes backwards, it's not in the information, by the way, that brochure doesn't tell you to do that, no, that would have been painful, here we go, so what we need to do is need the chrome rail. the new channel that goes against the wall, yeah, and we're going to need our drills, we have the drill bits, we're going to need the wooden box, thanks, go get the chrome rail in the Harvard box and let's get to work, okay , great chrome.
Well, mm-hmm, just as a note, if you're doing a new bathroom installation, you'll notice that I haven't put the finished pictures up on the wall yet. I haven't even installed the toilet, but your bathrooms are a little tight. space, so if you can make your glass system before placing all the other accessories, it will be beneficial for you. He needs all the room he can get to maneuver around here, based on the reactions, it will be the same everywhere we need it. To attach the U-channel to the wall when framing this, generally speaking we make sure to always place the frame behind the wall.
If you don't have frame plugs, this will work, but be sure to secure the back with double-sided tape. and/or silicone, so what we do is we just hold the U channel back up, the wall will go up level in a minute, but first I just want to mark generally where these holes are going to be okay, so this is a hardware for sliding door. usually this goes down here my glass goes in here and then the other door slides in and here so what I'm seeing is I need a measurement name of how far from the outside edge to the center of that hole here where The glass panel goes from there to the center, it looks like it's about a half inch, but maybe five-eighths, no, it's about a half inch or an inch and a quarter of the motor, okay, so the center of this hole with a pencil is the center of that hole from the outside. edge oh okay and let's make sure it's back in position there so let's go to the center of that hole so it's over a half inch super 9/16 or something stupid okay so what we want to do is make sure that the center of this is 9/16 from that edge, okay, so let's also put some tape here because the more you level and square things and think, and from the beginning the more likely you are not to screw everything up, okay, but make a tape measure here.
I'm going to mark 9/16, put the tape on, please, here we go, there's 9/16, that's the center of my glass. Wow that's actually on the outside edge that's where it needs to go so basically what I'm doing I have my 9./16 on the rail now put this 9/16 that represents the center of the glass place it against my tile beam let my pencil work where I'm going to drill a hole right and then I'm going to put tape in there, the tape is because I need to use a level to make this mark correctly. Okay, there's my 9/16. I have to drill.
Okay, now I'm going to put my level there. Nick, can you make sure I'm on level? Yes. You are good and this is one of those cases where you don't just want to be close, you want to be right. Thank you. The benefit of having the DeVault drill here is that I have a hammer drill function. They call me crazy, but. I love my hammer drill phocion generally speaking when you're using the sun a bit and there are actually two drill bits that I've used. I would like the drill bit for glass and tiles, it looks like a small spatula as well as a point and no.
It doesn't run with you, this type tends to travel when you are drilling a hole so you have some sort of support and then holding the drill against the wall to get a couple of points of contact and you want to start the hole just below the pencil mark. I know, once you get a nice hole that holds it's stable Wow, that's noisy, here's the other type, it looks like a little spade tip, it's carbide tipped which should work just as well, the difference is these just They tend to last so long that you don't want to overheat them, so you might only get two or three holes drilled with something like this, but if all you're doing is showering, it's nice to love that hard tile, oh holy! , it is a strong stone.
Oh, ladies and gentlemen, so this is it. about nine dollars for four forty dollars that works, they are very good for ceramics, but this is a very hard porcelain. I want to use the other bit, which costs about 40 dollars, the same ones. I forgot one that will work over and over and over again because it's Just Infuriating Hello President, So I had a problem today. How did my silicone turn out? I usually use my new flex, so inflate a pump. We had to go to the hardware store. God help us. He says French. A sturdy one in 30 minutes.
Not bad. I guess if you're really in a hurry to get it wet, it's a 10 year old mold resistant microbe and technology kitchen bathroom blah blah that's nice. Silicone always needs to be pierced, make sure you do this or you will make a huge mess trying. You have to squeeze the tube, but it will come out the back, so whenever we work like this we will put silicone in the hole first, a good measure to seal that hole before placing screws or plugs, no thanks. if you have wood behind it you'll be fine, if not you want to use a plug, if you have I use a plug, press it into the silicone, yeah right there these plugs are about the same thickness it's my stone. and drywall is lovely so like most fabricators they use these Philips tips, a real pain in the ass.
The Philips bits don't hold onto a screwdriver as freely, thread the screws with the hole because you can't hold the metal holder and the screw and your drill all at the same time now this is actually easier to do if you have very fingers thin ones, but what you want to do is hold the top of the screw in the bit like this and then insert it, so once you have the rail on that establish where the glass panels are going to go and the end of the glass panel they have this little accessory here there are a few different varieties of this, but in this case this one slides over the piece of glass there's a little cap here that you can take off and put a screw into the shower pan.
I'm not a big fan of that. I would prefer to use silicone and double sided tape for all of these applications just because if you buy custom glass all these accessories that's it they will use silicone and double sided tape why do these manufactured glass systems always want you to put screws in the shower tray and then you risk water getting in and starting to turn black and dirty and you just don't need that, so what are we going to do? We're just going to cut some pieces of the trim that we have, they're like little pieces of rubber gasket, and we're going to use them as a silicone shim to level the glass panel and check the pen.
The angle of this is about a degree off and you want this door to be as square as possible. Now the doors themselves will adjust the height of the way the roller sits to close against the wall, but if you can mitigate some of the variations by having the door panel perfectly level, this makes the rest of the installation be much smoother, so I suggest you take a few more minutes to make sure your glass panel is as level as possible before continuing and that you will need some of these little rubber sleeves with the same rules before you want to keep the glasses as vertical as possible and this is more of a one man setup so we'll go in and then you'll let go. that I can drive I don't look at the ceiling on the floor at the same time wear your shoe, okay, you can see, I only have a few centimeters of clearance until Rasila here, so I'll wear my shoe and I'll wear that. to slide this glass into place, okay, we're glad we don't have a toilet here yet.
I'm going to put him on the railing, no, no, what are you going to do? Pick it up and get the corner into the space first. Okay, I'm going to slide it in nice and smooth like I'm lifting the corner here putting my hey, you got it, yeah, putting my little pull package. Remember you had it, yes, thank you. Okay, come down right now. yeah slowly okay that's almost perfect so here's the secret and I know this will blow your mind. I grab my pack of wedges Nate, can you lift the glass please? Hyup, just a touch, you know, when I move it a couple of inches, leave it. mmm BAM, so here's the deal, the closer you get your little pack of shims to the corner, the more it will turn the whole glass and it will work, so for the do-it-yourselfer, if it's your first time doing one of these doors, there is a step you can do here and turn this into a two day install, you can do it at this point, so look at the silicone on the wall, the floor, let all of this dry for 24 hours and then come back and install the rest, which makes life really simple, so nothing is guaranteed to move, but if you don't have that luxury of time, you can believe it or not and use some masking tape to keep everything in place while you finish mass.
It's amazing how strong the tape can be, just put it on both. sides basically you're just gluing the glass to the shower panel creating resistance now the glass won't move okay here we go let's continue we need to take our rail and place our hardware here this is the part that goes in. the glass and you can always tell which side goes into the glass because it comes with all these little plastic covers that separate the metal that way you don't have to come into contact with the metal on the glass to prevent it from chipping so the screw holes are left in the instructions so many millimeters up so many millimeters down I hate that kind of thing.
I'm more of a visual person. I like to draft to make sure I'm comfortable with what I'm doing, so that's exactly where we are. I'm going to do I've worked with different systems, some of them come with a little L shaped square and you can put it in there and mark the holes, that's brilliant, but this system doesn't have that, so what are we going to do? Are we going to put this hardware here and just work until we find the sweet spot? There we are and we're not going to tighten it all the way yet, we're just going to put it in so that this particular hardware is It comes in two pieces, very nice.
Now these are just decorative covers. Okay, you don't need to put them on right now, but just visually they'll help keep you in check. Now I need the other one to go this way. Alright. What happens is you can see this little bracket here and on the left side of that bracket there are two screw holes and the bottom part is going to support the weight of the bar so all you're going to do is go. to set the level you're going to slide this in and you're going to screw it to the wall so we can do that we have to grab our allen wrench in this particular case that I thought was in my bag and there it is and We're just going to do reps buddy we're level and we will tighten the Allen key so that it does not slide.
Now that I have both ends clamped to my bracket, I'm not attached to the wall. however obviously this isn't tight either, we want to level it before marking it okay so here's the key, this is a small torpedo level, it comes with a magnetic side, you'll notice that with stainless steelIt works, yes. To avoid damage, don't trust it, it's also very sharp, so even when you think you're level, it's very hard to tell. It is a very good quality torpedo level, but the longer the level, the more accurate the reading and you will see. which according to this one I'm out, so even the torpedo level said it was perfectly level and it was wrong, bigger is always better, so what we're going to do is just trace the outline of the pencil that I don't want.
To use a marker here, like I said, this is a lip and foot slab, so it's porous. Lay this all out first and then we'll remove all of this hardware and we'll go back and drill these holes and then we'll melt these brackets. in the exact position we want, we're just going to mark and go and then drill four more holes, we'll be back in a minute. I like to use the back of my tape measure to place my outlets on the wall, it's solid rubber. It does the job it doesn't break anything, you'll see I'm pretty exhausted of my ability to put that plug against wood, I'm a little crazy, I like to overdo it a little bit, okay? we have to get our bar into position and put it through the glass so you end up with something scary waiting three points now we have this in this final resting place my allen wrench there's a hole in the side of this and you use your allen wrench to tighten it like a shiny wrench, it's a quick summary now that we have our fixed panel in place and we have our top bar secured and in place so that every structural element of this is made from this Point forward, what we're going What to do is hang the door, make the adjustments and then add all the finishing touches just to keep the water from running out of the shower and then we're basically done so what are we going to do?
What we're doing here is we're taking these wheels apart, so it's helpful to have an extra pair of hands, so I've got my wheel and my little plastic gasket here just to keep all the metal from coming into contact with the glass. It's important that there's a wheel here, but the hole is offset so when you turn it to adjust it, you're actually raising and lowering the glass and that's the other side of the nut, so you put the nut out and then put the nut. hold the nut and simply turn the wheel until it is finger tight hold the side of the decorative cap because you won't need it until you have finished making all the final adjustments do the same on the other side to the right turn without packaging , sure Hi, mm -hmm gray plastic, which side does it come in, yes, no, Hagen, I wouldn't hold the nut to the thread and then turn the big wheel, big fingers, honey, and that's why you want to move the big wheel , here we go, yes, it is important that you are.
Threading something like that, go backwards until you feel like catching it and then go forward, you know, cross the thread, okay, it's tight, it's not going to fall off, that's good, yeah, okay, here's the time to the truth is, ready, mm-hmm, so we will use two people. here we're going to lift this over the rail, okay, so your job will be to make sure that they both go to the edge, okay, my job, to make sure that the bottom glass fits into that little space there, okay, at the same time. Okay, so we want to bring it up and then drop it into place and down.
Okay, so you take care of the visual at the top. I don't deal with the visual at the bottom. Okay, we're okay, we're okay and down is not nice. we're there we're there okay so we're on our slide Hey so this system has this little braking system built into the hardware tight like a bug in a row that's good that's a great little trick it's your strength against the glass you same and okay, so all of these gaskets are not applied with any adhesive, no silicone, it's just a compression fit, they are also available for replacement parts if you go to your local glass shop, anyone that has eight, ten or twelve milks.
Laughs will have them in stock so if you have a kit that requires you to cut them to size then you are making a mistake, just go and get a new replacement, they are only a few dollars, they are in stock and that way you will win. Don't be disappointed with the end result when you press this, just be very careful, it's a very stiff plastic so if you go too fast you'll end up burning your thumb, it generates a lot of heat, it's nice and easy. These gaskets are designed to prevent water from escaping. Water is generally a problem at the bottom of the shower, not the top, which is why we don't use silicone on the screws that mount the top row.
You will not be covered in water. up there, so once you get to the bottom, set up real good, go ahead and finish all that. Really the last step for us here is to just put our little brackets down here on the silicone, this is our drip edge, this is just a little threshold that they were designed goes inside the doors, the water that drips off the glass is redirected. back into the shower and then we're done, we just grab a silicone and walk away, so now that we've got it in place, the reason Putting them on first is because this particular system doesn't have a guard on the boat on the rail.
Some systems have a little bumper here, so we open the door arm and it stops there. Pretty and shy, you will never have contact. the wall, this one goes tight right on the wall, call me a little nervous, but I want to make sure I have that little protection and here this system again, there's nothing stopping this from going all the way except that the brick here and as it is a new system for me, I didn't want to take any risks, so now I have something nice and soft for those pieces to land on. This wheel is designed and this is going to be crazy and we will adjust it. this in a minute so that when the collar screwed into the door it can't lift up from the bracket, that's simple, so if you grab the handle and lift it up a little it will hit the rail and won't fall out. out that's all you're just for security and push well, in the kit you will get one of these little keys, depending on the kit there may be more than one key, but here what we have is a really interesting situation on this door despite the best we have done.
The efforts are a little bit off level, let's put this wrench on, okay, this place for you to see, you really know, watching the glass go up and down, we want to get down on our side here as much as I can, it's amazing. This little adjustment, well, there's a big difference and then we'll take our wrench on the little nut in the middle and tighten it to lock that place in place, okay? because we like the way he's sitting. I don't want to let that chain tighten that nut into place now please if the accent table we had before we'll just put it on now we need a door handle of course the same rule applies you'll want to put one on.
Of these plastic gasket pieces on each side there was a set screw here with the set screw facing down and again it's so nice to have three hands so the last part is just to put the molding on the base this is just a water deflection so this is not a big deal we're just going to add a little bit of silicone to this piece of plastic that the door receives okay this is very important here slide the door let the door dictate where it should go and swipe it again. This last little piece here goes. outside the door we'll go under that molding, so what I would do, I would use it as a straight line just to mark where it's going to go.
This product will work for me very smoothly, it just makes a difference. All that's left now is take your clear silicone use a good mold resistant product that will last a while and make a good seal anywhere metal meets tile or glass meets acrylic base and just close it all up with the silicone, remember this type of a system is not waterproofing, it is just a water diversion, as long as everything that the water is going to touch as it follows gravity and heads towards the drain is sealed, it will not start to slide back not even below the edge of this base.
It's probably got a two degree slip, everything is going down the drain, so what I like to do is seal the outside first and then once it's all done I'll come back the next day and seal. the inside and silicone of my entire shower because I still have to do all the inside around the seal and around the base, but then your shower system will be ready, most of these units follow a similar principle, there may be minor adjustments here, remember the steps are simple lots of measurements, do a trial run, have an extra pair of hands and you can do it yourself, too weird.
Today we will teach people how to install a toilet, but more than that, it is a new construction, so we have a ruff. from the prints or the house builder, this is the house builder's sketch and we have a chest water supply line that we are going to crimp up to the wall from the back after we finish today, basically what we do is turn off the water rule number one is important now because this is loaded we are going to cut this line we are going to put a shadow valve on it this is actually a pair of trimming scissors I use this when I am installing a quarter circle or a mold for shoes.
I can actually just run around a room with this and cut the angles of all my little pieces of wood, but it announces a cut pipe so mister is about to find out I just got an old bucket here. a little bit of water and water pressure, so let's give this a cut, here we go, you don't have the right tool for the job, have a good tool for the job, at least that's a lot safer than using a knife , here we go. I'm going to scale this down a little bit where I don't see any compound or anything in the pipe, so this is a shark bite, dude, okay, basically what we're going to do is we're just going to push this in and twist it. on the pipe and then they have this little decorative cap here as well.
Before we do that, we're going to put a cover plate on the pipe. You can always get a post-fit cover plate called a split pipe flange. I like to use these. cuts are options, okay, so just turn this on and that's it so we can clean all the sludge out of that pipe. Well, one of the advantages of this system is that after installing it you can still adjust it to prevent it from bending. line a bit of feed to the toilet which becomes kind of a cute little system. We just installed the shutoff valve on a new build.
Align the text and about six or seven seconds and you can't do that with copper. You would have to solder that drain line and dry it and if you are a homeowner and you are running away on your own schedule this is the way to go so from the back you just drive a small retaining nail into place. keep this all nice and strong we'll be ready to go yeah let's go to the bathroom the plumbing has a three inch piece of pipe here for the bathroom so I went out and got this on hand. small ABS saw.
I got this a couple weeks ago because I had to make an adjustment to the roof for a vent stack. Today was a little crazy. I could only reach there with the long saw like this to get to it, so I thought. this is great this tool was only nine bucks so if you're doing a little plumbing at home and looking for a good way to cut the bite out this is a very small fine tooth saw that cuts through abs instead of melting it , there are a lot of tools that melt it and make a big mess, but basically what you do is bend the saw blade, hold it against the ground and we're cutting flush, okay, take my knife, clean the burger, okay, no, this is my flange, it's a three inch inner pipe flange for such an occasion.
Hey, can you get me a cup of coffee please? Okay, what are we going to do, we're going to glue the inside of the pipe and then we're going to glue the flange, okay, taking note very carefully of where these rectangular holes are so that we don't have them at three nine o'clock, there It's where the bolts start and then you have to move them around so they're this nice and tight and then when your ball goes in, it'll slide into a position and they'll lock there when you go to the bathroom. These little rectangular areas here to allow Bolton access, so make sure you put the flanges in their good place, thank you and of course until we're ready to go through the sewer gases, so when you're doing your salt bath Make sure you have all the bolts, nuts, and decorative caps because this is something you want to install first. you put the brass nut on right, very important, if you try to do that first by installing the toilet and add them later you will be disappointed with the performance it actually fits and this design fits the toilet so you have to install this part. before your brass nut, okay, let's install and put our wax ring in there, okay, take the nuts off, go, don't let it go down the toilet hole, put these little things down here, okay , they simply join the thread andIt's designed so that once you put it in position you can pull the nut like this and it will hold it upright.
Tell me when you're placing the toilet, that's what really eliminates a lot of the guesswork. what you do is actually from the front, you hold the cup like this, you straddle this whole situation. Now I can put the weight on my elbows, you can hover over the toilet and visually make sure that I'm getting that bolt and each of those holes and then just follow that down and now I want to put the same kind of pressure on the entire surface of the toilet all the time I'm pressing down and sometimes the best way to do it is to just sit down, ah perfect, important to note that you want to put your medal, your little metal washer and then you put this on now.
I don't know if the camera will catch this, but at the top they print the sign with this side up, you'll see it this way, it's like the ceiling. of a house you want that there because that's actually what covers the toilet bowl and that's how it fits and then you put the nut that Nate you wrote above and you take the grinder with the little cutting wheel out of the truck bay, like this that every time you buy a toilet bowl it's too long, they make it long on purpose, generally speaking, they make it so that no matter how many layers of floor someone walks into their house, they can fit a toilet, so I don't mind You may ask why, but they go a little overboard here, it's a two and a half inch toilet bowl.
If you end up needing a toilet extension in the kit, they have three inch bolts so it would be nice if someone made a toilet bowl, it was the right thing to do. bloody size and it's in the toilet in a normal situation, so first I'll show you how to use the saw to do this because I don't expect everyone to have a grinder with a metal cutting disc, but basically this is similar to drywall, you want less pressure but a lot of movement, okay, I mean here you're just cutting brass after a good check because you don't want to break the toilet and if it's a little too loose just tighten the bolt again. kick up the dust because they go away so the alternative method is to get out your grinder with your cutting wheel this also works great and works in a jiffy oh yeah now we have our tank.
Thanks Nate, yes this is a small meeting. Vinglish, what's in it? finish rolling that suction cup, make sure it's in contact with the toilet, the whole area around it, push it in as far as you can and then everything we have to do for this particular model. I should mention sometimes the toilet companies that make these bowls that you'll slide in and you'll have to connect it to the tank first and then place it in the toilet, so check your instructions. I always check your instructions. Sometimes people do these weird little things that you don't want them to do.
Place it. Instead, we're dropping them into their holes, the idea that this rubber gasket under compression creates that tight seal, okay, so here's my secret to putting on the tank bolts, hold the nut in your hand, put the washer on top like that, go down and hold the bolt, study it and put it in place, back up until you feel it grab the thread, move forward, I don't know what it is about toilets, but each bolt seems to be so long, okay, there It's where there is a company in the world somewhere. Thailand that means nothing but threads of bolts and they make it for everyone so there are all these different sizes that make a universal toilet bowl, yeah between making the toilet bowls there a billionaire probably wants to squeeze that's until your tank is nice and secure okay here we go yeah the other thing you want to do is install the water supply.
These lines usually come with a big sticker here, this sticker nobody wants to see and it's never around and we just screw it on our three-eighths. be careful when you buy your shut off valve it says 1/2 inch and 3/8 you can get a quarter inch 1/2 inch remember 3/8 is the typical water supply for toilets and faucets where a quarter inch is the supply of water for a refrigerator line, you don't want to choose the wrong one because this will make a 15 minute job take a whole hour because you have to make a trip back to the store, there you go, once it's tight, grab the wrench and put a couple of turns up, turn up the water supply, okay now, if you were looking from the back, it's actually turning clockwise, so it's actually turning clockwise, if you can imagine looking at it from the ground, it is important to always look at it. from the position of looking at the container and then you will know which way to go, there is the advantage of this shut-off valve, it can be installed conveniently like I said, now that that's done, I'm going to go and attach it to the wall Nate goes and opens the container again water from the house, we are going to open these little covers in the back because this bathroom is used as a company and it is downstairs, around the corner and at the end of a hallway.
He wasn't worried about a soft close, but just a word of caution if he's going to set it up near his garden seat or the master bathroom and there are a lot of people around, he'll just invest in soft clothing if he goes. to a plumbing supply place it costs about twenty five thirty five dollars depending and then you can't close the lid and wake anyone up when you've done it again. This is just another 1400 inch bulb with no particular craziness, click, twist, twist. and it turns and turns, okay, dear Lord, the guys that make these screws, I'll finger tighten them and then we'll tighten these bad boys.
There is a rubber gasket on this. Someone said to tighten too much. It would be good to continue. put the covers in place, that sounds like the water is on and a quarter turn, shut up, there will be some air in the line, don't let that scare you and here we go, we'll make sure it's working properly, so what we want to do. now it's wait to make sure the water fills the tanks should be marked with the waterline everything is working properly it will stop filling if it doesn't stop filling this is your fit on your flute it's fine so you can loosen it or tighten it it's to adjust the amount of water you have in the tank, this particular run, that's our low flow and then we go down to a point, one gallon per flush, which is almost nothing, love me, some water conservation here, we go out directly from the factory to the waterline.
I love it so just a quick shade of the Pro Flow company. These toilets are available from Woolsley Canada. I'm not sure if they are available anywhere else, but they are a great value. They have the largest P trap and are available in Plymouth and the least amount of water available in bathrooms and now they are even quiet, in today's world we are using many new and different materials to finish our kitchens, bars or powder rooms, and one of the Really popular materials now is the tree live edge slab. one here is two and a half inches and nine feet long and is made of ash and in our part of the world we have had something called the ash borer beetle that has been eating its way through the bark and killing these trees.
So, this is actually a piece of dead tree that was cut, planed, and turned into this countertop. Even though we're using a lot of wood, it's something that would otherwise have no purpose, so we're reusing a dead tree to make a really cool countertop, so the way we originally installed this countertop is actually quite, since You know, Creative came up with a little system using wooden dowels for just a few dollars at the hardware store and this is seven eighths, so what we made is a bite of a slightly larger drill bit, okay, so it's fifteen sixteenths. and it's a little bit bigger so what we can do is pre drill holes in the wall that we made and on the back of the countertop fill them both with reverse glue we hit it with our hands and that's how we install it with some brackets temporary, so my system for installing these wooden countertops is very basic, you don't need many tools or skills, what you need is one piece. one by four, something that uses a straight edge, in this case we don't have a hanging rail left over from an IKEA kitchen and this works very well because it has a lot of contour guaranteed to be straight.
All we're going to do is just lay them down, we're going to measure this on the back of our counter, it's almost eight feet long and the wood is exactly eight feet long, so we know that when we screw in our dowel , if we line it up with the edge of my countertop I want to have a one inch overlap, so I'm going to place this where I want my space to be and I'm going to attach one by four to my slab here and I have to leave enough room on the another side for my backsplash, okay, we're screwing this temporarily against the ruler to create a nice straight line because it's hardwood, it's nice to have an impact driver, there we go, now it's straight, so let's take our drill.
The piece that is a little larger than the dowels we are using on my countertop is about this long. My one inch overhang will be two. Here, once we have this set up, we can cut the countertop, but I don't want to downlink too close to the edge, so I'm going to back up a little bit, we'll go to a healthy place about eight inches from the edge, okay, I'll mark that place and I want to have about eight of these. so I'm going to go every 15 inches so what we're going to do is we're going to mark 15 inches now that we know it's going to work up here, 25 60 inches and we're going to drill a hole through our 1 by 4. where we want the dowel to go and then once we start on the hardwood, we're going to stop and drill that hole in a minute, okay, so we're going to remove this and then we're going to turn it over and it's going to be flush. with the end knowing that the holes will line up leaving the countertop an inch longer okay I want you to fasten it here and here again where the screw is and then I'll manipulate the wood into position so then I'll manipulate My wood is straight there we go while my dad lines up legally so I had my assistant cut me a bunch of these little pieces off the one and a quarter inch dowel and he's using the palm sander to round the edges just to make installation. nice and sweet, we don't want to have to fight to make all the holes now to an inch and a quarter, half of that of course is three quarters of an inch, so three quarters of an inch from that tip is the depth I want base on what I'm going to do is place this tape a little bit above 3/4 of my drill bit so that when I'm drilling it acts as a little marking flag, and this is just a great way to make sure I don't go too deep. and get right to the courts, that would be bad, okay, now we're using this 1 by 4 as our template, so it was on the counter, we turned it over and installed it on our wall and now we're going to mark on our plate with the drill and this is a self adjusting bit so it sticks out nice and deep.
We just want to get that center hole. Now we remove our 1 by 4 and finish drilling our holes again. have the same depth set with the tape, the trick here is to go a little deeper than the middle of where the tape line is because we want to make sure that we have room for the glue to be on the top and bottom and that the countertop fits well. and rinse, this is a software that we're digging into, it's a lot easier, come on, so our design is now 95 inches plus an inch of overhang on each side, which is 97.
We'll do what I measured and we'll mark that and I . I'm going to take my 18 on the ninth and transfer that information here so we can cut it square and we're going to cut the slap before we turn it over because we're using a hand saw that cuts from the bottom and if we cut this way. We are actually cutting the end side of the counter to prevent chipping, chipping and breaking. If we install it first and then cut it, we run the risk of breaking off the excess on top or just before we are. trying to finish it and that would be bad and I'm going to cut this tree from the side that doesn't fall so the saw doesn't run any risk of getting stuck, someone needs to hold the weight but not let it turn towards me just one so now all we want to do is be generous with our glue pillar travel, but a third of the throw will guarantee contact.
The worst thing that happens here is that it squeezes it and you can wipe it off with a red rag. It is not like this. This is too much in this scenario, you definitely couldn't use it and put the peg in the wall that we built right, unlike the counter type and the flap, put it in the position where your name is, okay, lift this side up please , very careful and me. I have a couple of set screws here now. I just grabbed a couple of two-by-threes, put adjustable legs on them and a little quick fix plate so I could make some temporary legs, and down below I justI put a little weight on that one there. come on, come on, okay, just a really quick note, once you're done nice and sanded, there's no raised green, just double check your edges.
I mean, the edge of a counter will always be dangerous to some extent, but sometimes and these come. off the planning machine, the edges are so sharp that if someone who is short were to crash into it, they wouldn't just crash into it, it would be sharp enough to split their skin trying to take good care of the little ones, that's all. I can show you today that we are using this barring table finish from Vera Thane. It's a two-part epoxy resin finish, which is awesome. It gives you that really thick glass look when you're done, as you see in some pubs and restaurants. you've been, we'll wait until this finish dries before we start working on the surface and we'll also install, you know, your classic black metal bars for additional support, we'll place them about halfway up.
Go back and bring them down to the ground with a threaded rod that way we can adjust it before screwing it into the surface and that will work wonders, it will give me some peace of mind knowing that there are people here that are putting weight on that they shouldn't. You won't be here dancing on the counter, no one will get hurt. If you want to see this finish, all you have to do is click the link at the end of the video. You will have the opportunity to go and see it. the full video of the project itself, we will have all the finished images and camera angles and I am sure you can enjoy it too.
We're excited. I would love to hear your opinion on this type of finish. Put some in the comments below. you have a better product or experience using something different than you have a favorite product of course. I am open to suggestions. I'm only using this because this is what is available at my local construction store. I'm open to suggestions, that's all for today, thanks for joining us and again, if you enjoyed this video, please hit the like button if that interaction is important and if you have any questions, leave a comment below. I would like to answer them all.
Still, so it will be. about a hundred thousand subscribers before we have to start involving other people to help answer those questions, but for now I'd do it alone and I'm up every night dealing with it, so I'll see you next time. We are finished and when I mean finished I mean finally finished what started out as a fairly simple project to finish a basement space that took on a life of its own as the client began to see it develop and expand his vision and came up with new ideas, so originally we had designs just for a small bar in the corner and every time we took another step around the corner, the development of this project, the bar grew and grew and grew and we had to involve the designers and change our expectations, we added these incredible elements and now what we have is something that is absolutely speckled and repeated, this is really spectacular here, so we have a live edge countertop, we have our quartz countertop.
Believe it or not, all of these cabinets are from Ikea, so thank you for that, they really work great in this space and we were able to modify and make all of our creative products with it. It didn't work well. I love the bar top. This is an 8 foot by 8 foot bar that now sits in the middle of the space, so hopefully this would be big enough to accommodate all of your entertaining needs, but as you can see behind us, the lighting here It's bright, it's not even very sunny today, but this is a main floor type environment even though it's a basement because it's a walk-in closet and so it deserved a little more attention, a little more detail, some finishes. really quality, so what we did was replicate everything from the top and lower it so that we have the windowsills. on the windows and nice big thick molding with a very modern look, so we're very happy that you can notice it as you walk around.
The apartment is really incredible. This is an apartment for rent. This is a laminate flooring product, but it is very high quality. incredibly durable it has a great texture that fits nice and tight together so if you are looking for a floor for your house I would suggest this this material is amazing of course the double doors are inside and the bulkheads are finished and the space is huge. completely open and although it is a basement with a drop ceiling it doesn't feel like a cramped space, there is nothing but space here so I am very happy, although the clients are happy.
I know the crew is happy to be done and I know Max is happy we're filming, so one of the things about this bar that we love is the fact that we have so much space between the wall and the cabinets when you design a space like this, it is not enough to simply squeeze. Well, you want to make sure that your funk, your features are working properly, you have plenty of space, okay, this is a big enough bar, there could be more than one person back here, so you definitely need the space and remember when you're doing a project like This the last thing you do is always make sure you put a bottle of champagne in the refrigerator without clothes, little surprise, so when we left the master bedroom and headed down the hallway, by the way, I really loved how the floor turned out tiles again.
Kudos to the granite tile leveling system for helping us with that really important thing to keep in mind here in a basement, you really need to make sure you have the hallways nice and wide open for you, a concept, so we've changed the layout of the original plan that had a bigger bathroom and a bigger bonus room and made wider hallways so when you go down to this level this is not a basement you feel like it's just a different level and it's amazing so let's head in to the bathroom. I'll show you how we finished that, so one of the things we changed is the original redesign of this bathroom.
It was a typical 5 by 7, so it would have been a vanity door, tub and shower, a bit of a hallway, and took up about 35 square feet. feet, so what we did was we changed the layout and we went with a 6 by 7 and made it more rectangular, so when you do that you end up with the door in the middle, why open to an area that looks much larger and not They are so tight. I hate those five by seven bathrooms, so what we did was change the hallway a foot larger and stretch the bathroom out this way and take up a little more storage area, which wasn't really necessary because I had tons of space available in there , this way this bathroom, although still small, feels quite large, you're not claustrophobic and there's room for a couple of different design features, you can put accents and different things in the room and you.
We're not going to feel cluttered, here we have a simple little vanity, a built-in storage shelf can double as a guest bathroom so you can load it up with towels without having to worry about things and then the shower is basically a system. a five by thirty inch sliding door kit, the fixed shower bar, this is a really nice job, a fantastic simple tile wall, and again we are using our pro flow system on the bathroom shower wall, This is a valve and it only has one control but put it on the adjustable slide bar so no matter who you are this is really easy to use it is just controlled with your thumb and then you can move the wand then wash the shower.
This is as basic as it gets, but it's very elegant and very reminiscent of style when you're designing a space as a base, whether it has low ceilings, the secret is lights, lighting, lighting, lighting, lighting in all parts, okay, that's the key, so the LED pot light is a brilliant way to do it because these are installed afterwards, you can connect additional ones to the system after the fact. If you need it once you start with one LED light, you can add 15 or 20 in the same run because they don't use a lot of power and they don't generate heat, like for example in this area, this is basically just the hallway and that's been widened and we have a nice four inch door that goes to the storage area to make it easy to store anything that comes in and out without damaging things over time, but on the ceiling we had a similar situation if you remember that old Victorian kitchen we did , we had district heating in this area, so this is right next to the boiler and we had to hide we had to hide this, we had to hide something here, so we ended up just creating this whole box roof. effect, but rip out and do the crown molding, put in a couple of clown lights and now instead of just a bunch of boxes in the basement with no purpose, they look like the way we created this ceiling effect where it looks. like a designer roof made on purpose to create this height effect and I think it's beautiful it's a great way to solve a problem so thank you for joining us for this how-to video marathon everything you need to know to build a basement .
Now, if you are a home renovator and are just looking for knowledge, information, techniques and processes, then we have other A to Z videos for you. We have our series of terraces. We have a number of bathrooms and we have more in the future. So check out our playlist below, comment on these videos. If you have questions related to your project, we will be happy to answer them and look forward to seeing you next.
If you have any copyright issue, please Contact