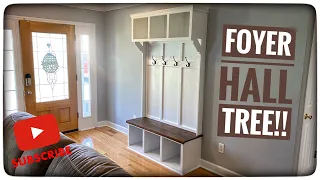
DIY Hall Tree Bench
May 08, 2020What's up guys? Ashley here and I'm back with another video to show you how I built this DIY, our
tree
sponsored by Home Depot, so first I'm going to start here by just drilling holes in my plywood that my Kreg jig is on. a 3/4 inch setup here and I'm using my new Dewalt atomic hammer drill to drill those pocket holes in the sides of thehall
way treatment, once I finish making those pocket holes in the plywood I'm starting to add them to the bank. legs, as you can see here, I'm just putting on a little bit of wood glue and then using 1/4 inch pocket hole screws to screw them into the legs here and I'm just doing this for the other side, as you can Look, I introduced the plywood board a little so that there is a little space between the beginning of the board and the plywood side and I'm doing the same thing using those screws with holes to screw the plywood sides and then I'm just doing the same thing to have two sides now, once I have those two sides all assembled, I'm now going to take the longer plywood boards and attach them to the top and bottom of the two faux sides of the stream bed, as you can see.
I'm using a little wood glue here too and then using those same 1/4 inch pocket hole screws to screw those boards to the sides of the
bench
. Now I decided to add both plywood boards to one side first and then. I can flip it over and then screw the other sides to the other side. I love the hull treatment, as you can see here and here. I'm just repeating the same step, just adding those screws to secure thebench
. Now I'm going to add the molding as you can see here. I'm just adding a little bit of wood glue.
More Interesting Facts About,
diy hall tree bench...
I've been adding my 1 by 3 to the top and then using my nailer to secure it down. I also did the same step for the bottom. cutout in the bathroom but unfortunately my video didn't catch it so now we have to cut it with my circular saw so once I cut it I placed it on the bench made sure all the sides were even and then applied tosomeone. blue and below and then attached it to the fish using my brad nailer and some shiny nails. Now that that's all, it's the light bulbs, we can move on to the top frames.

Here I'm just creating some pocket holes in the frames that will be on. At the top of the entire
tree
, I'm using the same 3/4 inch setup and drilling these pocket holes in the top and bottom center pieces. Once I finished those holes, I used my Craig right angle clamp to help me assemble the top. frame here as you can see I put the clamp on and one of the pocket holes and it holds it in place then I take it out and then I screw in the extra pocket hole screw and I'm just doing this for the same size so we can finish with a rectangle at the end, now be careful when creating this backing because of the 1 by 3 because the 1 by 3 is so small that it can look a little flimsy, so make sure you screw and handle carefully here again.
I'm doing the same thing, just creating that rectangular shape with the record sleeves. Now here I am taking out the mirror that I will use. I bought this mirror from Home Depot, it's the 24 well by 48 mirror. It's a frameless mirror and I'm just getting the mirror out. I can measure it against the back. I know the size is 12 inches but I just wanted to make sure it fit perfectly so I took out the mirror and put it on. the frame so I can know exactly what I need to put that middle one by three, so I'm doing that now.
I'm adding that middle piece by screwing those pocket screws back in, the same ones I used for the outside frame and I just wanted to make sure again that that mirror is going to be a perfect fit, as you can see. I've turned it over here and the mirror fits perfectly so we can go now. I'm adding these 1 by 2 horizontal trim pieces here. I just use a pocket hole on the back that's all you need and then I use those pocket hole screws again to make sure they're secure and I have my mirror still so again I can make sure the mirror is okay adjusted and there we are.
Come on we have our battery now, once the back frame was finished it was time to edit the assembled bottom bench so I took the back of the frame and screwed pocket hole screws along the bottom side so I could attach it to tip. Now you have to be careful with this part because the top frame is a little flimsy without being screwed on. I realized that I'm standing in front of the camera, which I didn't realize, so it's a little difficult. so you can see what I'm doing but basically all I'm doing is just screwing the top frame to the bottom using this now again once you screw it on it's still going to be a little flimsy until you add it back so just make sure To be careful during this part of the cocktail, now that it's all screwed together, I positioned the floor so I could apply some wood glue to the back of the frame and the side edge and then took the 1/4 inch piece of plywood and put it on top of the bench and put some nails on it so I could hold it down before looking for it now as you can see my backrest doesn't cover the entire backrest I did that specifically because when I looked at the bench from the side.
I didn't want to be able to see that 1/4 inch backrest, so I lightly removed some plywood from the corners, but once I got it up, I attached the backrest to the Hartree bench. and then I use my staple gun to make sure it's secure. Brad Nails won't secure it as much as staples and I gave it a nice paint look. She and my transport tree are finished. I hope you enjoyed this video. Don't forget to like and subscribe and for more projects and tutorials check out Handmade - Haven com, okay guys, later.
If you have any copyright issue, please Contact