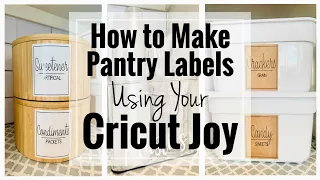
CRICUT JOY SMART LABEL WRITABLE VINYL : HOW TO DESIGN & CUT JAR LABELS!
Jun 01, 2021Hi everyone, I'm Bethany and in this tutorial we're finally going to explore
smart
tags, so I'm really excited to show you this because it's so fun and can really open up your world to so many different crafts. Really excited, I tried this last night for the first time and I was really happy with the result, so what I'm going to do today is show you how you can usesmart
tags and you actually can't. write on smartlabel
s so we're going to use thecricut
joy pen and this is just the pen that came with the joy so we're going to use it to write on thelabel
s and create somelabels
for these sweet little jars that I have. so I bought them, ordered them from Hobby Lobby and will link them below.
Always make sure to look at the description box below to see the materials I'm using, but I bought these, they cost about 2.49 cents so I can't remember if they're on sale or not, but they're 10 ounces so I bought these sweet little records. They are glass, but the top feels like the little top piece is plastic. It doesn't feel like glass at all. To me it feels more plastic, so I'm going to make some
labels
for each of these three jars and these are going to go in my craft space, so as you know, if you have a craft space, there are always little things that organize so if you want to organize your craft space this is a great tutorial if you want to organize your pantry this is a great tutorial anything you want to put a label on with this smart labeling system and write the labels this tutorial will be amazing for you, so Make sure if you don't want to make craft labels, just take the tips and tricks out of this tutorial and make labels for any small jars you want, but I'll do it for these sweet little kitchen organization jars. craft room for me, so What we're going to need today is obviously the Cricut Joy.
More Interesting Facts About,
cricut joy smart label writable vinyl how to design cut jar labels...
We're going to need this smart seal again. It is recordable
vinyl
. On this one I just received the 48 inch package so I don't remember if they sell a larger version of this but. This is the one I bought, but you will need the pen that came with the Cricut Joy. This is a fine tip pen and a black and pointed pen. To be honest, I didn't really like using it. pens and all that with my Cricut machines, but the joy of the Cricut has made me a lover of the writing feature, so I definitely think I'll go online this weekend and order some different colored pens because I'm having a moment. so much fun to do all of this so dye is all you're going to need for smart labels so if you want to stop there then you're done so I'm actually going to add some paper on top.
These little boats just added a little color and fun, so I bought three different colors of scrapbooking paper. These came in a pack together, it was called a girl pack and I think they go really well together, sort of sweet polka dot. a floral one and then a pretty checkered one, so on, we're going to look at the inside of these rounds at the top of the container and measure them and then we're going to use some masking tape to get all of our measurements. for the labels and then the top of the jars and then some scissors and a spatula again everything here is everything for the top of the jar except the scissors you'll probably use those for both but if you're just making labels smart you literally need your machine, your pen and the smart labels and then potentially some scissors, obviously, so it's a very, very easy project.

I'm really excited to show you how to do it, so we'll jump into
design
space in a second. I'm going to show you how you can organize and layout all of your labeling and then what we're going to do is we're going to cut everything out so first of all let's go ahead and measure our jars so I'm going to open up the Inside, first let's measure our little circles so I'm just going to flip it over the lid down. I'm taking my tape measure and I'm going to measure the inside and that's about three inches, but I don't want it to be like that. so big it bubbles or something so I'll just say I want it to be less than three inches maybe a hair shorter so we'll use that for the inside and I'll put it back on the top and now the next thing I'm going to do do is I'm going to lay it on its side here and I'm going to measure from the top of the glass to the bottom of the glass, so not from the little lid. here, but just this top part of the glass and we're about three inches, a little bit less, so that's going to make it easier because we just have to remember three inches and keep it smaller than that, so I'm thinking. my tag will probably be an inch and a half for my height, so it's okay, we have all the main men.We do a little tongue twister. We have all the measures we need. I think it's because I'm reading a lot of Dr. Seuss lately OMG they're getting fun so we're going to go ahead and jump into the Cricut
design
space and we're going to cut out and design our labels and we're going to draw a lot on them and it's going to be really really fun I can't wait for you guys to see this so let's get started okay here we are in the Cricut design space and I'm going to try to make this perfectly for you guys so smart tags are new to all of us because it was released about a month ago with Cricut Joys, so this is all really fun, but it's also really new to all of us, so I love it when you give me suggestions for tutorials that you want to see and most of the time.I know exactly how to do it because I've done it over and over again, but with new products I have to think I'll definitely make a video, but I have to learn on my own so I can then teach them, so I'm going to create. labels for you today and you will learn how to do it, it is really easy if it takes a couple more steps than normal, but you just watch the practice, you will learn it in no time, just like I have done now. What I'm going to do is I'm going to start by going to the image box and I'm going to click on the first one that I wrote when purchasing a border draw and I'm just going to add a little vine to my label so I'm going to do that first one and it's this one here and let me press the info button in case you want to find the same because it can be difficult to find so the code is MC ffb e80 and I think it's useful to put the little pound. symbol when trying to search for it helps, so I'm going to go ahead and select that one here and say oval tag, oops tag, and if you're not sure what kind of tag you want, you can just type tags into the little search engine up here and you can explore all the options, so I'm going to take this one to have my vine and my oval and I'm going to go ahead and insert them. on my canvas, so the first thing I'm going to do is label my little blank label and first of all, I'm going to adjust the size to a height of 1.5, so I'm going to make it a lot bigger so we can Look, reduce the size a little bit that way, we can actually see, but I wanted to adjust the size of my label at the beginning so I don't forget it, so now what I'm going to do here is go ahead. and duplicate this and the second one I'm going to say draw, so what this is going to do is I'm going to make it a little bit smaller.
I'm just going to create a little border around my label so at the bottom, the bottom oval is going to be cut off just like it says here, this top label is going to draw an oval on top of my label, so it's just going to add a little border. . I thought it would add some visual interest, so what? What I'm going to do is select both ovals. I'm going to go up here to a line, you can click on it and say Center, so it moved it just a hair, but it made it perfect, so now what I do.
What I'm going to do is make my little fine a little bit smaller again. This is a drawing file, so it will be drawn and if you bring it in and you can't see it, what you can do is just drag it. to the top of your panel, your layers panel here or you can right click and say Center Front, so now I'm going to get this and it looks pretty good to me, so the next thing I'm going to do is I think it looks this good, like this which what I'm going to do next is highlight it and say attach now, attach and make sure that this whole label is cut and drawn exactly how I like it here, so you want to make sure that I attach it, so what I'm going to do next is duplicate it to the other tags I'm going to create, but I'm also going to duplicate it a fourth time and that fourth. label what I'm going to do is hide it, so I'm going to click on this hide button.
I'm doing this because I want to have a blank label on hand on my canvas because I already know I'm going to calmly go to Hobby Lobby and order more of these jars because they are adorable and I'm going to need more for my craft space anyway, so I'm going to make sure I have a blank label hidden in my canvas that way when I go back to create more labels, that's it, now what I'm going to do is add the text, so I'm going to go to the text box here and use the font to the seasons. home decor and it's the style of writing so my first word I like to start with my longest word for size purposes and my first word is going to be letter board okay so I'm going to have to reduce the size of this so I want all of my words on each one to be the same size so I like to start with my longest word so I can size it appropriately and then base everything on that just because it's easier to size the biggest one first which looks great for I think we're going to be there perfect so now what I'm going to do is select my words and then I'm going to come up here and say duplicate and I'm going to drag it down and Double click because now they're the size I want so I just want to duplicate them. so everything stays the same and the next thing I'm going to do is close the pin and now it's sized so I can drag it up. free, okay, now the next thing I'm going to do is go ahead and duplicate this one more time.
Sometimes you just want to capture all the wrong things. My computer tells me it's 5 a.m. m. and it's too early to elaborate, but I disagree. I can create any type of theme, so now I'm going to do the third one and the third one will say washi tapes, okay, and that one is cool, so now what I'm going to do I think they like it, wait, okay. I love the way they look, so now what I'm going to do is go ahead and highlight each one of them and make sure I attach them the way they're cut and exactly how I have them organized here.
Okay, now. The next thing I'm going to do is make those circular tops for the paper to cut out, so I'm going to go over here to the leaves and I'm going to make a circle and I'm going to remember that I said I just wanted this to be a hair less than 3 inches, so I'm going to do like 2.9 for that lipstick and I want to make sure that they're okay, they're like an inch and a half and heights, which was great and now They're all good, so I'm going to hide the circle and I'll go back to come in and I'll cut it out later on paper with our green mat, but I'll let these cut first, so I'll go ahead and click. do it and I'm going to say no mat because we're using a new roll of vital recordable smart
vinyl
and now this looks great, you can move them around if you want, but it looks great to me.I'm going. go ahead and click continue and now you're going to locate our little toy here and now we're going to go to the popular material and we're going to click smart label recordable vinyl and now what we're going to do is load the black pen first. and then we'll load the material if it tells you there are multiple colors down here and you want to use the same color, then keep clicking Go every time it tells you to load a new pen, sometimes the lines are like the vine or the oval. what we're going to draw or the text, um, sometimes they think they're going to be different colors, because the color variation on the canvas can be a little different, Cricket thinks you want to use multiple colors, so if you want change your colors and make sure to make some color changes to your canvas and you can make really colorful labels.
I'm going to use black for all of this, so I'm just considering that you want me to add a separate black pen. and then a midnight black pen, that's totally fine. I'm just using the same time for everything, so if that occurs to you and you see that it tells you to load a pen but you don't want to change the color, continue. and keep clicking "Continue" and you can use the same type that you have uploaded. It's totally cool so now what I'm going to do is I'm going to go ahead and load up the stylus and we're going to start cutting okay so we have the recordable vinyl out of the box everything is ready to go and the first thing you want us to do is load the pen first, so what we're going to do is we're just going to open up the clamp and we're going to take out the little blade. and just put it to the side and then we'll take off the cap and just put the pen in, just drop it in and close the clamp, it's very, very easy and now what we'll do is charge the smart device. vinyl with automatic loading in the machine, so we'll just let it come in, it'll put it all the way in and we'llwe'll make sure we have enough vinyl to make the cut, which we definitely have a lot of, and then it'll go ahead and say click go and it'll start typing, so this is actually a lot of fun to watch, so if you grab some coffee, Which I do, I have my little coffee, I'll just sit here and watch it cut, and the fun thing is that the joy cuts in any order, so it's fun.
To see what it does first, now I want to make sure that my vinyl is not bunched up here, so I let all my paper keep falling on the table that way, it's not bunched up, so it makes me nervous when it piles up and it's the pen the one that writes because I don't want it to do anything silly so just make sure it can flow well across your table or come off your table would be my preference so now I'm going to start with the little lettering, it looks great okay, it's just finishing up, it looks so cute so what I'm going to do while it's finishing up, I'm going to take some isopropyl alcohol and just wipe down the little jars because they were shipped to so they probably have a lot of dirt on them just from being in the store shipping and handling all of those things, so I'm going to clean them all like I would with the adhesive vinyl.
I just like to make sure the fronts are nice and clean and free of dirt, okay, here we go, and if you look at your cotton swab, you know that usually some things come off from there, so it's best to be safe and leave it all alone nice and clean, so now Just doing the front of those, now what I'm going to do is install the fine point blade, so I'm just going to take this out and put the cap back on and then we'll drop the blade to the right. in the little place here and then close the clamp and click Go.
Another thing I just remembered is that the reason it might be ordering other pens is because of the differences, like the vine might be ordering a different pen size, so what can you do? In design space, you can just cut the selected point for that point or the fine tip for each thing, like you want to select it for the oval, the vine, and the writing, and then everyone will use the same pen, so that's another one. passed. That will probably remedy that situation, but again we're all learning that's new too, so now what we're going to do is just say download and they look great, so I'm just going to cut them out and I'm going to use my little paper cutter here and I like to use my paper cutter with smart vinyl because I like to leave a nice clean edge that way when I go to Auto loaded back into the machine, it has a nice straight starting point for the next project, so now I can save this for my next project and that next project is probably coming a lot sooner than I think because it's so cute and fun, okay, now what I'm going to do, I'm going to set this up. aside and I think I'm going to take my scissors and I'm just going to shave this little bit down here because I know depending on the size, I can create another label, so I'm going to save this little bit that way, I can create another label of that size. if I want it looks amazing I'm so excited okay now let's get ready to put them in the jars okay so I'm grabbing my jars and the ink is already dry.
You know, it dries very, very, very quickly. So that's a wonderful thing, that's also the wonderful thing about using the pencil that you recommend because it's compatible with vinyl so it's known to dry and it doesn't smear or smudge, so now what I'm going to do is just I'm going to place my little jars here and you can put a little shim under each side so it doesn't roll around and I'm going to apply them like a sticker, so I'm just going to fold the back vinyl over, okay? so I'm just going to peel this off like it's a sticker like this and I'm going to center it however I can, oh, that's so cute, oh, sorry guys, let me put it in a little bit, okay, I'm just going to center it.
The best I can and I lay it down like this then like I would with regular vinyl I'm going to start in the middle and then with my finger I'm going to rub towards the center making sure there aren't any little bubbles left. appears and if there are, you'll do the same thing you do with vinyl and you'll just rub them with your finger, how cute, oh my gosh, they look so sweet. I love it, okay, so I'll leave this here for reference. So I know where to put that other label because I'm going to be really upset if I don't get these perfect ones so let me put another one here together you're pushing each other you're fighting over it so now I'm going to take the next one and I'm just folding that other piece back and then it's just a pretty thin little layer, um, so be very careful, but it feels really cool and then I re-center it just visually. others move away, okay, I centered it before okay, so again, like this cute, cute, cute nest, oh my gosh, I love it, okay, so we'll put this one here again.
I'm just leaving one down so I can combine them as best I can here, okay, and our little masking tape will look great in my little craft space. I will definitely have to order more. I think it's amazing. I like to write. To start I order a couple and just see how things go and how the look comes together and then if I really like everything I order a bunch more, okay, okay, then there they are, the tags are on and they look incredible. And now that? What we're going to do is we're just going to cut out the little circles for the top with our pattern paper and that's just going to add a little pop of color to the top and then we'll actually put them together and see. the final product, so now I'm just going to put my paper on the mat and we're going to cut it right, so I'm just going to add my little paper to my mat, just place it now in Craigie design space, the material I set it to paper fancy and it cuts really well, so I'm going to go ahead and auto load it to make sure my mat is lined up and then I can go ahead and click Go and I'll cut this circle now again.
This was just a shy three inch hair and um, we're just going to put it on top of our little jars. I think it's going to add something really fun, it's going to add a little bit of color, okay, that's done, so what I'm going to do is say download and then what. What I'm going to do is I'm going to peel off this perfect paper and save it for another project and then for this piece, what I'm going to do is I'm just going to fold my walnut, I'm probably going to bring my little slice or my spatula and I'll mention it lightly, it's almost like you're peeling cookies from a baking sheet, it's exactly the same method, so now I have that little piece and now I will do the other two, okay, now I have all of them.
My little circles are cut out so what I'm going to do is I'm going to go ahead and take the top off of my jars and I'm going to place a circle with the pattern facing up so that it's pattern facing up for the top of the lid and then I'm going to put it on there and I'll close it and then it has a very nice cover. I think it's really fun now if you want to add double stick tape or something to keep it from moving. You can, I'm going to let mine float there and like they push up when they're closed and I think it looks really, really pretty, so I'm going to add that little third one and I liked to make a little mix. of patterns because I thought it looked really cool and I added some fun little looks so those are the little jars so let's fill them all up and then we can put them on the floor space okay so they're all full.
I'll need a bigger jar or another because all my letters didn't fit because I have the big ones, but it looks really cool. I love how they look. I love how the covers look and the little washi tapes all there. Everything is in a nice little place, so everything looks so cute. I'm very happy with the final look. I hope you enjoyed this, so no matter what, if you want to create little jars for your craft space, if you want to create little jars for your pantry. You can do the same routine and the same methods to create your tag, so go ahead and go crazy and create tags for whatever you want, but I personally love how they turned out and I hope you enjoyed it, so if you enjoyed this tutorial, please please be attentive.
Make sure you give it approval. I would love to and if you are new to my channel. I would love for you to subscribe and stay. I'd love to show you what's coming next for the channel. The next thing that should be. our cupcake toppers are coming out soon so we're going to make some little cupcake toppers we're going to make some tea towels that will come and make my tea and here right now we're doing everything we can. washing, so let's make some nice kitchen towels, let's make some infusible ink. There's so much fun stuff on the channel so if you're new or if you've been here for a while get ready and make sure you're all subscribed hit the bell to get a nice chime on your device when I post a new video and we'll see you on the next video.
I hope you have a wonderful weekend and thanks for watching.
If you have any copyright issue, please Contact