CARDBOARD BOXES TO HEADBOARD !! HOW TO MAKE YOUR OWN TUFTED HEADBOARD |DIY HEADBOARD|
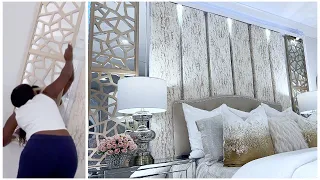
Feb 27, 2020What's up guys today? We're doing that header behind me. It is a king size
. We are improving a queen's
. I have a mattress of
headboard
. We are improving a queen's headboard
headboard
. I have a mattress of headboard
your
s coming for you too, enjoy it and thanks for looking, so I'll start with two bigboxes
. I bought them at Walmart, they were like a dollar 47 each and I'm going to start by taping them in the center so that the parts where they would normally bend can't bend anymore. I have seen plywood used, but for me. It's easier to use cardstock orboxes
and it works well, all you need is something difficult and work it out foryour
base.
Now I'm going to take my yardstick and
make
sure my boxes are the same width as a king. bed size so you can easily find the measurements by measuring your bed or searching online for standard king queen bed measurements for whatever size bed you are making your headboard on, for now I am going to use my hot glue gun and glue . I will place my boxes on each other where they overlap. I'll do that for the front and back and then cover them with masking tape as well. Now I'm going to take my triple cards that are the same height as my boxes. so they line up perfectly, I'm going to use that tomake
it sturdier and tape them here, you can see I've already drawn the pattern of where I want my buttons to be, also if you notice I'm in a different outfit because I worked on this headboard for several days, so not because I'm just changing clothes or something, but I'm going to use scissors to make holes in thecardboard
where I've already marked where I want my buttons to go.
More Interesting Facts About,
cardboard boxes to headboard how to make your own tufted headboard diy headboard...
Later I realized we had a drill, so I never went back over my holes using materials to make them more circular and easier to put a needle through. I also had to redo my measurements. my holes like two or three times just because I have no idea, it was just a moment of struggle for me to get them right. I realized I should have measured them differently than I did, but they ended up being even in the end, so that's all that matters, let's grab our mattress protector. I also bought this at Walmart. It costs like 17 dollars.

It is a queen size mattress protector. I have two, so I'm going to reduce them to the size of My Cardstocks in my boxes so they line up. You can use one if you want, but two will give you that deeper, fluffier lock. It looks. One is fine, but honestly, two look better. Now I'm going to use my heat spray to spray my boxes so my mattress protector can stick on top and then I'm going to use the adhesive spray on this mattress protector to stick the other match protector on top of it, so I used a pencil, a pen and any sharp objects you had.

I was able to figure out how to make holes through the foam where my budding marks are on the back and then I used scissors to cut an of it to create the fold and now we place our batting on the floor. This came from Walmart. It's great, the price varies depending on which one you get, but it's not very expensive and I'm going to cut it down to size and use a staple gun to staple it to the back of my headboard and this is what we have so far. I'm going to make my buttons.
I didn't record any photos of me making the buttons, but if you Googled how to make my own buttons for
tufted
furniture, you'll find videos on how to do it. It's time consuming, but luckily I had help and once I have my buttons made, we'll start applying them to our header. The markings and where we place our buttons are on the back, so you take the needle and put it through the back of the header to the front, then you use the needle to wrap the button around and put it back in. through the hole. This takes a long time and gets tedious because I've had trouble putting this needle back in the same hole it came out of, so I'm not going to lie, it took me about 15 minutes to put the first button in, it's important to throw it away. your thread is very tight to achieve thetufted
look.I use a hot glue gun to adhere the thread to the headboard and then cover it with a piece of masking tape. I also use staples to staple the thread and finally started stapling the glue to hold it. that and that's it and we're going to do that for all of our buttons. I have 25 in total, so it took me a long time to do this, but we're going to use the same process to place all of our buttons in our header. after I finish all my buttons, we're going to remove that tape, we're going to staple the edges of our fabric tight over the back of the headboard.
If you want to tighten it, otherwise you won't. I'm going to understand that you already know the elegant look you're looking for for your headboard. You can also cover the back of your hand with cloth or boards or something like that. I just didn't do it because I thought no one would see it. My back was against the wall and I just didn't take the time to do something that Justin feels is important. If I were making this for someone else I would probably cover it from behind to make it more attractive, but for me and my husband. he doesn't make it clear because like I said no one will see it and this is what it looks like once we finished stapling the fabric to the back of the headboard and these are our final results, it turned out amazing, my buttons were even, thanks to God.
I'm very happy with the color, it looks great so I hope you enjoyed it and thanks for looking.
If you have any copyright issue, please Contact