7 Genius Hiding Places Around Your Home
Jun 07, 2021Hi, I'm Nils and I'm learning DIY. And today we are going to see seven cool
hiding
places
inyour
house. The number seven is the classic hollowed out book. The idea here is quite simple. You mark a square inside the book and then use a knife to cut out several pages at a time. I started this, but realized maybe I could use some power tools. So I used this oscillating tool to cut larger sections at a time and did it quickly. Shake off any loose debris and then you'll use super glue to line the inside of the cutout.
Then, once you let it sit for a while, it's all set and you'll have a nice little hideaway. This makes it an excellent
hiding
place for emergency devices. Two-way radios, USB sticks, jewelry, cash, or anything else you can keep in there. Now, if you don't want to go through all the work of cutting out a book safe, you can also buy them online. These are ready to go. Plus, you have plenty of storage space inside. Links are in the description below. Number six is the fake plant. Many fake plants are easy to separate and actually have a small storage area inside where you can store jewelry, cash, or other small items like that.
More Interesting Facts About,
7 genius hiding places around your home...
They are Ikea plants and have worked especially well. And when you put them back in place, no one can know what's there. Now, for number five, sometimes you find
your
self in possession of a love letter you wrote to Whitney Houston when you were a teenager and you really don't want anyone to see it. So there's a simple tactic for hiding things that are flat like this. Find a drawer, whether in your dresser, kitchen or anywhere else, grab an envelope and then some tape. And in fact, you can just tape that envelope to the back of the drawer, where no one will really look.
And then it's out of sight and out of mind as a hiding place. Number four, I'm just going to use an empty paint can. Many times we find ourselves with extra paint cans from different jobs over the years, look for a can that has little or no paint in it. And then once you open the lid, make sure you wipe everything down completely so it's dry and clean in there. And with that, you have plenty of space to store things like hard drives, backup DVDs or CDs, storage drives, cash jewelry, you name it. It is a fairly good sized space.

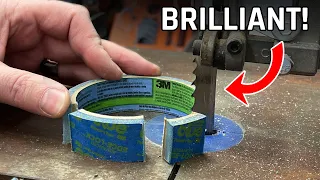
Just make sure you seal it really well when you're done, once you're ready to put it back in with the other paint cans, just make sure you have some way to remember which one it is. Number three, on our hiding list. Let's start with an empty medicine bottle that has a screw cap. And then we'll go to the garden or patio and find a rock that has a relatively flat side. For one, I'm going to use some Gorilla Glue hot glue sticks. They are actually very strong and last a long time. I'm going to put a generous amount on the lid, a little bit more on the rock and then I'm going to put them together and then just seal up any little gaps that might be there to make sure it's nice and tight from there.
We can take the key to a house, whether it's a bicycle lock, the key to the key shed, things like that. Put them in the bottle, put the lid on and then we just have to find a good hiding place outside. I'm clearing a space here in my front yard where I can place the bottle. The goal is to make sure the top is perfectly aligned with the surface of the material around it so that all you can see is that little rock. Sometimes it is very well hidden. You can barely see it, but it is there.
Now, probably no one will ever see this, but when you need it, if you're stuck outside your house for example, you can just get up off that rock, empty the bottle and then you'll have your spare keys ready for you to use. Number two on our list is the multi-book safe. I'm going to start by taking some measurements of this lockable unit here. And then I'm going to grab two larger books from the thrift store and... I'll listen to the sound it makes when you pass it across the table, I saw here... Some interesting little noises, but it does a good job. job and gives you a pretty clean cut that you can then remove a huge section of the book in one go.
When you do this with both books, you are left with an empty space that is the perfect size for the safe. We'll apply some of the same hot gorilla glue to the binding of both books and then seal them. And then, before long, you have a finished product that you can hang on the shelf and no one will be able to see it's there. A safe like this that can be locked is a perfect place to store weapons and things you want to keep away from children and strangers, as well as a good place to store valuable things, such as passports, cash, and other goods.
And like all of our books, it slides onto the shelf and no one can see it's there. Now, a second option for a multi-book safe is that we're going to cut out a large multi-book box section, but what's left is this nice opening, which you can take measurements from to create a plywood box. Here I'm just using half inch plywood, cutting all six sides. Using a combination of table saw and miter saw, and then use a brad nailer with one inch nails to secure them all together with a full box. Now I can use that hot gorilla glue again to attach the spines and exterior of the book to the box.
Like many of these, this one is hiding in plain sight, and for our number one hiding place, I'm going to place a safe inside the wall behind one of our photographs. You can see the multiple Star Wars images here and this large one in the center will hide the safe we are about to install. I will use a stud finder to locate the studs on each side. Now this requires that I have a drywall or sheet rock installation, and then I'll use a drywall saw or a hole saw to cut three sides of the opening. Once I have all three sides cut out, I will mark the left side of the drywall paper.
And then I'll give it a quick tap and it should be free from there. I just need to mark it completely and then I can remove that piece from there. You are ready to grab the safe and dry mount it on the wall. The safe comes with six large wood screws, making it a really sturdy accessory, as you can see here. So I installed a couple of hinges, very carefully on the frame and then used drywall anchors to drive some screws into the wall and then attached the frame with the hinges. I put some velcro on the opposite side and this allows it to stay securely in place when I close it.
And with that, we have a nice hiding place behind this frame, which is a great place to hide things like heavy gold bars, which you can use to trade for things like toilet paper during a pandemic. Now, some advice. If you are going to use this safe, remember to lock it behind you. I had a lot of fun with that one. I hope you enjoyed it. Now, if you want to see what happens when you 3D print a bulletproof stormtrooper, watch the video here.
If you have any copyright issue, please Contact