2020 Supra B58 Engine Teardown - First Look - Better than the 2JZ?
Feb 27, 2020Hi, I'm Stephan Papa Daka, we're here at Papa Doc, he's running today. We have something pretty special, a
2020
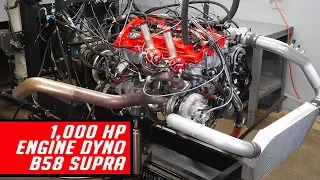
Supra with 500 miles. We have a great goal. We actually want to make a thousand horsepower with thisengine
. I started it up and took it apart, so thisengine
was so new that we had to get an actual complete vehicle to be able to take the engine apart. It's a straight-six engine, which is what Superests have had for generations, except this one is so much more. modern, it's cool to see all the new technology they put in like this, everything was very lightweight, the exhaust system, it even had oval pipes on the exhaust, everything was pretty modular and relatively easy to remove and surprisingly the cars actually fit They feel simpler than some of the older ones, a couple of years ago the cars got really complex with all the emissions control and everything, but now Engineering has gotten to the point where they've simplified it again into the four systems, so that thefirst
thing that came up when we took the engine out we realized that we couldn't mount it on a normal engine mount because the timing chain that goes from the crankshaft to the cam gears is actually at the back of the engine where it is mount the transmission and you.
I can see here where it comes apart with the black silicone coming off and since we usually bolt the engine mount to where the transmission bolts into the block, we couldn't do that this time because that cover has to come off so we had to actually make a bracket that goes from the engine mount to where the engine mount bolts into the side of the engine block and then once we set it up we noticed that the engine mount was moving quite a bit like it was flexing, so we added it welded to the engine mount where it's just bolted on to try to make it more rigid, which actually worked out pretty well once Shawn and I removed all the wiring and hoses you could start to see the block, the cylinder head and the turbocharger. and the
first
thing you notice is that there are only two exhaust ports, but it's a six-cylinder engine.
More Interesting Facts About,
2020 supra b58 engine teardown first look better than the 2jz...
What they've done is there's actually an internal exhaust manifold, but I like the sleekness of the turbo that bolts directly to the cylinder head. Here is the dry one. The wire throttle body and inside is where the intercooler is. It is actually a water to air heat exchanger. The reason you want the intercooler is because when the turbo compresses the air and increases boost, it actually increases the temperature of the air and that will reduce it. The dense air charges the intercooler, it will cool it before it enters the engine, the air will be denser and will actually make more power.

The first thing we did was take out the throttle body and dry it with a cable, you know modern cars. No longer use an accelerator cable that connects your foot to the accelerator, everything is electronic. The speed of the electronics is actually faster than your foot can move if you complain about the way your drive-by-wire works. or you don't like the answer, it's tuning, it's not actually inherently a problem with drive-by-wire. Next, we will remove the intake manifold. You will notice that it is all plastic and somehow they can do it. make this with an intercooler inside you can't actually separate it it's attached this whole unit at the back of the block here is the thermostat housing and it doesn't use a traditional thermostat it opens and closes with the temperature of the ECU it actually controls the rotary valve inside it and can change the flow of water, however, it is programmed rather than mechanical, as you know, previous engines here we have the oil filter.

I really like these canister style oil filters because then you can see the actual element. and whatever the filter has been collecting, then this block is the oil to water or heat exchanger and what it does is basically an oil cooler and it uses the coolant from the radiator to keep it cold, the coolant flows in one direction down which the oil flows. the other and if you
look
when I pour it you will see oil coming out of one point and then the green coolant coming out of the other, this allows the oil to come up to temperature faster which actually simplifies the oil system because I don't have extra lines of nut oil that go to a cooler at the front of the car.Once you have the water pump and alternator bracket removed, we can move on to the other side, which is the exhaust side of the turbocharger side. The first thing we will do is remove all the hoses, this is the oil drain so the turbocharger needs to be lubricated after the oil goes through the turbo it goes back to the pan through this hose, pretty simple just six bolts and a support at the bottom and came the entire turbocharger system. off and it's actually very light which is good you can see the heat shield on the back and again just the two exhaust ports so this is the entire ignition system direct coil in plug so this It's the coil, the igniter, like anything you're used to. it's all in this package so there's just direct wiring from the ECU directly to these coil packs and then the spark plug goes down to that hole for direct injection so all the fuel injectors aren't actually in the ports , they go directly to combustion. chamber, this is a mechanical fuel pump because direct injection runs at such a high pressure, thousands of psi, that you need a mechanical fuel pump to generate those pressures, so once I remove the hard lines for that, I'll remove the mechanical fuel pump and it will be Quite elegant design, it bolts here to this bracket and to the valve cover and you can see the mechanical part where it goes up and down and pumps the fuel, which we'll get to later, you'll see a lobe on the camshaft. what's actually pumping the pump up and down so this is the fuel rail this fuel rail and these injectors where you see the hole down there's a hole for the spark plug on the bottom and the hole for the injector on top and both.
Those go directly to the cylinder when we remove the head at a time. You'll be able to see those holes once we remove the valve cover. You'll be able to see the adjustable cam gears, so here the chain goes up to those gears and inside. Those gears, the computer can control the location of that camshaft relative to the crankshaft and adjust the timing of the cams, however the programmers program it, then you can get maximum fuel consumption, more torque and actually , more power. We leave this out when we build the racing engines next. I'm going to take out the spark plugs.
This was again another challenge where the spark plug socket was too big, so I bought a fourteen millimeter socket, but found that the diameter was too large to fit there. We actually need a thinner wall and So I went to the lathe, lowered it a little bit and was able to get the spark plugs out, so we'll turn the engine over a little bit and get to the oil pan. This car and many modern cars have some kind of warning when the oil level gets low and this is the sensor that goes to the oil pan and it measures how much oil is in your engine, so once we take that sensor out, you can leave it to one side and then start removing the entire oil pan. and you'll notice it's a big aluminum oil pan, they don't really use gaskets, there are very few gaskets in this whole engine, it just uses silicone to seal it, so a little bit of prying and we have the oil pan.
On the way to removing the camshafts, we have to remove this entire timing chain, so this part is the timing chain tensioner, so it maintains the correct amount of tension on that chain, once the remove, we will pull the Remove the timing cover and remember that this is the back of the engine where the transmission normally bolts on. All of this timing chain stuff is at the front where the pulley is, so I'm going to check where the pulley is, turn it and now you can see how it works. the crankshaft turns down there at the bottom there is a chain that goes up to the top to turn both camshafts and a secondary chain at the bottom turns the oil pump after we remove the timing guides.
I can set the timing chain aside and we can get started. taking out the camshafts, but before we do that, I'll describe what you're seeing here with the valve train, so this is a dual overhead camshaft engine, which means two cams and they pushed down the vowels with these relatively typical rockers. so the exhaust is on the left, the intake cams are on the right and the exhaust is relatively simple, the cam lobe rotates, it pushes that roller on the rocker arm, the rocker arm then pushes down on the valve and opens the valve , the valve spring is what is used to push it up again, the intake side is actually much more complex, it has a variable lift camshaft setup and still uses one camshaft but there are two rocker arms separated and has an eccentric shaft that changes the rocker ratio so you can do it mechanically normally. the computer controls this depending on the throttle position and the load and how they program it it will have a different amount of camshaft lift when you turn it you can see this eccentric shaft moving the upper rocker arm and it changes the ratio and now when the The camshaft moves, pushes the first rocker arm with that, then pushes the second rocker arm down and finally pushes down and opens the intake valve.
The first pair of the exhaust cam will lift the exhaust covers and this is the mechanical fuel pump bracket you can see. all the cam lobes and this one is a little different, it has three sides, that is the lobe that pushes the mechanical fuel pump and it pumps three times each time the camshaft turns, it pulls out the exhaust cam, leaves a side the rockers. there under the camshaft and they turn on this with the color lifter, it's a hydraulic lifter so these types of engines never need a valve adjustment and one thing I really like is that these rocker arms have this little clip on. spring and prevents the rocker arm from falling off the lifter if there is a valve float or something at really higher rpm.
Some of the other engines we work on in the past we have had problems with rocker arms falling out in racing, but hopefully this should solve that problem on the intake cam side, there is actually a special tool that You need to remove these springs and I don't have them, so now we're improvising. You generally don't want to go in there with a crowbar and be as careful as you can. and it's kicking my butt, so what I said to do was unload the spring as much as I could lean on it with this hog mat so I don't miss anything, wear my safety glasses and just slowly pull the tree out. cam and allow the springs to decompress.
I wouldn't recommend doing this, but you know it's for you. I have to finish this video. I can't wait for the tools to arrive. I will definitely need the tool when reassembling it once the cam covers are off and I made sure I didn't hurt myself and didn't lose any parts. We remove the intake cam and it is the eccentric shaft that adjusts the rocker arm ratio now that we have the cylinder head. all taken apart you can see all the components there are and I have placed them all in order of where they came from that way when they come back together they can go back to the same place they came from we now have access For the cylinder head bolts these are relatively easy T60 torques, drive and get in there with my big breaker bar because all of these are always very high torque.
Get ready for me, it's the engine mount and then I'm going to turn them a quarter turn first just to get them. a little loose and then I'll take the gun and take them all the way out and I'm just
look
ing down to make sure I didn't forget anything. I don't know. I've never taken one's head off. of these before, so I always try to look around and make sure I don't forget anything or miss anything. Now we can see the six cylinders and the head gasket. The orange you're seeing is the sealant, the layer they put on.There to make sure no water or oil ports leak out. Now that the cylinder heads are removed, you can see in the combustion chamber the two lighter colored valves for the intake valves and the black valves for the exhaust valves. You can see the The threaded hole is where the spark plug goes and the hole right next to it is where the fuel injector is inserted. It injects the fuel directly into the chamber right there. The first thing I noticed when I removed the head now is that it is a solid platform block. I mean, you see holes for water and stuff, but it's not an open water jacket and they are much stronger, so I think this engine has tons of potential.
Now let's turn the engine over and we can begin to separate the short block. This bolt is actually reverse rotation. I have been reading aservice manual about this and this is one of the reasons I always want to read the manual if it's available because a bolt like this can really give you a bad day if you don't realize it's reverse rotation and you keep turning it in the counterclockwise to try to loosen it and you end up breaking it or something you knew beforehand turn clockwise it came out right and on to the next thing so this is the protection tray combination windshield and locking sash, so it's actually pretty heavy, it's a couple of pounds and it's thick, it attaches to all the main crank caps and the block skirts and the nice thing about that is it makes the block to be much more rigid, another thing that's really interesting about this engine: there is no The center crankshaft pulley bolt is like a flange type pulley, so you have these four bolts to be able to turn it.
You have to get it in the special little socket and it was easy to get there. It cost 60 dollars. Another thing about this block that I really liked. as it is the lubrication system, you know there is a lot of oil that goes up to the head and has to go back to the oil pan, so the way they design this because they don't want the oil to end up in the crankshaft and create a a lot of wind, so it actually goes down the side ports and ends up under the wind pan and directly into the pan, so the crankshafts aren't splashing oil into the pan and creating wind and drag and if you look up Below you can see the oil sprayer, that little sprayer pushes high pressure oil into the bottom of the piston and keeps the piston cool and actually helps lubricate the cylinder. wall too, another thing I like to do is see if I can turn the engine short block by hand and in fact it was very easy to turn which means it has very low friction rings which is good to get high horsepower and efficiency, so after I removed the connecting rod cap.
I noticed a couple things right away, number one is that it now has a broken crank cap, that sounds like something is broken but it's actually a design, we'll get to that in a minute when we start talking about the crank . Another thing is that it also has a coated rod bearing, so I guess with all the automatic engine start/stop functionality, you know that when you go to the stoplight and the engine turns off and on again, it can start to wear out a lot the bearings. faster, so they have these coated bearings, so there's no problem with that, once we take the piston rod out, we can take a closer look at what's going on with the design of this rod and if you look at it very up close, you'll see how porous everything is and everything.
This weird shape and from what I've seen, the way they break the rods is they go in there with the laser and they draw a line inside the hole and there's a machine that comes down and splits the rod in two and then what What ends up happening is that when you screw it back in, it screws into exactly the same place every time and they don't have to machine all the surfaces, the pistons are really modern and you can also see where it's fitted to reduce weight. It uses a fully floating pin and has a cape on the skirt.
This is a forged steel crankshaft that looks relatively robust, so we'll start with this. I think it's definitely going to have at least a thousand horsepower now that it's time to I took off the pulley and thought okay, that didn't seem very safe to me so I asked Matt to come help me. We put a couple of bolts in the back of the crankshaft to keep it from turning and then I was able to loosen it. All the bolts that hold the pulley on once I removed it you can see it's just a flange there's no real snout on the crank anymore and what's also a trick is the block that has like a deep skirt and just straight up .
It has a hole in the side with the front main seal, so I'm going to go ahead and loosen all the main cover bolts, take them all out with the gun, and then I can start taking the crankshaft out. This definitely looks like a solid racing block one of the big questions is whether this is a worthy successor to the 2jz engine, time will tell and the hood. I'm doing well partnering with BMW on this entire project so far. I'm quite impressed. Thanks for watching, I hope. I enjoyed it, if you did please hit the like button and if you want to see more please consider subscribing.
This engine
teardown
is part of a complete project where we are going to rebuild and finish on the engine dyno, so if you want. To see those videos, stay tuned to Pop Doc's racing YouTube channel and if we've already produced the videos, I'll put the links in the description. See you later, thanks, wait, how do you do it for that mode? What drives sport? The mode is already scaring me.If you have any copyright issue, please Contact