1929 Gibson L5 Restoration / Detailed Tutorial
Apr 26, 2020good morning everyone Michael Conville here again Stratford Ontario Canada for the string technology workstation what we have here many would certainly consider those in the jazz world this is the most iconic of all the archtop guitars under the leadership of Lloyd Lower when he joined was the He was the first guy to put F holes on the top of a guitar; In other words, this was the first guitar model built in the manner of a cello with a carved arched top, a carved arched back, and Ethel on the soundboard of this particular model. It's in
1929
the original foot of the bridge is there, we have three other bridge caps that we can play with to align the intonation perfectly on this one it's in pretty remarkable shape for1929
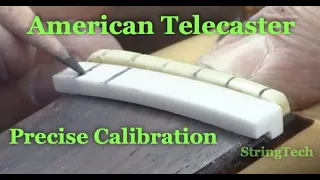
, some pre-work done, some work done very well , and some other jobs that were not executed as well, we have a sheet of this perloid, this piece was obviously replaced, it fell off at some point, so they will replace it.
I'm just in consultation with the client right now to determine if we'll just do the entire fretboard for consistency, we have enough material to completely redo the fretboard so we have uniformity and I think that's probably the route we're going to go down, too. we'll get a full update, these frets are pretty well fried, it's amazing they're still there from 1929, there are a few places around the binding where the plastic is a little loose and comes loose, plus the full setup of the refractors and then a hinted bridge cap, there are a multitude of other little things.

More Interesting Facts About,
1929 gibson l5 restoration detailed tutorial...
That's what we're going to take care of as we go along with this guitar, and as always on the Patreon channel, you'll get a play-by-play of all this work, hey dizzy, before we loosen the strings and remove the bridge. In preparation for that reef fret, we are marking the bridge footprint on both sides, as is very common with these early bows. You can see the kind of crash marks on that tailpiece, it's actually a pretty heavy brass bar, but come on. Again with very, very low tack painter's tape, we'll just hold it in place while we remove the frets.

My client just emailed me and completely agrees. Look at this, this is just leaving it there. This one is horrible. -Seeing as someone said it has nothing to do with the original and this one is loose, this one is loose, we are removing the frets, tuning the fretboard, why not do the inlays completely and we will get a nice consistent color and N and that is? exactly what we're doing right, I'm on the last fret, most of those frets came out pretty clean, but before I pull this last fret I just wanted to point out all this crumbling and breaking that comes from the last guy, so they're actually, just two places that were a little bad here, obviously, in this Inlet, you can see by how easy it came out, that it's been on and off the guitar a few times.

I just want to show you that before we pull out the last extension so we can Let's start by cleaning out those cavities to get a nice crisp piece of new inlay. After talking to Denny, we decided the easiest and cleanest thing to do is to replace all of these so we have a nice, uniform consistency. the length of the mast when we're done, so this is the first step. There were actually a few places on this guitar where there were loose joints along the edge of the fretboard and around the bodies. Now this was a 36 hour care and I left it at the full 36 hours I'm not taking any chances for this those inlays are done and they never come out all these clamps and wires and calls there's a radio at the bottom of that call it's actually rainier and for the wider block inlay I doubled them, that looks good, just a little proud, beautiful, okay, same thing here for this wider inlay.
I kind of use double calls. This one I got away with. This one I got away with. Basically, I'll level this while respecting the original. radio and getting those inlays flush, they are now proud of a 12k Ariel, very happy with that, so we will keep you posted as we progress, thanks again for your patreon support. Greetings, you can see there is a gap here between the plastic binding. and the nut I'm about to loosen because I need to level the fingerboard so the gap is indicative of how much plastic shrinks over time. This is one of the main reasons bindings and bindings break and fall off because wood swells and contracts much faster and much more regularly than plastic, so something has to give at that joint and, If not, the plastic will crack.
Another example of plastic and wood is not exactly a marriage made in heaven, it still looks beautiful. although just pointing it out is the nature of the beast, I'm going to heat this up and delete it because we need to do it to its full length, so we have a hundred year old soul that still functions perfectly, as I mentioned in My level two classes for years we are at about to do a complete upgrade on this and reset the fretboard. You have to make sure you have a little bit of charge in there before you do your adorable.
You are hot enough. there to facilitate this suit, this is the original nut, it never has been, oh yeah honey, and that's what we have, they have a perfect snap fit on this beautiful thing, the most important thing right now is that we have access clean along the entire length. of the fingerboard along the path of the string from the edge of the nut all the way past the last extension and now we're ready to start this leveling process, so first very gently, we're actually laying it down as I lay it down. that on my M and by the way to make it a little proud the real wood the fingers just take it this is my first time with this plastic late it would be scraped with a razor blade to make it look good and clean and remove any scratch marks and would bring and still let them take a look at this.
I have this level. I couldn't run the ruler there in a second and show it to you, but there were two really steep sections of the fretboard where damage had already occurred in the past with the 9th fret position and the 12th fret position allowed me to bring up quite a bit of damage sustained on one of many attempts to fix the ending in the last 90 years. The 9th fret I'll also have to remove because I'll mix in some ebony powder and fill it in so that when it's all done it will look like nothing ever happened.
You have my rule here and just checking. that across the width we have a nice tapered radius that's a little bit dropped at the top end here, which is beautiful, you know, that's cool and there's a lot of adjustment on that truss rod, other than using the sanding blocks that you have. You've seen me use it in other videos, just checking that the entire path has good contact with that ruler. I love it. We'll go over it with 120 grit and I'll bump it up slightly to 180 grit. I'll scrape up those plastic block build-ups nice and clear. the scratch marks are marked so this is the damaged area i was talking about this is the 12th fret and then the 9th fret same thing if it's shallow enough i might be able to get away with any dust and, as always, you have to play by game.
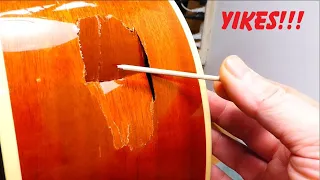
I have to bring you in and show you this because it's just like falling apart, so it's just a junkie put in there. I assume it's putty or lacquer stick or something, but leave it alone, that's not what some previous attempt to do this inlay probably several times. For the last 90 years, this needs to be fixed now before continuing and it's the same here with the 9th fret. Look, this is not wood. I think he put black or pale there. I have to reduce it. the wood now, of course, I crossed this first and leveled the fretboard along the path of the strings and now I'm going to have to fill this in before I put the frets on.
I'll bring it in for the second filling. I already filled it once. and I filled this one out once, so I'm going in a second time. I have my ebony powder just putting what it takes, a little bit soft and then on this side the same thing I already felt right away, but I'm filling it now for the second time, so I have that polyethylene dam to prevent anything from getting glue to the fret slot. Now this is that blue stuff. I don't care, given this, this stuff works very well. I've used it a few times, Peggy White, a luthier guitar builder from Ottawa, distributes it on forums for Canadian builders and texts some very cool stuff, so I'm doing as much damage control as I can right now.
This is the glue reinforcement accelerator. Just give it a couple of shots. It will set up instantly and now I will be able to level it. I have some filling to do here. I have another little filling to do here. I can do the rest after the frets are placed. Get it ready right now to do this side of the inlay because when I put the glue in, of course, it wants to run downhill. I'm going to tilt the guitar the other way to do the other side of the inlay here and then there's another one.
Another place here we're going to do it with the razor blade, I'm just going to scrape flush and this one to create that flush, so I built that saw cut wall now so I can at least put a fret in there without that. The edge crumbles, so when I clean these grooves I drop the Japanese flush cut saw into the groove and push with this hand. I shoot with this hand. I hold the saw against my chest so that my body weight provides inertia against the cut of the saw to prevent slipping and this prevents damage to that fragile 90 year old plastic binding.
This saw simply opens the saw cut to 20, the perfect size for the fret wire. Now I've got the guitar tilted a little bit in the other direction, so we're going to bring I have the other side of the 9th fret inlay. I have my little poly dam, I just take a brush and brush off what we don't need. This is our first filling on this side. I made two fills on the other side too straight to level it, so there's our glue reinforcement. They give you this little miniature applicator which is great because it allows you to put a controlled amount of super glue there and then over here.
Give it a couple of leaks and then we can get our damn poly dam out, so we're going to have to clean that saw slot again because we have to do a second fill with some Avenue powder, so that was our first fill. that was a really heavy fill so im going to put the dam back in and then do a second fill this was the other one he had and it was one of the worst yeah here we go again now that we have the edges of those saw curves were built to be able to handle the bottom of the floor with the fret, we will do our final leveling along with 180 grit and then we will start laying Fred said that most of the frets are I have purposely stopped at these last five frets because I want to come up to you and show you precisely how I do this so you can now see all those nasty things falling apart that you saw earlier in the video.
They are gone forever. These are fifty-one. a hundred thousand about this, we're going to zoom in and show you precisely what goes into doing fret work on this particular guitar. This is the Japanese flush cut saw that I used to place right on that joint while I clean that fret slot and prepare it for the new frets. You really have to be very careful. Get a guitar like that intentionally, if it's not almost a hundred years old. A nine year old guitar. That plastic is super brittle, very easy to break. There are no obstructions in those slots, so when we go to put the new fret wire in, it fits perfectly.
I started with that full length, we cut that tang and the bottom of that extrusion never goes completely flat so we're just going to clean that up so the next thing I'm going to do is grab that Tang with that flush ground and cutters and I'm flexing that frat wire to make it a little bit more radius, a little bit higher radius than the actual fretboard. I'm checking to see that Tang gets close to the plastic binding, but not so close that when you drive home it pushes the binding. You have to be very careful with this one. once again, here you have a 90 year old plastic binding.
Like, let me give you kind of a bird's eye view of the tolerance, so that's the tolerance that we're looking for as far as overall length goes, so this disc sander I actually control it with a foot switch and what I'm doing is imitating the rough bevel so we're moving on to this 1929 Gibson l5 to go over all the video sync kickbacks doing impeccable fret work with the very brittle plastic binding cutting the overhang etc. so we'll get you closer a little more and we will continue with our very
detailed
step by step. You can see how the radius exceeds a little bit. extra protrusion not too much those ends have been polished that protrusion so that when we adjust it we're not going to loosen the fret, that's good, it's nice and tight, okay, so the first step is to cut that fret a little too long, these are the tolerances we havespeaking here, that's our next tolerance, next we're going to cut the tang on each side, okay, here's our next step, a cut of that tang at the bottom, the next step will be to clean up the remains of that extrusion on the bottom of the crown so it's flush on the other side, same thing is the side view, so we've basically cleaned up the rest of that tang extrusion on the bottom so it's completely flush next time, so , what am I doing?Next is to cut the overhang before cutting it while I can get a good grip on it. I'm flexing it a little bit and then I've got it on the other side, same thing, grab it flexed a little bit and then we cut it. In a minute you'll see why you do that. In the next step, this disc sander is on the pedal, so I'm going to get it. to turn I'm just touching the end, I'm cutting the initial bezel with the crown, the next thing I'm doing is loading this canvas drop with the Rouge jewelers.
I also have this on the pedal and I'm polishing to smooth that edge so that when we file it flush there's no snagging or anything to catch, this is actually smooth to the touch when I do that cross filing, there's nothing to grab or catch, these are the tolerances we're looking for here so that Tang is slightly away from the binding on both sides and it needs to be that way because when you drive the fret home it flattens out and actually elongates slightly and you don't want to break the binding on this beautiful vintage guitar.
As a precaution, it is better for Tang to be a little further from the binding than too close. There's one last step that I'm going to show you, so I'm going to put it in there with a regular wood glue mix. wood glue, are we gluing the Fred? No, actually, you don't know that you are not gluing metal to wood, not with this glue anyway, but what we are doing is filling the saw cut, so what happens is that both sides of the saw cut They're n grain and even n grain as tight as ebony will absorb that glue and swell a little bit, so what we're really doing is encouraging the saw slot to swell and grab that D fret, we have that fret. over the radius and we're ready to take it home beautiful, the next stand on Tech Deck acts as a huge shock absorber and absorbs the blow of the hammer while supporting the neck when you introduce those threats, so tolerance, we want beautiful, check that again to see the tolerance.
Yes, like a good extrusion on the bottom, beautiful, so again the glue is only used to swell the end grain, grab the tenon or fret bead swell and lock. Editing is a beautiful thing, we just have to kill this bit of glue. tighten there, whoa, yeah, home stretch, last fret, that's our initial tolerance, so we'll trim that bihac, here's our next tolerance, so you have enough left to take the clip out of the tenon, check it one more time to see the tolerance, yeah that looks good. We'll clean up the bottom of the crown, we'll flex the fret wire at an exaggerated radius so those outside edges are nice and tight and once again, well, we've got something to hold on to, let's trim that overhang, well, I've got something to what to grab, I could actually just turn it down a little bit and that guarantees that those outside edges are going to be completely tight, then we'll touch that up on the sander, touch that up on the polisher, triple check that groove to make sure. there are no instructions that look good, here is one more tip I want to show you when you are dealing with an ebony fretboard, often the tang and beat combination is maybe a little tight, well, I have a set of end cutters, like this that I have dulled them.
The blade on both sides of those cutters allows me to flatten the fret bead and get a beautiful fit on that ebony. Now with rosewood, a lot of people don't realize that, I mean, it's a lot harder than rosewood. and rosewood because of its resins and oil inherent to the wood, actually allows the fret to slide. You know, when you drive home, where's the ebony? It's much drier and more susceptible to chipping and, as you can see earlier in the video. On the last few attempts, when those guys tried to change the inlay, there were huge chunks of ebony that broke off.
It's all taken care of now, but I'm just saying a little extra caution. I crushed that bill. I have a beautiful fit. Here we are. We're going to put our wood glue in there to swell the grain of the end of the saw groove on both sides, we're going to let this set overnight and we're ready to do our final finish. Here we go, we've got our excessive radius fret and we're going to send it home. Pick up that glue, squeeze it well and clean one like this; okay we'll let it sit overnight and we'll come back tomorrow and finish all of our fret adjustments just get some rough dimensions here first so essentially what we've done here is we've created a brass spacer washer and what What it does is recover some extra threads in the truss rod adjustment.
If you remember earlier in the video, I actually loaded that soul rod that we just bought. More adjustability than ever, this neck will always be adjustable. I love it when a job is done so cleanly. I barely had to touch those frets for the fretboard to level out and that kind of smooth compound radius with just a little bit of droop on the top end is as close to perfect as we can get so now I can keep polishing it and every minute we're closer to stringing this and playing it when you think about what those frets looked like in the beginning. from this video, those original frets, we've come a long way, we have about forty-nine fifty thousand fret wires in there with all the work that was done to replace those inlays, they were covered throughout the entire fret prep process and barely we're getting I'm ready to start working on the bridge radius and the right information, so we have to deviate a little bit with this L5 because for common reasons we didn't get a perfect fit to the soundboard with this stock foot.
The problem with being modified is that we have the original script l dash 5 and the serial number on the bottom of the feet of this original foot. You can also view this as a separate piece here, so what we've chosen to do, I'll do. Make a replica of this foot to obtain this profile. I started with this piece of oak. I checked it with the actual bridge, so we got a pretty close replica here once we established that with the oak, so I've got some ebony material and that's nice. from where we are going this is what we ended up with there is a replica of the bridge and the original bridge I experimented with this piece of quarter sawn oak first and then proceeded to make a cross section profile Bini this is for the Replacement Foot, the bridge original was split underneath, but as you can see, this is the history of this guitar, so in order to get this original bridge to fit perfectly these telltale signs from 90 years ago, that serial number and our little writing l5. would have to go, so after consulting with the customer we decided to go down this route to make a replacement Bray based on the original bridge model with all the adjustability needed to put the action intonation exactly where we need it.
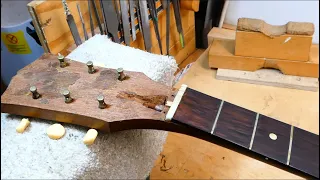
Welcome back everyone, Mike McConville. here in Stratford Ontario Canada for String Jack workstations before this 1929 l5 returns to customer I wanted to go over the whole thing, show you what we did and point out some of the details that were indicative of this era, one of the things I found quite beautiful is the taper shape of the headstock, so we go from 5/8 of an inch to 7/16. It's just one of those beautiful details that you don't see on production guitars and if on the back of the neck, the way the sculpt rises gracefully to that point, this is one of the things that shouldn't have been done and what was done, these are the original heads, in fact I greased them and put a little lithium grease on them.
I will clean it before returning it to the customer. This is actually a five-piece neck, so you have the two pieces of maple, the book-matched center strip of walnut, and then the amputated fingerboard. There is a shot of the back that is beautiful. It burst, the cut has slipped, the place is flexing, so I'm going to put some wick and stick it there. The way I have this setup is the leather straps and that strip, a rubber, I pull the side in very gently. I don't force anything it will soak up the high glue there and then let it set so this is the replacement foot that I made because the original one had these serial numbers on the bottom so we got a beautiful fit all the way around , a lot of intimate contact. fit on those thumb wheels, you can see by the markings on the top that this has been on and off god knows how many times over the last 90 years anyway, it's a good fit all the way around and has been fully tuned to these strings that the customers chose and of course we have all new frets and we replaced that inlay, we repaired the fretboard, what we're doing here is the side has come loose from the cut, so I set it up so that those straps are actually When squeezing it hard, you have to be careful, you can't put too much pressure on an instrument of this age.
The last thing you want to do is break the top or the side, so I heated the leather glue underneath, I have a hockey. The puck mat hockey puck flexes naturally to the shape of the side and those straps tighten and push that side to where it's loose and hold it while I get that joint in after all these years we've gone with a puck strap canvas instead of leather so with canvas it doesn't really matter what the dimensions are anymore because you make a canvas strap whatever size you want okay that's what we have we'll let it sit for about an hour so this It is essentially done as you have done.
I've heard myself say in other videos, this is the beauty of high glue, it doesn't stick to the lacquer and if you get it at the right time, I can do it when they're nice and tight, it doesn't flex anymore. This had been previously drilled. I reamed it with the cello reamer and then made a matching plug to get the perfect taper. Now that we have a perfect match, we can simply push it into place. Okay, now that that set I'm using a point tip to center, here it is. ours is a little bit bigger, but we're still going with the nail tip, so now we just open it up slightly and test our pin and a little bit more to make it our perfectly fitted replacement bridge in a contact percentage all the way through.
The bow is actually sitting much more evenly than the last bridge, which obviously someone tested that original bridge several times and Denny had chosen to use fourteen tons of jam first string and eighteen plain second strings. It's basically a Marten 12. 254 strings, but the top two strings were replaced with a flat 14 and a flat 18. Excellent choice, on Nate's wonderfully and the tuners were a little lubricated so now they don't creak or grab, they have surprisingly 90 years old. machine that is beautiful, nice and smooth to turn and hold the string perfectly in a beautiful guitar sound. I mean, war wounds are expected with new frets and all those crumbling inlays, replaced fingerboard leveled and the replacement bridge foot fits right into that. arc, we had one hundred percent contact, you can hear the amplitude, listen to that first ring, this is just the super fast attack of the camera microphone and that's it for the 1929 l5.
If you have any copyright issue, please Contact